Want to give your golf cart a fresh new look? Follow our step-by-step guide on how to paint a golf cart, including preparing the surface, choosing the right paint and supplies, applying the paint properly, and finishing touches for a professional finish.
Preparing the Golf Cart for Painting
Cleaning the Surface
To ensure a smooth and professional paint job on your golf cart, it is essential to start with a clean surface. Begin by removing any dirt, grime, or loose debris from the exterior of the cart. You can use a mild detergent or automotive soap mixed with water to wash the surface thoroughly. Scrub gently with a sponge or soft brush, paying attention to hard-to-reach areas and corners. Rinse off the soap residue with clean water and allow the cart to dry completely before moving on to the next step.
Sanding the Surface
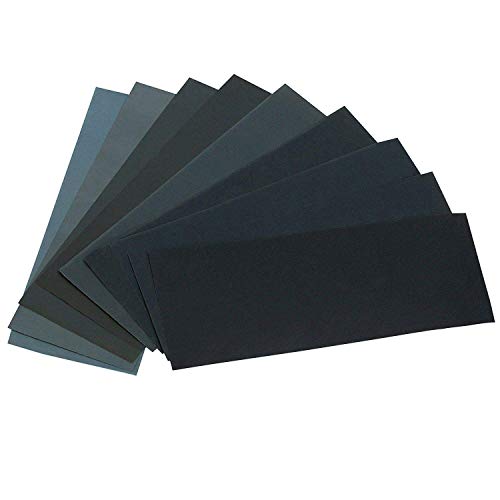
Sanding the surface of the golf cart is an important step in preparing it for painting. It helps to create a smooth and even surface for the paint to adhere to. Start by using a fine-grit sandpaper (around 220-400 grit) to sand the entire exterior of the cart. This will help to remove any imperfections, such as rough spots or old layers of paint. Sand in a circular motion, applying light pressure, and be sure to sand all areas, including curves and edges. After sanding, wipe down the surface with a clean cloth to remove any dust or debris.
Removing Rust or Flaking Paint
If your golf cart has any rust spots or areas with flaking paint, it is crucial to address them before painting. Use a wire brush or sandpaper to remove any loose rust or paint flakes from the affected areas. Once the loose material is removed, you can treat the rust by applying a rust converter or primer designed to prevent further corrosion. Follow the instructions on the product carefully. If there are any deep rust spots, you may need to fill them with a body filler and sand them smooth. This will ensure a seamless finish when you apply the paint.
By following these steps to prepare your golf cart for painting, you will lay the foundation for a successful and long-lasting paint job. Remember, a clean and properly prepped surface is essential for achieving a professional-looking result.

Choosing the Right Paint and Supplies
When it comes to painting your golf cart, selecting the right paint and supplies is crucial to achieving a professional and long-lasting finish. In this section, we will discuss the key factors to consider when choosing the paint type, picking an appropriate primer, and gathering the necessary tools and equipment.
Selecting the Paint Type
Choosing the right paint type for your golf cart is essential to ensure durability and a smooth finish. There are various options available, each with its own advantages and considerations. Here are a few popular types of paint commonly used for golf cart painting:
- Acrylic Enamel: Acrylic enamel paints offer excellent durability and are known for their high gloss finish. They are resistant to chipping, fading, and weathering, making them a popular choice among golf cart owners. Additionally, acrylic enamel paints are easy to apply and provide good coverage.
- Urethane: Urethane paints are known for their superior durability and long-lasting finish. They provide excellent resistance to chemicals, UV rays, and weathering. Urethane paints also offer a wide range of color options and are known for their high gloss appearance.
- Water-based: Water-based paints are gaining popularity due to their eco-friendly nature and low odor. They are easy to clean up and provide good coverage. However, they may not be as durable as other types of paint, so proper preparation and application techniques are crucial.
When selecting the paint type for your golf cart, consider factors such as durability, color options, ease of application, and environmental impact. It is also important to choose a paint that is specifically designed for automotive use to ensure optimal results.
Picking the Appropriate Primer
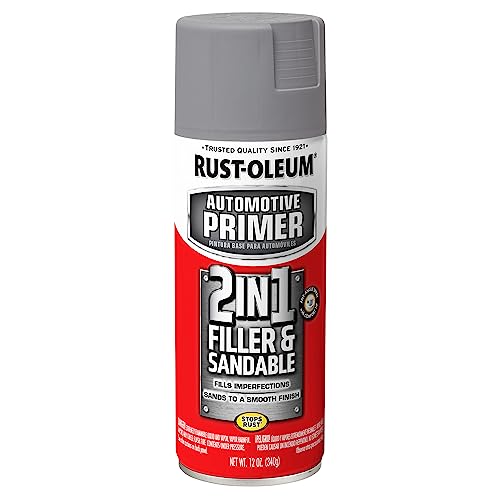
Before applying the paint to your golf cart, it is essential to apply a primer. The primer helps create a smooth surface, enhances adhesion, and improves the durability of the paint job. Here are a few considerations when picking the appropriate primer:
- Epoxy Primer: Epoxy primers are known for their excellent adhesion and corrosion resistance. They provide a strong bond between the surface and the paint, ensuring long-lasting results. Epoxy primers are particularly suitable for metal surfaces prone to rusting.
- Self-Etching Primer: Self-etching primers contain chemicals that chemically bond to the surface, creating an excellent base for paint adhesion. They are commonly used on bare metal surfaces and provide good resistance against corrosion.
- High-Build Primer: High-build primers are designed to fill in small imperfections and provide a smooth surface for the paint. They are thicker than other primers and can help hide minor scratches or dents.
When choosing a primer, consider the type of surface you will be painting, the level of imperfections you need to address, and the compatibility with the chosen paint type. It is important to follow the manufacturer’s instructions regarding the application and drying time of the primer.
Gathering the Necessary Tools and Equipment
To ensure a successful painting project, it is essential to have the right tools and equipment at hand. Here is a list of the necessary items you will need:
- Sandpaper (various grits): Sandpaper is used to smooth the surface, remove any existing paint or rust, and create a suitable base for the paint.
- Paint sprayer or paint gun: A paint sprayer or paint gun will help you achieve a smooth and even application of the paint. It is important to choose a sprayer suitable for automotive use and follow the manufacturer’s instructions for proper setup and usage.
- Paint booth or well-ventilated area: Creating a dust-free environment is crucial for a professional finish. If you don’t have access to a paint booth, make sure to paint in a well-ventilated area to minimize dust and debris.
- Masking tape and plastic sheeting: These items are used to mask off areas that you don’t want to be painted, such as windows, lights, and interior components. Ensure that the masking tape is automotive-grade to prevent any paint bleed-through.
- Safety equipment: Painting can involve exposure to fumes and chemicals, so it is important to prioritize safety. Wear a respirator, safety goggles, and protective clothing to protect yourself from any potential hazards.
- Cleaning supplies: Before painting, you will need to thoroughly clean the surface of the golf cart. Gather cleaning supplies such as degreaser, soap, water, and lint-free cloths to ensure a clean and debris-free surface.
By gathering the necessary tools and equipment, you will be well-prepared to tackle the painting process with confidence and achieve professional results.
Masking and Protecting Parts
When it comes to painting your golf cart, it’s important to take the necessary steps to protect certain parts of the vehicle from paint overspray or damage. In this section, we will discuss the different techniques you can use to mask and protect specific areas of your golf cart.
Covering the Tires and Wheels
One of the first areas you’ll want to focus on when masking and protecting your golf cart is the tires and wheels. This is especially important because overspray can easily settle on the rubber or rims, causing potential damage or an unsightly finish.
To cover the tires and wheels, you can use a combination of plastic bags and masking tape. Start by wrapping each tire individually with a plastic bag, making sure to cover the entire surface. Then, use masking tape to secure the bags in place, ensuring a tight seal. This will prevent any paint from coming into contact with the tires or wheels.

Masking Off Windows and Lights
Another area that requires careful masking is the windows and lights of your golf cart. These delicate components need to be protected to avoid any damage or interference with their functionality.
To mask off the windows, you can use masking tape to create a barrier around the edges. This will prevent any paint from accidentally getting onto the glass. Make sure to press the tape firmly against the glass to ensure a tight seal.
For the lights, you can follow a similar approach. Use masking tape to cover the areas surrounding the lights, leaving only the lens exposed. This will protect the lights from overspray while allowing you to paint the rest of the golf cart.
Protecting the Interior Components
When painting your golf cart, it’s important to consider the interior components as well. These include the seats, dashboard, and any other exposed surfaces inside the vehicle. While they may not be directly exposed to overspray, it’s still a good idea to take precautions to avoid any accidental damage.
To protect the interior components, you can use plastic drop cloths or sheets to cover the seats and dashboard. Simply drape the plastic over the surfaces, ensuring full coverage. You can secure the plastic in place using masking tape or clamps, depending on the accessibility of the areas.
By taking the time to mask and protect these parts of your golf cart, you can ensure a clean and professional-looking paint job. Remember, the key is to create a barrier between the areas you want to protect and the paint. This will help you achieve a flawless finish without any unwanted overspray or damage.
In summary:
- Cover the tires and wheels with plastic bags and masking tape to prevent overspray and damage.
- Mask off the windows using masking tape to protect the glass from paint.
- Use masking tape to protect the lights, leaving only the lens exposed.
- Protect the interior components with plastic drop cloths or sheets, securing them in place with masking tape or clamps.
Now that you have successfully masked and protected the necessary parts of your golf cart, it’s time to move on to the next step: applying the paint. We will discuss the different techniques and considerations for a flawless paint application in the following section.
Applying the Paint
When it comes to painting your golf cart, the application of the paint is a crucial step that requires careful attention. This is where you will see your cart’s transformation take place, so it’s important to follow the proper techniques and use the right products for a professional-looking finish. In this section, we will discuss the three key stages of applying the paint: applying the primer, applying the base coat, and adding the clear coat.
Applying the Primer
Before applying any paint to your golf cart, it is essential to apply a primer. The primer serves as a foundation for the paint, creating an even surface and enhancing adhesion. To apply the primer, follow these steps:

- Preparation: Begin by thoroughly cleaning the surface of your golf cart. Ensure that it is free from any dirt, grease, or debris. You can use a mild detergent and water to clean the cart, followed by a rinse and dry.
- Masking Off: Use masking tape and plastic sheeting to cover any areas you do not want to paint, such as windows, lights, or interior components. This will protect them from overspray or accidental paint application.
- Primer Selection: Choose a primer specifically designed for automotive use. Consider the type of paint you will be applying and follow the manufacturer’s instructions for compatibility. It’s best to opt for a high-quality primer that provides good coverage and adhesion.
- Application: Shake the primer can well to ensure proper mixing. Hold the can approximately 8-10 inches away from the surface of the golf cart and apply the primer in smooth, even strokes. Start from the top and work your way down, overlapping each stroke slightly. Apply multiple thin coats rather than one thick coat for better results. Allow each coat to dry according to the manufacturer’s instructions before applying the next.
- Drying Time: Once you have finished applying the primer, allow it to dry completely. This may take anywhere from a few hours to overnight, depending on the specific primer and environmental conditions. Ensure that the primer is fully cured before moving on to the next step.
Applying the Base Coat
After the primer has dried, it’s time to apply the base coat of paint. The base coat provides the color and visual appeal to your golf cart. Follow these steps for a successful base coat application:
- Choosing the Paint: Select a high-quality automotive paint that is compatible with your primer. Consider factors such as color, finish, and durability. It’s best to choose a paint that is specifically formulated for use on vehicles to ensure a long-lasting and professional-looking finish.
- Preparation: Just like with the primer, proper preparation is crucial. Ensure that the surface is clean, dry, and free from any dust or contaminants. Use a lint-free cloth to wipe down the surface and remove any remaining debris.
- Application: Shake the paint can or mix the paint thoroughly according to the manufacturer’s instructions. Start by applying the paint to the larger, flatter areas of the golf cart, using smooth and even strokes. Work your way from top to bottom, overlapping each stroke slightly. For smaller and more intricate areas, use a smaller brush or foam applicator for better control.
- Multiple Coats: Apply multiple thin coats of paint rather than one thick coat. This will help achieve a more even coverage and prevent runs or drips. Allow each coat to dry according to the manufacturer’s instructions before applying the next. Aim for a total of two to three coats, or as recommended by the paint manufacturer.
- Drying Time: Once you have applied the final coat of base paint, allow it to dry completely. The drying time will depend on various factors such as temperature and humidity. It is crucial to follow the paint manufacturer’s instructions for the recommended drying time.
Adding Clear Coat
To protect the base coat and give your golf cart a glossy and durable finish, it is essential to apply a clear coat. The clear coat acts as a protective layer and enhances the overall appearance of the paint job. Here’s how to add the clear coat:
- Choosing the Clear Coat: Select a high-quality automotive clear coat that is compatible with your base coat. Consider factors such as UV protection, durability, and gloss level. It’s best to choose a clear coat that is specifically designed for use on vehicles to ensure optimal results.
- Preparation: Just like with the previous steps, ensure that the surface is clean, dry, and free from any dust or contaminants. Use a lint-free cloth to remove any remaining debris.
- Application: Follow the manufacturer’s instructions for mixing and applying the clear coat. Using smooth and even strokes, apply the clear coat over the base coat. Start from the top and work your way down, overlapping each stroke slightly. Apply multiple thin coats for better coverage and a smoother finish. Allow each coat to dry according to the manufacturer’s instructions before applying the next.
- Drying and Curing: Once you have finished applying the clear coat, allow it to dry and cure properly. This can take several hours or even days, depending on the specific clear coat and environmental conditions. It’s crucial to create a dust-free environment during the drying process to prevent any particles from settling on the surface.
By following these steps and using the right techniques, you can achieve a professional-looking paint job for your golf cart. Remember to take your time, be patient, and ensure proper drying and curing for a long-lasting and visually appealing finish.
Proper Techniques for Painting
Using Smooth and Even Strokes
When it comes to painting your golf cart, using smooth and even strokes is crucial to achieve a professional-looking finish. Uneven strokes can result in an inconsistent application of paint, leading to an unsightly final result. To ensure a smooth and even paint job, here are some tips to keep in mind:
- Choose the right brush or roller: The type of brush or roller you use can greatly impact the outcome of your paint job. For larger surfaces, a roller is usually more efficient, while a brush is better suited for smaller areas and intricate details. Make sure to select a brush or roller that is appropriate for the type of paint you are using.
- Start with a clean surface: Before you begin painting, it is essential to clean the surface of your golf cart thoroughly. Remove any dirt, dust, or debris using a mild detergent and water solution. This will ensure that the paint adheres properly and prevents any imperfections caused by loose particles.
- Apply the paint in thin layers: Instead of trying to cover the entire surface with one thick coat of paint, it is better to apply multiple thin layers. This allows the paint to dry evenly and reduces the risk of drips or runs. Start with a light coat, and once it dries, apply additional layers until you achieve the desired coverage.
- Use long, smooth strokes: When applying the paint, use long and smooth strokes in the same direction. This technique helps to distribute the paint evenly and minimizes the appearance of brush or roller marks. Avoid using short, choppy strokes, as they can create an uneven texture on the surface.
Maintaining Consistent Pressure
Maintaining consistent pressure while painting is another essential technique that contributes to a flawless finish. Inconsistent pressure can result in uneven coverage and visible variations in the paint’s thickness. To achieve consistent pressure throughout your paint job, consider the following tips:
- Apply even pressure on the brush or roller: Whether you are using a brush or roller, it is important to apply consistent pressure while painting. Pressing too hard can cause the paint to pool or streak, while not applying enough pressure may result in an uneven application. Find a balance that allows the paint to glide smoothly without excessive force.
- Control your hand movements: As you paint, be mindful of your hand movements. Try to keep them steady and avoid sudden jerks or changes in direction. Consistency in hand movements helps to maintain a uniform application of paint and prevents any accidental smudges or smears.
- Pay attention to pressure changes: Different areas of your golf cart may require slightly different pressure levels. For example, when painting over raised edges or corners, you may need to apply slightly more pressure to ensure even coverage. Pay attention to these variations and adjust your pressure accordingly to achieve consistent results.
Avoiding Drips and Runs
One of the most common challenges when painting is dealing with drips and runs. These imperfections can occur when too much paint is applied or when the paint is not properly distributed. To avoid drips and runs during your golf cart painting process, consider the following techniques:
- Remove excess paint: Before starting to paint, make sure to remove any excess paint from your brush or roller. Wipe off any drips or blobs of paint on the edge of the paint can or container. This helps to prevent an overload of paint that could lead to drips and runs.
- Apply thin coats: As mentioned earlier, applying thin coats of paint is crucial not only for achieving a smooth finish but also for avoiding drips and runs. Thin coats dry faster and are less likely to sag or drip. Remember, it is always easier to add more paint than to remove excess paint.
- Watch for pooling: Keep an eye out for any areas where the paint starts to pool or accumulate. If you notice any pooling, gently spread the excess paint with a brush or roller to ensure an even distribution. This will help prevent drips and runs from forming as the paint dries.
- Work in sections: Instead of trying to paint the entire golf cart at once, divide the surface into manageable sections. This approach allows you to focus on one area at a time, ensuring that you can maintain control over the paint application. Working in sections also reduces the risk of drips and runs caused by rushing through the process.
By using smooth and even strokes, maintaining consistent pressure, and avoiding drips and runs, you can achieve a professional-looking paint job for your golf cart. These techniques, combined with proper preparation and the right choice of paint and supplies, will help you transform your golf cart into a stunning vehicle that turns heads on the course.
Drying and Curing the Paint
Allowing Sufficient Drying Time
When it comes to painting your golf cart, allowing sufficient drying time is crucial for achieving a professional and long-lasting finish. Rushing this step can lead to imperfections and premature wear and tear on the paint job. So, how long should you let the paint dry? Well, it depends on various factors such as the type of paint used, the ambient temperature, and humidity levels.
Typically, water-based paints dry faster than oil-based paints. On average, water-based paints may take anywhere from 1 to 2 hours to dry to the touch, while oil-based paints can take around 6 to 8 hours. However, this is just the initial drying time, and it’s important to note that the paint will continue to cure over the next few days or weeks.
For a more accurate estimate, always refer to the manufacturer’s instructions on the paint can. They will provide specific guidelines on drying times based on their product. It’s important to follow these guidelines to ensure the best results.
Creating a Dust-free Environment
To achieve a flawless paint job, it’s essential to create a dust-free environment during the drying process. Dust particles can easily settle on the wet paint surface, ruining the smooth finish you’ve worked so hard to achieve. Here are some tips to create a dust-free environment:
- Clean the surrounding area: Before you start painting, make sure to clean the area thoroughly. Remove any dust, debris, or loose dirt that could potentially contaminate the paint.
- Close doors and windows: If you’re painting indoors, close all doors and windows to minimize the chances of dust particles entering the area.
- Use a dust extraction system: If possible, set up a dust extraction system or use a fan to create a controlled airflow that helps remove dust particles from the surroundings.
- Keep the workspace organized: Avoid unnecessary movement and clutter in the workspace. This reduces the chances of accidentally kicking up dust or bumping into objects that could disturb the drying paint.
- Use a paint booth or tent: If you have access to a paint booth or tent, that’s even better. These enclosed spaces provide a controlled environment and protect the paint from dust, insects, and other contaminants.
Curing the Paint for Long-lasting Finish
Allowing the paint to fully cure is vital for achieving a durable and long-lasting finish. Curing refers to the chemical process in which the paint film hardens and reaches its maximum durability. While the initial drying time gets the paint to a touch-dry state, curing takes longer and ensures the paint is fully hardened and ready to withstand the elements.
The curing time can vary depending on the type of paint used and the environmental conditions. In general, water-based paints may take around 30 days to fully cure, while oil-based paints can take up to 60 days or more. During this time, it’s crucial to avoid any harsh chemicals, excessive moisture, or physical stress on the painted surface.
To protect the paint during the curing process, consider the following precautions:
- Avoid washing or scrubbing the painted surface for at least a month.
- Avoid parking the golf cart under direct sunlight or in extreme weather conditions.
- Be cautious when handling sharp or abrasive objects near the paint.
- Apply a protective sealant or wax after the paint has fully cured to enhance its longevity and shine.
By allowing the paint to cure properly, you’ll ensure a robust and beautiful finish that will withstand the test of time.
Remember, patience is key when it comes to drying and curing the paint on your golf cart. By following the recommended drying times, creating a dust-free environment, and allowing for proper curing, you’ll achieve a flawless and long-lasting paint job that will make your golf cart stand out on the course.
Finishing Touches and Final Steps
Removing Masking Tape and Coverings
After you have allowed sufficient time for the paint to dry and cure, it’s time to remove the masking tape and coverings that were used to protect certain parts of the golf cart during the painting process. This step is essential to reveal the clean lines and smooth finish of your newly painted golf cart.
To remove the masking tape, start by pulling it back at a 45-degree angle. This will help prevent any damage to the paint or any remaining adhesive residue. Take your time and be gentle, ensuring that you don’t accidentally peel off any newly painted surfaces.
As you remove the tape, inspect the edges for any paint bleed or imperfections. If you notice any, use a small brush or touch-up paint to fix them. It’s always better to address these issues now rather than later.
Once the tape is removed, carefully peel off any protective coverings that were used to shield larger areas, such as the windows or lights. Again, be cautious not to damage the paint as you remove these coverings.
Buffing and Polishing the Paint
To achieve a professional finish and enhance the shine of your golf cart’s paint job, it’s important to buff and polish the surface. This step helps to remove any imperfections, such as minor scratches or swirl marks, and brings out the full luster of the paint.
Start by washing the painted surface with a mild car wash soap and water. This will remove any dirt or debris that may have accumulated during the painting process. Once the surface is clean and dry, you can proceed with the buffing and polishing.
Using a dual-action polisher or a rotary buffer, apply a high-quality automotive polish to the painted surface. Work in small sections, using smooth and even motions. The polish will help to smooth out any remaining imperfections and restore the shine of the paint.
After polishing, use a clean microfiber cloth to remove any excess polish and buff the surface to a brilliant shine. Take your time and pay attention to detail, ensuring that every inch of the paint is properly polished.
Reassembling the Golf Cart
Now that your golf cart’s paint job is complete and the surface is looking pristine, it’s time to reassemble any parts that were removed or disconnected during the painting process.
Start by referring to any documentation or photographs you took before disassembling the golf cart. This will help ensure that you correctly reattach all components in their original positions.
Begin by reinstalling any parts that were removed, such as the lights, windows, or trim pieces. Take care to align them properly and secure them in place according to the manufacturer’s instructions.
Next, reconnect any electrical wires or cables that were disconnected. Double-check that all connections are secure and that everything is functioning properly.
Finally, give your golf cart a final inspection to ensure that everything is in place and working as expected. Take a moment to appreciate your hard work and the transformation you have achieved.
Congratulations! You have successfully finished painting your golf cart and completed all the necessary steps to ensure a professional and long-lasting finish. Now it’s time to take your newly painted golf cart out for a spin and enjoy the fruits of your labor.