Improve your putting game by mastering the proper hand placement for a better putter grip. Learn about finger positioning, thumb placement, wrist alignment, grip pressure, stance, and body alignment to enhance your putting technique.
Proper Hand Placement
When it comes to putting, proper hand placement is crucial for a consistent and effective stroke. By positioning your hands correctly on the grip, aligning your palms, and finding the right gripping pressure, you can enhance your control and accuracy on the green.
Positioning your hands on the grip
The first step to achieving proper hand placement is positioning your hands on the grip of the putter. Start by placing your lead hand (the hand closest to the target) on the grip with your palm facing towards the target. Your thumb should rest on the top of the grip, pointing down towards the putter head. Wrap your fingers around the grip, ensuring a secure and comfortable hold.
Next, position your trailing hand (the hand furthest from the target) on the grip, with your palm facing towards your lead hand. Your thumb should also rest on top of the grip, pointing down towards the putter head. The fingers of your trailing hand should overlap the fingers of your lead hand, creating a unified grip.
Aligning your palms
Aligning your palms properly is essential for maintaining control and stability during your putting stroke. Make sure that the palms of both your lead and trailing hands are parallel to each other and perpendicular to the target line. This alignment promotes a square face at impact, helping to prevent the putter from opening or closing during the stroke.

Imagine holding a tray of drinks, with your palms facing up. This analogy can help you visualize the correct palm alignment. By keeping your palms parallel and level, you ensure a consistent and smooth stroke.
Gripping pressure
Finding the right gripping pressure is another important aspect of proper hand placement. You want to achieve a balance between a firm grip and a relaxed feel. Squeezing the grip too tightly can lead to tension in your hands and arms, negatively affecting your stroke.
To determine the ideal grip pressure, start with a relaxed grip and gradually increase the pressure until you feel a secure hold on the putter. You should be able to maintain this pressure throughout your stroke without any excessive squeezing or gripping.
Think of gripping the putter as holding a bird – firm enough to keep it from flying away, but gentle enough to not harm it. This analogy helps to emphasize the importance of finding the right balance of grip pressure.
In summary, proper hand placement is crucial for a successful putting stroke. Position your hands correctly on the grip, align your palms parallel to each other and perpendicular to the target line, and find the right balance of gripping pressure. By mastering these elements, you’ll have a solid foundation for consistent and accurate putting.

Finger Placement
When it comes to putting, the placement of your fingers on the grip can greatly impact the control and feel you have over the putter. Proper finger placement is essential to achieve a consistent and smooth stroke. In this section, we will explore different finger positions on the grip, including the positioning of your fingers, the overlapping grip, and the interlocking grip.
Positioning your fingers on the grip
The first step in achieving the right finger placement is to position your fingers correctly on the grip. Start by placing your hands on the grip in a relaxed and natural manner. Your fingers should wrap around the grip comfortably, neither too tightly nor too loosely. Avoid gripping the putter too high up the shaft, as this can restrict your range of motion and affect your control.
To find the ideal finger position, imagine holding the putter as if you were holding a delicate bird. You want to have a gentle but firm grip, allowing for fluid movement and sensitivity. Avoid placing your fingers too close to the top of the grip, as this can limit your control and feel of the putter face.
Overlapping grip
One common finger placement technique is the overlapping grip. This grip involves placing the pinky finger of your trailing hand (the hand that is farthest from the target) between the index and middle fingers of your lead hand (the hand closest to the target). This grip is also known as the Vardon grip, named after the professional golfer Harry Vardon who popularized it.
The overlapping grip offers several benefits. Firstly, it promotes a unified motion of the hands, ensuring that both hands work together as a cohesive unit during the stroke. Secondly, it allows for a greater degree of control and stability, as the pinky finger of the trailing hand adds extra support to the grip. Finally, the overlapping grip can help reduce the likelihood of the putter twisting in your hands during the stroke.
To achieve the overlapping grip, place your lead hand on the grip first, with your thumb running down the shaft. Then, position your trailing hand so that the pinky finger rests comfortably between the index and middle fingers of your lead hand. Allow your other fingers to wrap around the grip naturally, creating a secure and stable hold.
Interlocking grip
Another finger placement option is the interlocking grip. This grip involves interlocking the pinky finger of your trailing hand with the index finger of your lead hand. The interlocking grip is often favored by golfers with smaller hands or those who prefer a more connected feel between their hands.
Similar to the overlapping grip, the interlocking grip promotes a unified motion of the hands and provides added stability. The interlocking of the fingers creates a stronger connection between the hands, reducing the risk of the putter twisting during the stroke. It also allows for a more controlled and comfortable grip.
To achieve the interlocking grip, start by placing your lead hand on the grip with your thumb running down the shaft. Then, position your trailing hand so that the pinky finger interlocks with the index finger of your lead hand. Allow your other fingers to wrap around the grip naturally, ensuring a secure and balanced hold.
In summary, finger placement on the grip is a crucial aspect of effective putting. Whether you choose the overlapping or interlocking grip, it is important to find a finger position that feels comfortable and secure. Experiment with different finger placements to determine which grip suits your personal preferences and provides the best control and feel. Remember, a proper finger placement can greatly enhance your putting performance and help you sink more putts with confidence.

(Image of overlapping grip and interlocking grip)

(Table comparing overlapping grip and interlocking grip)
| Grip Type | Benefits | Suitable Hand Size |
|---|---|---|
| Overlapping grip | Promotes unified hand motion, added control, reduces twisting | Larger hands |
| Interlocking grip | Enhanced connection between hands, added stability, controlled grip | Smaller hands |
Thumb Placement
Placing your thumbs on the grip
When it comes to thumb placement on the golf club grip, there are a few different options that golfers can choose from. The placement of your thumbs can have a significant impact on your overall grip and swing technique. Let’s take a closer look at the two main types of thumb placement: the double-thumb grip and the single-thumb grip.
Double-thumb grip
The double-thumb grip, also known as the overlapping grip, is a popular choice among golfers. To achieve this grip, place your left hand on the club grip (for right-handed golfers) with your thumb positioned along the shaft. Then, take your right hand and place it below your left hand, overlapping the thumb of your left hand with the pinky finger of your right hand. This grip creates a secure and stable hold on the club, allowing for better control and power during the swing.

The double-thumb grip is often recommended for golfers with larger hands or those who prefer a more secure grip. It helps to prevent the club from twisting in your hands and allows for a smoother swing motion. Additionally, this grip can help promote a unified movement of the hands and arms, leading to improved accuracy and consistency in your shots.
Single-thumb grip
The single-thumb grip, also known as the interlocking grip, is another popular option for golfers. This grip involves interlocking the thumb of your left hand (for right-handed golfers) with the pinky finger of your right hand. The rest of your fingers should wrap around the club grip naturally.
The single-thumb grip is often favored by golfers with smaller hands or those who prefer a more connected feel between their hands. This grip can provide a sense of unity between the hands and arms, allowing for better coordination and control during the swing. It also helps to maintain a more relaxed grip pressure, which can aid in generating clubhead speed and distance.
When deciding between the double-thumb grip and the single-thumb grip, it ultimately comes down to personal preference and what feels most comfortable for you. Both grips have been used by successful golfers, so it’s important to experiment and find the one that suits your individual needs and playing style.
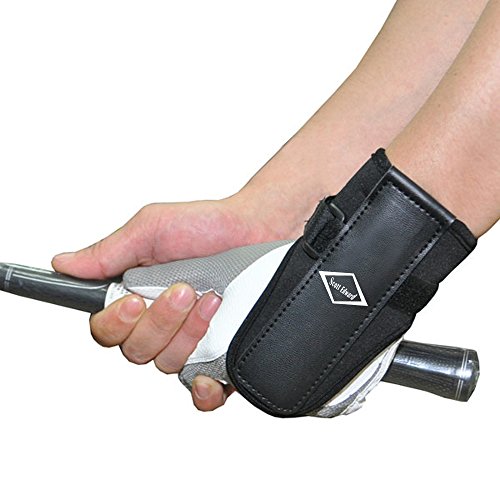
Wrist Alignment
Proper wrist alignment is crucial for achieving a consistent and accurate putting stroke. By maintaining a straight wrist, avoiding excessive movement, and finding a neutral position, you can greatly improve your putting technique and overall performance on the green.
Maintaining a straight wrist
When it comes to wrist alignment, one of the most important things to remember is to keep your wrist as straight as possible throughout the putting stroke. This helps to ensure a smooth and consistent movement, allowing you to maintain control and accuracy.
To achieve a straight wrist, imagine that there is a straight line extending from your forearm through your hand and into the putter grip. Keep your wrist in line with this imaginary line, avoiding any bending or cocking of the wrist during the stroke.
Avoiding excessive wrist movement
Excessive wrist movement can be detrimental to your putting stroke, as it can introduce unnecessary variables and inconsistencies. It is important to minimize any excessive wrist movement to maintain a stable and repeatable stroke.
To avoid excessive wrist movement, focus on using your shoulders and arms to control the putting motion, rather than relying solely on your wrists. By keeping your wrists relatively stable and using your larger muscles to power the stroke, you can achieve a more consistent and controlled putting motion.
Neutral wrist position
Finding a neutral wrist position is key to maintaining a comfortable and effective grip on the putter. A neutral wrist position refers to a natural and relaxed alignment of the wrist that allows for optimal control and feel.
To find a neutral wrist position, start by relaxing your hand and allowing it to hang naturally at your side. Take note of the angle at which your wrist naturally rests. This is your neutral wrist position. When gripping the putter, aim to replicate this natural alignment, ensuring that your wrist is not excessively flexed or extended.
By maintaining a neutral wrist position, you can reduce tension in your hands and wrists, promoting a more fluid and smooth putting stroke.
In summary, wrist alignment plays a crucial role in achieving a consistent and accurate putting stroke. By maintaining a straight wrist, avoiding excessive wrist movement, and finding a neutral wrist position, you can enhance your control, accuracy, and overall putting performance. Remember to focus on using your larger muscles to power the stroke and aim for a relaxed and natural wrist alignment. With practice and attention to wrist alignment, you can become a more confident and successful putter on the green.
Table: Wrist Alignment Tips
| Tips for Wrist Alignment |
|---|
| Maintain a straight wrist throughout the stroke |
| Minimize excessive wrist movement by using your shoulders and arms |
| Find a neutral wrist position that replicates your natural alignment |
| Focus on using larger muscles to power the stroke |
| Aim for a relaxed and natural wrist alignment |
Remember, consistency is key when it comes to wrist alignment. Practice regularly and pay attention to your wrist position to improve your putting technique.
Grip Pressure
Finding the right grip pressure is crucial for a successful and consistent putting stroke. It can greatly impact your ability to control the direction and distance of your putts. Let’s explore how to achieve the correct grip pressure, avoid squeezing too tightly, and maintain consistent pressure throughout the stroke.
Finding the right grip pressure
Finding the right grip pressure is like finding the sweet spot on a tennis racket or a baseball bat. It’s a delicate balance that allows you to have control without sacrificing feel. So, how do you find that perfect grip pressure?
One way to determine the right grip pressure is by experimenting with different levels of grip tension. Start with a light grip and gradually increase the pressure until you feel comfortable and in control. Pay attention to how the putter feels in your hands and how it affects your stroke. Remember, the goal is to find a pressure that allows you to maintain control without causing tension or strain.
Another helpful tip is to imagine holding a small bird in your hands. You want to hold it firmly enough so that it doesn’t fly away, but not so tight that you harm it. This imagery can help you visualize the ideal grip pressure and find that delicate balance.
Avoiding squeezing too tightly
One common mistake many golfers make is squeezing the putter grip too tightly. This can lead to tension in your hands, wrists, and arms, which can negatively affect your stroke. Squeezing too tightly can also decrease your feel for the putter head and make it difficult to maintain a smooth and fluid stroke.
To avoid squeezing too tightly, try to relax your hands and wrists before gripping the putter. Take a deep breath and consciously release any tension. As you grip the putter, maintain a light and comfortable pressure. Avoid the temptation to grip the putter tightly, especially when you are feeling nervous or under pressure.
Another helpful tip is to imagine holding a tube of toothpaste. If you squeeze too hard, the toothpaste will come gushing out uncontrollably. But if you apply just the right amount of pressure, you can control the flow. Similarly, finding the right grip pressure allows you to have control over your stroke without overdoing it.
Maintaining consistent pressure throughout the stroke
Consistency is key when it comes to grip pressure during your putting stroke. Maintaining a consistent pressure ensures that your hands and wrists remain relaxed and that you have a repeatable stroke. It allows you to focus on the line and speed of your putt without being distracted by variations in grip pressure.
One way to maintain consistent pressure is by practicing with a metronome. Set the metronome to a comfortable rhythm and use it as a guide for your stroke. Focus on maintaining a steady grip pressure throughout the entire stroke, from the backswing to the follow-through. This will help you develop muscle memory and create a consistent and reliable putting stroke.
Another useful technique is to pay attention to the pressure in your fingers rather than your palms. Your fingers have more sensitivity and control, so focusing on them can help you maintain a consistent grip pressure. Imagine holding a delicate flower between your fingers and strive to keep that same gentle touch throughout your stroke.
Stance and Body Alignment
When it comes to putting in golf, having the right stance and body alignment is crucial for a successful stroke. Your stance sets the foundation for the entire putt, and proper body alignment ensures that you are lined up correctly towards the target. In this section, we will explore the key aspects of positioning your feet and body, aligning your shoulders and hips, and creating a balanced stance.
Positioning your feet and body
The first step in achieving a solid putting stance is to position your feet correctly. Start by standing with your feet shoulder-width apart and parallel to the target line. This allows for stability and balance throughout your stroke. Many golfers find it helpful to slightly flare their lead foot (the foot closest to the target) outwards, which promotes a natural hip rotation during the stroke.
Next, focus on your body positioning. As you address the ball, lean slightly forward from your hips, maintaining a straight back. This helps in creating a more athletic posture and allows for a smooth and controlled stroke. Keep your weight evenly distributed between both feet, with a slight bias towards the balls of your feet. This ensures that you have a solid base and can maintain your balance throughout the stroke.
Aligning your shoulders and hips
Proper alignment of your shoulders and hips is vital for accurate putting. To achieve this, imagine a straight line extending from your target through the ball. Align your shoulders parallel to this line, ensuring that they are square to the target. This promotes a consistent stroke path and helps in maintaining a straight clubface at impact.
Similarly, your hips should also be aligned parallel to the target line. This alignment allows for proper rotation during the stroke, ensuring that your body moves in sync with the putter. Avoid any excessive hip movement or rotation, as it can lead to inconsistent strokes and misalignment.
Creating a balanced stance
Balance is a key component of a successful putting stance. Without proper balance, it becomes difficult to execute a smooth and controlled stroke. To achieve a balanced stance, distribute your weight evenly between both feet and maintain a stable posture throughout the stroke.
One way to ensure balance is to feel a slight pressure in the arches of your feet. This sensation indicates that your weight is evenly distributed and that you are grounded properly. Avoid leaning too far forward or backward, as it can disrupt your balance and affect the consistency of your stroke.
Additionally, it’s important to note that maintaining a balanced stance also helps in controlling the speed and tempo of your stroke. A balanced stance allows for a more fluid motion and reduces the chances of deceleration or acceleration during the putting stroke.
Putter Length and Weight
Choosing the Right Putter Length
When it comes to choosing the right putter length, it’s important to consider your personal preferences and physical attributes. The length of your putter can greatly impact your stroke and overall performance on the green.
One factor to consider is your height. Taller golfers may benefit from a longer putter, as it allows for a more comfortable stance and better alignment with the ball. On the other hand, shorter golfers might find a shorter putter to be more suitable, as it provides better control and maneuverability.
Another aspect to consider is your putting style. If you have a more upright stance or prefer a more pendulum-like stroke, a longer putter may be beneficial. Conversely, if you have a more crouched stance or prefer a more arced stroke, a shorter putter may be the better choice.
It’s also worth noting that putter length can affect your posture and eye position over the ball. A putter that is too long or too short may cause you to hunch over or stand too upright, resulting in inconsistent strokes. Finding the right putter length can help you maintain a comfortable and balanced posture throughout your stroke.
Considering the Weight of the Putter
The weight of your putter is another crucial factor to consider when seeking optimal performance on the green. The weight of the putter can affect your control, feel, and overall confidence in your stroke.
Lightweight putters are typically easier to swing and can provide a smoother stroke. They are well-suited for golfers who prefer a lighter touch and have a more delicate stroke. On the other hand, heavier putters can offer more stability and resistance against outside forces, such as wind or uneven greens. They are often favored by golfers who prefer a firmer stroke and want to minimize the impact of external factors.
The weight distribution of the putter is also important to consider. Some putters have a more toe-heavy design, while others have a more face-balanced design. Toe-heavy putters are known for promoting a slight arc in the stroke, ideal for golfers with an arcing motion. Face-balanced putters, on the other hand, are better suited for golfers with a straight-back, straight-through stroke.
Ultimately, the weight of the putter comes down to personal preference and what feels most comfortable to you during your stroke. Experimenting with different weights and weight distributions can help you find the perfect balance for your game.
Customizing the Putter for Your Preferences
Customizing your putter can further enhance your performance and make it uniquely tailored to your preferences. Here are a few customization options to consider:
- Putter grip: The grip is your connection to the putter, so finding the right grip size and material can greatly impact your feel and control. Experiment with different grip sizes and materials to find the one that suits you best.
- Putter head shape: Putters come in various head shapes, including blade, mallet, and half-mallet. Each shape offers different benefits in terms of alignment, forgiveness, and feel. Try out different head shapes to see which one aligns best with your visual preference and stroke style.
- Putter alignment aids: Some putters come with alignment aids, such as lines or dots on the top of the putter head. These aids can help you line up your putts more accurately and consistently. Experiment with different alignment aids to find the one that works best for your eye.
- Putter shaft material: Putters are commonly made of steel or graphite. Steel shafts are known for their stability and consistency, while graphite shafts offer a lighter weight and potentially more feel. Consider your personal preferences and the characteristics you value most in a putter shaft.
Remember, customizing your putter should be done with the intention of improving your performance and enhancing your comfort on the green. Take the time to test different options and seek the advice of a professional club fitter if needed. By finding the right putter length, weight, and customization options, you can optimize your putting game and increase your chances of sinking more putts.