Want to achieve a professional shine on your golf clubs? Follow this step-by-step guide on how to polish golf clubs using the right materials and cleaning techniques. Plus, learn how to properly maintain and protect your clubs for optimal performance.
Materials Needed for Polishing Golf Clubs
Microfiber Cloth
When it comes to polishing golf clubs, having a high-quality microfiber cloth is essential. These cloths are made of ultra-fine fibers that are gentle on the clubheads while still being effective at removing dirt and grime. The small fibers in the cloth help to trap particles, preventing them from scratching the surface of the clubheads. Additionally, microfiber cloths are highly absorbent, allowing you to easily remove any excess cleaning solution or metal polish.
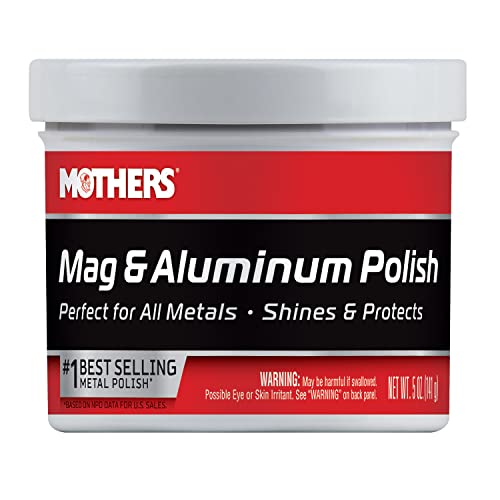
Metal Polish
To bring back the shine to your golf clubheads, you’ll need a reliable metal polish. Metal polishes are specifically formulated to remove tarnish, oxidation, and other blemishes from metal surfaces. Look for a metal polish that is safe to use on golf clubs and that doesn’t contain any harsh chemicals that could damage the finish. When applying metal polish, make sure to follow the manufacturer’s instructions and use a clean, soft cloth for best results.
Golf Club Cleaning Solution
In addition to a microfiber cloth and metal polish, a golf club cleaning solution is another essential item for polishing your clubs. Golf club cleaning solutions are specially designed to remove dirt, grass stains, and other debris that can accumulate on the clubheads and affect their performance. Look for a cleaning solution that is safe to use on different types of club materials, such as stainless steel, titanium, or graphite. It’s important to note that using regular household cleaners or harsh chemicals can damage the clubheads, so it’s best to stick to a golf-specific cleaning solution.
Now that we have covered the materials needed for polishing golf clubs, let’s move on to preparing the clubs for polishing.
Preparing the Golf Clubs for Polishing
Removing Grips
Before you start polishing the clubheads, it’s important to remove the grips. Grips can accumulate dirt and oils over time, and polishing the clubheads with the grips still on can lead to a messy and ineffective process. To remove the grips, use a grip removal tool or a utility knife to carefully cut them off. Be cautious not to damage the shaft while removing the grips. Once the grips are off, set them aside for cleaning later.
Cleaning Clubheads
After the grips are removed, it’s time to clean the clubheads. Start by filling a bucket or sink with warm water and a small amount of mild dish soap. Dip a clean cloth or sponge into the soapy water and gently scrub the clubheads, paying extra attention to areas with stubborn stains or dirt. Avoid using abrasive brushes or harsh scrubbing pads, as they can scratch the surface of the clubheads. Rinse the clubheads thoroughly with clean water and pat them dry with a towel.
Inspecting Shafts
While cleaning the clubheads, it’s a good idea to inspect the shafts for any signs of damage or wear. Look for cracks, dents, or rust on the shafts, as these can affect the performance of the clubs. If you notice any issues, it may be necessary to replace the shafts or seek professional repair. By regularly inspecting the shafts, you can ensure that your clubs are in optimal condition for polishing and playing.
Now that the golf clubs are prepared for polishing, let’s move on to the next step: polishing the clubheads. This is where we’ll bring back the shine and restore their original beauty.
Polishing the Clubheads
Applying Metal Polish
To begin the polishing process, apply a small amount of metal polish to a clean, soft cloth. Gently rub the metal polish onto the clubheads, using circular motions. Pay close attention to any areas with tarnish or oxidation, as these may require a bit more pressure. Keep in mind that different metal polishes may have varying instructions, so be sure to follow the specific product’s guidelines. As you polish, you’ll start to see the clubheads regain their luster and shine.

Using a Polishing Cloth
After applying the metal polish, use a separate clean, soft cloth to buff and shine the clubheads. This step helps to remove any excess metal polish and further enhances the shine of the clubheads. Again, use gentle circular motions to ensure an even finish. As you work, you’ll notice the clubheads becoming brighter and more reflective. Take your time during this step to achieve the desired level of polish.
Removing Stubborn Stains
If there are any stubborn stains or blemishes that didn’t come off during the polishing process, you may need to take some additional steps to remove them. One option is to use a fine-grit sandpaper or a specialized stain remover designed for golf clubs. Be cautious when using these methods, as excessive or aggressive scrubbing can damage the clubheads. When dealing with stubborn stains, it’s always a good idea to seek professional advice or assistance to avoid any potential harm to your clubs.
Now that the clubheads are polished and looking pristine, let’s move on to cleaning the grips to ensure a complete and thorough golf club maintenance routine.
Cleaning the Grips
Removing Dirt and Grime
To clean the grips of your golf clubs, start by wiping away any loose dirt or debris using a clean cloth or towel. If there are any stubborn stains or grime, create a solution of warm water and mild dish soap. Dip a soft brush or sponge into the soapy water and gently scrub the grips, paying attention to any textured areas or grooves. Rinse the grips with clean water and pat them dry with a towel.
Using a Grip Cleaning Solution
If the grips still appear dirty or discolored after using soapy water, you can try using a grip cleaning solution. These solutions are specifically formulated to remove oils, sweat, and other residues that can accumulate on the grips over time. Apply a small amount of the grip cleaning solution onto a clean cloth and gently rub it onto the grips. Allow the solution to sit for a few minutes, then wipe off any excess with a clean cloth. Rinse the grips with clean water and pat them dry.

Drying the Grips
After cleaning the grips, it’s important to ensure they are completely dry before reattaching them to the clubheads. Excess moisture can lead to mold or mildew growth, which can deteriorate the grips. Use a clean towel to thoroughly dry the grips, paying attention to any hard-to-reach areas. Once dry, you can reattach the grips to the clubheads.
Now that the grips are clean and ready, let’s move on to the final section: maintaining and protecting the golf clubs for long-lasting performance.
Maintaining and Protecting the Clubs
Storing the Clubs Properly
After polishing and cleaning your golf clubs, it’s important to store them properly to prevent damage and maintain their performance. Ideally, you should store your clubs in a cool, dry place, away from extreme temperatures or humidity. Consider using a golf club bag or organizer to keep them organized and protected. Additionally, never leave your clubs in the trunk of a car or exposed to direct sunlight for extended periods, as this can cause the grips to deteriorate and the clubheads to warp.
Regular Cleaning Routine
To keep your golf clubs in top condition, it’s essential to establish a regular cleaning routine. After each round of golf, take a few minutes to wipe down the clubheads with a clean cloth to remove any dirt or debris. This simple step can help prevent the buildup of grime and prolong the life of your clubs. Additionally, periodically check the grips for any signs of wear or damage and clean them as needed.
Applying a Protective Coating
Another way to protect your golf clubs is by applying a protective coating to the clubheads. There are various types of protective coatings available, such as clear lacquer or polymer finishes, that can help shield the clubheads from scratches and corrosion. Before applying any protective coating, make sure to thoroughly clean and dry the clubheads to ensure optimal adhesion. Follow the manufacturer’s instructions for applying the coating and allow sufficient drying time before using the clubs.

By following these maintenance practices and incorporating them into your golf club care routine, you can keep your clubs looking and performing their best for many rounds to come.
Preparing the Golf Clubs for Polishing
Preparing your golf clubs for polishing is an essential step to ensure that they are clean and ready for the next round. In this section, we will discuss three important aspects of preparing the golf clubs: removing grips, cleaning clubheads, and inspecting shafts. Let’s dive in!
Removing Grips
Before you can begin polishing your golf clubs, it is important to remove the grips. Over time, grips can become worn out and lose their tackiness, affecting your grip and ultimately your swing. Removing the grips allows you to thoroughly clean the club and replace the grips if necessary.
To remove the grips, you will need a grip removal tool or utility knife. Start by positioning the club in a vise or clamp to keep it steady. Then, use the grip removal tool to carefully cut through the adhesive or grip tape at the top of the grip. Slowly peel off the grip while applying gentle pressure to avoid damaging the shaft.
Cleaning Clubheads
Next, let’s focus on cleaning the clubheads. Over time, dirt, grass, and debris can accumulate on the clubheads, affecting their performance. Cleaning them regularly will not only help maintain their appearance but also ensure optimal playability.
 Izzo Golf Izzo Ultra-Lite Stand Golf Bag with Dual Straps & Exclusive Features, Navy Blue/Light Blue
To clean the clubheads, you will need a bucket of warm water, a mild golf club cleaning solution, and a soft-bristle brush. Fill the bucket with warm water and add a small amount of the cleaning solution. Dip the brush into the soapy water and gently scrub the clubheads, paying extra attention to the grooves. This will help remove any dirt or grass that may be lodged in the grooves, improving your ability to generate spin on the golf ball.
After scrubbing, rinse the clubheads with clean water and wipe them dry with a towel. Make sure to remove any excess moisture to prevent rusting. It is important to note that if you have clubheads made of materials other than stainless steel, such as chrome or copper, you may want to consult the manufacturer’s guidelines for specific cleaning instructions.
Inspecting Shafts
The final step in preparing your golf clubs for polishing is inspecting the shafts. The shafts play a crucial role in your swing, providing stability and transferring energy to the clubhead. It is important to ensure that the shafts are in good condition to maintain consistent performance on the course.
Start by visually inspecting the shafts for any signs of damage, such as dents, cracks, or rust. Pay close attention to the areas near the clubhead and the grip as these are more prone to wear and tear. If you notice any significant damage, it may be necessary to replace the shaft.
Additionally, check the alignment of the shafts. Hold the club at eye level and look down the shaft to see if it appears straight. Any noticeable bending or twisting could affect your swing and accuracy.
To further inspect the shafts, gently tap them against a hard surface, such as the floor or a golf mat. Listen for any unusual sounds or vibrations, as these could indicate internal damage. If you suspect any issues, it is recommended to consult a professional club fitter or golf shop for a thorough examination.
Polishing the Clubheads
Applying Metal Polish
When it comes to polishing golf clubheads, one essential material you’ll need is metal polish. Metal polish is specifically designed to remove dirt, grime, and oxidation from metal surfaces, leaving them shiny and clean. It’s important to choose a metal polish that is safe to use on golf clubheads and won’t damage the finish.
To apply the metal polish, start by squeezing a small amount onto a microfiber cloth. The microfiber cloth is gentle on the clubhead’s surface and helps to distribute the polish evenly. Using a circular motion, rub the metal polish onto the clubhead, focusing on any areas that have visible stains or discoloration. Be sure to cover the entire clubhead to ensure an even and thorough polish.
Using a Polishing Cloth
In addition to metal polish, using a polishing cloth is another essential step in achieving a polished finish on your golf clubheads. A polishing cloth is designed to buff the surface of the clubhead, removing any remaining residue from the metal polish and giving it a final shine.
To use a polishing cloth, fold it into a small, manageable size. Then, using gentle pressure, buff the clubhead in circular motions. The polishing cloth will help to remove any excess metal polish and bring out the natural luster of the clubhead. Continue buffing until you’re satisfied with the shine and cleanliness of the clubhead.
Removing Stubborn Stains
Sometimes, despite your best efforts, there may be stubborn stains or marks on your golf clubheads that require a little extra attention. In these cases, there are a few techniques you can try to remove those stubborn stains and restore the clubheads to their original condition.
One method is to create a paste using a mild abrasive cleaner and water. Apply the paste to a soft cloth and gently rub it onto the stained area of the clubhead. Be careful not to apply too much pressure or scrub too vigorously, as this can damage the finish. Rinse the clubhead with water and dry it thoroughly with a towel.
Another option is to use a specialized golf club cleaning solution. These solutions are designed to remove tough stains and dirt from golf clubheads without causing any harm. Simply apply the cleaning solution to a cloth or sponge and gently scrub the stained area. Rinse the clubhead with water and dry it thoroughly.
Remember, it’s important to always follow the manufacturer’s instructions when using any cleaning products on your golf clubheads. Additionally, be cautious when using abrasive cleaners or tools as they can potentially scratch or damage the clubheads.
By following these steps and using the right materials, you can achieve a polished and clean look for your golf clubheads. Properly maintaining and caring for your clubs not only enhances their appearance but also helps to improve their performance on the course. So, take the time to give your clubheads the attention they deserve, and you’ll be rewarded with clubs that look and feel great.
Now that we’ve covered polishing the clubheads, let’s move on to the next section: cleaning the grips.
Cleaning the Grips
When it comes to maintaining your golf clubs, one area that often gets overlooked is the grips. The grips on your clubs are crucial for maintaining a proper hold and control over your shots. Over time, dirt, grime, and sweat can build up on the grips, making them slippery and less effective. In this section, we will discuss the importance of cleaning the grips and provide you with some easy and effective methods to keep them in excellent condition.
Removing Dirt and Grime
Before you start cleaning the grips, it’s essential to remove any dirt and grime that may have accumulated on the surface. One simple and effective method is to use a soft-bristled brush or toothbrush. Gently brush the grips, making sure to get into all the crevices and grooves. This will help loosen and remove any dirt particles that may be stuck.
Another option is to use a damp microfiber cloth. Simply dampen the cloth with water and gently rub it over the grips. This will help remove surface dirt and grime. If the grips are particularly dirty, you can add a small amount of mild dish soap to the water. Make sure to rinse the grips thoroughly to remove any soap residue.
Using a Grip Cleaning Solution
For a more thorough clean, you can use a grip cleaning solution. These solutions are specifically designed to remove dirt, oils, and sweat from golf club grips. They are typically easy to use and require minimal effort.
To use a grip cleaning solution, start by applying a small amount to a clean, soft cloth. Gently rub the solution onto the grips, making sure to cover the entire surface. Pay extra attention to any areas that may be heavily soiled. Allow the solution to sit on the grips for a few minutes to break down any dirt or grime. Then, using a clean cloth or towel, wipe away the solution, along with the loosened dirt.
Drying the Grips
After cleaning the grips, it’s essential to dry them thoroughly to prevent any moisture from seeping into the club shafts. Moisture can lead to mold or mildew growth, which can damage the grips and affect their performance.
To dry the grips, use a clean, dry towel or cloth. Gently pat the grips to remove any excess moisture. Make sure to dry all areas, including the crevices and grooves. If you have access to a hairdryer, you can use it on a low, cool setting to speed up the drying process. However, be cautious not to expose the grips to excessive heat, as it can cause them to warp or crack.
Once the grips are dry, it’s a good idea to inspect them for any signs of wear or damage. Look for any cracks, tears, or loose areas. If you notice any issues, it may be time to replace the grips to ensure optimal performance.
Next Section: Maintaining and Protecting the Clubs
In the next section, we will discuss how to properly store your golf clubs, establish a regular cleaning routine, and apply a protective coating to keep them in top-notch condition. These steps will help you maintain the overall quality and performance of your clubs, ensuring that they last for years to come. So, let’s dive in and explore the best practices for maintaining and protecting your valuable golf clubs.
Maintaining and Protecting the Clubs
Storing the Clubs Properly
Proper storage of golf clubs is essential to ensure their longevity and performance. When not in use, it is important to store your clubs in a safe and suitable environment. Here are some tips on how to store your golf clubs properly:
- Keep them in a dry place: Moisture can cause damage to the clubs, especially to the clubheads and grips. Therefore, it is crucial to store them in a dry environment to prevent rusting or warping.
- Use a golf bag or club organizer: Investing in a good-quality golf bag or club organizer can make a significant difference in maintaining the condition of your clubs. These storage solutions provide individual compartments for each club, preventing them from banging against each other and causing unnecessary wear and tear.
- Avoid extreme temperatures: Extreme heat or cold can have adverse effects on the performance of your clubs. Avoid storing them in places where they are exposed to direct sunlight or extreme temperatures, such as a car trunk or garage. Instead, choose a cool and shaded area for storage.
- Keep them away from sharp objects: To protect the clubheads and shafts from scratches or dents, make sure to store them away from any sharp objects or tools that may accidentally come into contact with them.
Regular Cleaning Routine
Regular cleaning is vital to maintain the appearance and performance of your golf clubs. Here is a step-by-step guide to help you establish a regular cleaning routine:
- Gather the necessary materials: To clean your golf clubs effectively, you will need a bucket of warm water, mild dish soap, a soft-bristled brush, and a towel.
- Fill the bucket with warm water: Add a small amount of mild dish soap to the water and mix it gently to create a soapy solution.
- Soak the clubheads: Dip the clubheads into the soapy water and let them soak for a few minutes. This will help loosen any dirt or debris stuck on the surface.
- Scrub the clubheads: Use a soft-bristled brush to gently scrub the clubheads, paying close attention to the grooves on the face. This will help remove any dirt or grass stains that may affect the club’s performance.
- Rinse with clean water: Once you have thoroughly cleaned the clubheads, rinse them with clean water to remove any soap residue.
- Dry the clubs: Use a towel to dry the clubheads and shafts thoroughly. Make sure to remove any excess moisture to prevent rusting.
- Polish the clubheads (refer to “Polishing the Clubheads” section): If desired, you can apply a metal polish to give your clubheads a shiny and polished look.
- Clean the grips (refer to “Cleaning the Grips” section): Don’t forget to clean the grips regularly to maintain their tackiness and prevent them from becoming slippery.
Applying a Protective Coating
Applying a protective coating to your golf clubs can help prolong their lifespan and protect them from wear and tear. Here are some options for applying a protective coating:
- Wax or sealant: You can use a car wax or sealant to provide a protective layer on the clubheads. Apply a small amount of wax or sealant and rub it in circular motions using a clean cloth. This will create a barrier against dirt, moisture, and scratches.
- Clear coat spray: Another option is to use a clear coat spray specifically designed for golf clubs. This spray creates a thin and transparent protective layer that helps prevent oxidation and corrosion.
- Grip protectors: To protect the grips from wear and tear, consider using grip protectors or covers. These accessories provide an additional layer of protection and can be easily removed when needed.
Remember to follow the manufacturer’s instructions when applying any protective coating to ensure optimal results. Regularly inspect the coating and reapply as necessary to maintain its effectiveness.
By implementing these maintenance and protection practices, you can ensure that your golf clubs remain in excellent condition, allowing you to enjoy your game to the fullest.