Master the art of chipping a golf ball with our comprehensive guide. From grip and stance to club selection, swing technique, reading the green, chipping strategies, and practicing tips, improve your short game and lower your scores.
Grip and Stance for Chipping
When it comes to chipping, having the correct grip and stance is essential for achieving consistent and accurate shots. In this section, we will explore the importance of proper hand placement and correct foot positioning to help you improve your chipping game.
Proper Hand Placement
The way you grip the club can greatly influence the outcome of your chip shots. It is crucial to have a solid and stable grip that allows for control and precision.
To achieve the proper hand placement, start by placing your hands close together on the grip of the club. Your lead hand (the hand closest to the target) should be positioned slightly ahead of the ball. This helps promote a descending strike on the ball, leading to a crisp and clean contact.
Wrap your lead hand around the grip in a comfortable but firm manner, ensuring that your palm is facing towards the target. Your thumb should be positioned on top of the grip, pointing towards your trailing shoulder. This grip allows for better control and prevents the club from twisting in your hands during the swing.
Next, place your trail hand (the hand farthest from the target) on the grip, just below your lead hand. The grip pressure should be slightly lighter compared to your lead hand. Your trail hand should complement your lead hand, providing support and stability throughout the chipping motion.
Remember to keep your wrists relaxed and avoid gripping the club too tightly. This will allow for a more fluid and natural swing, resulting in better control and accuracy.
Correct Foot Positioning
In addition to the grip, your foot positioning plays a crucial role in chipping. It helps you maintain balance, stability, and control throughout the shot.
To achieve the correct foot positioning, start by positioning your feet slightly narrower than shoulder-width apart. This width provides a solid base and allows for better weight transfer during the swing.
Your lead foot (the foot closest to the target) should be slightly open, meaning it is turned slightly towards the target. This open stance helps align your body towards the target line, allowing for a more accurate and consistent chip.
On the other hand, your trail foot (the foot farthest from the target) should be square to slightly closed. This positioning helps create a stable foundation and promotes a smooth weight transfer from your backswing to your downswing.
As you set up to the ball, ensure that your weight is evenly distributed between both feet. This balanced stance allows for better control of the club and promotes a more consistent strike on the ball.
By focusing on proper hand placement and correct foot positioning, you can greatly improve your chipping technique. These fundamental elements provide the foundation for a successful chip shot. Practice these grip and stance fundamentals regularly to develop muscle memory and consistency in your chipping game.
Remember, mastering the grip and stance for chipping is just the beginning. In the upcoming sections, we will explore club selection, ball positioning, swing technique, reading the green, chipping strategies, and practicing techniques to further enhance your skills around the green. So, let’s continue our journey to becoming a proficient chipper!
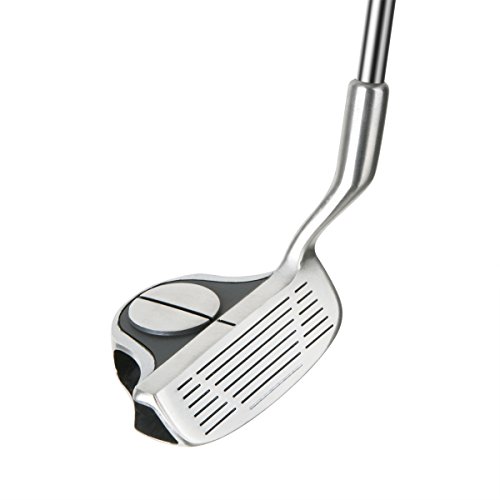
Club Selection for Chipping
Choosing the right club for distance
When it comes to chipping, selecting the right club for the distance is crucial. The club you choose will greatly impact the trajectory and roll of the ball, ultimately determining the success of your chip shot. So, how do you choose the right club for distance?
Firstly, it’s important to understand that chipping is all about control and precision. You want to select a club that allows you to make a controlled swing while still generating enough distance to get the ball to the target. Generally, you’ll want to use a club with a lower loft for longer chip shots and a higher loft for shorter chip shots.
For longer chip shots, such as those around 20 to 30 yards, a 7 or 8 iron is typically a good choice. These clubs have a lower loft, which means the ball will have a lower trajectory and more roll once it lands. By selecting a club with a lower loft, you can ensure that the ball carries a good distance while still maintaining control.
On the other hand, for shorter chip shots, such as those around 10 to 15 yards, a pitching wedge or sand wedge is often the preferred club. These clubs have a higher loft, which will result in a higher trajectory and less roll. This can be beneficial when you need to stop the ball quickly on the green and prevent it from rolling too far past the hole.
Utilizing different clubs for various lies
In addition to choosing the right club for distance, it’s also important to consider the lie of the ball when making your club selection. The lie refers to how the ball is sitting on the ground, and different lies require different clubs to ensure a successful chip shot.
When faced with a tight lie, where the ball is sitting on a firm and closely mown surface, a club with less bounce is ideal. The bounce refers to the angle between the leading edge of the club and the sole. A club with less bounce will allow you to make clean contact with the ball without the club digging into the ground. A pitching wedge or 9 iron with less bounce is often a good choice for tight lies.

On the other hand, when dealing with a fluffy or thick lie, where the ball is sitting on a longer grass or rough, a club with more bounce is recommended. The additional bounce on the club will help prevent the club from digging into the ground and allow for cleaner contact with the ball. A sand wedge or lob wedge with more bounce is often the preferred choice for these types of lies.
By utilizing different clubs for various lies, you can adapt to the conditions of the course and increase your chances of making a successful chip shot. It’s important to practice with different clubs and become familiar with how they perform in different situations. This will give you the confidence to make the right club selection when it matters most.
To summarize, choosing the right club for distance and considering the lie of the ball are vital aspects of chipping. By selecting a club with the appropriate loft and bounce, you can ensure proper trajectory, control, and distance for your chip shots. Remember to practice with different clubs and become comfortable with their performance in various situations. With the right club in hand, you’ll be able to chip confidently and improve your overall performance on the green.
Ball Position for Chipping
When it comes to chipping, the position of the ball in your stance plays a crucial role in achieving better contact and control. Placing the ball back in your stance is a technique commonly used to improve chipping consistency. By doing so, you can ensure that the clubface strikes the ball first, resulting in a clean and crisp shot.
Placing the ball back in the stance for better contact
To achieve better contact with the ball during chipping, it is recommended to place the ball slightly back in your stance. This means positioning the ball closer to your back foot, just inside the heel. By doing this, you create a steeper angle of attack, allowing the club to descend and strike the ball cleanly.

When placing the ball back in your stance, it is important to maintain a balanced posture and ensure that your weight is slightly favoring your front foot. This helps to promote a downward strike on the ball, preventing the club from scooping or sliding under it. By striking the ball first, you can generate consistent contact and avoid thin or fat shots.
Adjusting ball position for different chip shots
While placing the ball back in your stance is a valuable technique for most chip shots, it is important to adjust the ball position based on the specific chip shot you are attempting. Different chip shots require different trajectories and distances, and the ball position plays a significant role in achieving the desired outcome.
For shorter chip shots that require less roll and more loft, you may want to position the ball slightly more forward in your stance. This helps to increase the loft on the shot and reduces the amount of roll after landing. By adjusting the ball position forward, you can create a higher trajectory and softer landing.
On the other hand, for longer chip shots that require more roll and less loft, you may want to place the ball slightly back in your stance. This allows for a more descending strike, compressing the ball against the turf and generating lower trajectory with more roll. By adjusting the ball position back, you can increase the distance the ball travels on the ground.
It is important to experiment with different ball positions during practice sessions to develop a feel for how it impacts your chip shots. By understanding how the ball position affects the trajectory and roll, you can make more informed decisions on the course and execute your chip shots with greater precision.
In summary, the position of the ball in your stance is a critical factor in chipping. Placing the ball back in your stance for better contact ensures that the clubface strikes the ball cleanly. However, it is important to adjust the ball position based on the specific chip shot you are attempting. By experimenting with different ball positions, you can develop a versatile chipping game and improve your overall performance around the greens.
Swing Technique for Chipping
Chipping is a crucial aspect of the game of golf that requires precision and finesse. To excel in chipping, it is essential to master the proper swing technique. In this section, we will explore two key elements of swing technique for chipping: maintaining a smooth and controlled swing and using a pendulum-like motion for consistency.
Maintaining a Smooth and Controlled Swing
When it comes to chipping, a smooth and controlled swing is paramount. This technique allows for better control over the distance and direction of the chip shot. To achieve this, focus on the following aspects:
- Grip: Start by gripping the club with a light grip pressure. Avoid gripping it too tightly, as this can lead to tense muscles and an erratic swing. By maintaining a relaxed grip, you allow your wrists to hinge naturally, promoting a smoother swing.
- Posture: Proper posture is crucial for a smooth and controlled swing. Stand with your feet shoulder-width apart and slightly flex your knees. Lean slightly toward the target, distributing your weight evenly on both feet. This balanced stance helps maintain stability throughout the swing.
- Backswing: During the backswing, keep your arms and wrists relaxed. Avoid excessive wrist movement or a hurried backswing. Instead, focus on a smooth and controlled takeaway, allowing the club to swing back naturally. This controlled motion sets the foundation for a consistent chip shot.
- Downswing: As you transition from the backswing to the downswing, maintain a smooth tempo. Avoid rushing or decelerating the clubhead. Instead, focus on a fluid motion, allowing the clubhead to accelerate through impact. This controlled downswing ensures clean contact with the ball and consistent results.
By practicing and ingraining these principles into your chipping technique, you will develop a smooth and controlled swing that enhances your overall performance around the green.
Using a Pendulum-like Motion for Consistency
One effective technique to achieve consistency in chipping is to emulate a pendulum-like motion. This motion helps create a reliable rhythm and tempo, leading to more accurate chip shots. Here’s how to incorporate a pendulum-like motion into your chipping technique:
- Length of Swing: Imagine your swing as a pendulum, with the distance between your shoulders and the clubhead acting as the length of the pendulum. For consistent chipping, aim for a consistent length of swing. This means maintaining the same distance between your shoulders and the clubhead throughout the swing.
- Even Tempo: Just like a pendulum swings back and forth at a steady pace, aim for an even tempo in your chipping motion. Avoid jerky or rushed movements. Instead, focus on a smooth and rhythmic swing, with the backswing and follow-through mirroring each other in length and speed.
- Minimal Wrist Movement: To achieve a pendulum-like motion, minimize excessive wrist movement. Keep your wrists firm but relaxed throughout the swing, allowing the motion to originate from your shoulders and arms. This technique promotes a consistent arc and helps maintain control over the clubhead.
- Practice with a Metronome: To further hone your pendulum-like motion, consider practicing with a metronome. Set the metronome to a tempo that matches your desired swing rhythm. This exercise helps train your body to synchronize with a consistent beat, reinforcing the pendulum-like motion in your chip shots.
By incorporating the principles of a pendulum-like motion into your chipping technique, you will develop a consistent and reliable swing that enhances your accuracy and overall performance on the golf course.
Reading the Green for Chipping
When it comes to chipping, a crucial element to consider is reading the green. This involves assessing the slope and break of the green, as well as factoring in the grain and speed of the putting surface. By understanding these factors, you can make more informed decisions and improve your chances of executing successful chip shots.
Assessing the slope and break of the green
One of the key aspects of reading the green for chipping is assessing the slope and break. Just like when putting, the slope of the green can greatly influence the trajectory and direction of your chip shot. It’s important to take your time and carefully observe the contours of the green to determine the best approach.
To assess the slope, look for any noticeable changes in elevation. Are there uphill or downhill sections? Is the green sloping from left to right or right to left? By identifying these characteristics, you can adjust your aim and club selection accordingly. For example, if you’re facing a downhill slope, you may need to choose a less lofted club to prevent the ball from rolling too far past the hole.
In addition to slope, break is another factor to consider. Break refers to the movement of the ball once it lands on the green. Is there a subtle curve or a pronounced break towards the hole? Understanding the break will help you determine the correct line and aim for your chip shot.
Factoring in grain and speed of the putting surface
Another important consideration when reading the green for chipping is the grain and speed of the putting surface. Grain refers to the direction in which the grass blades grow. Depending on the grain, the ball may roll differently. For instance, if the grain is growing against the direction of your chip shot, the ball may slow down or veer off course. On the other hand, if the grain is growing with your chip shot, the ball may roll more smoothly.
To identify the grain, look for any visual cues such as the color or texture of the grass. You can also use your hand to feel the grain by running it across the putting surface. By understanding the grain, you can adjust your aim and speed to compensate for its effects.
Speed is another crucial factor to consider when reading the green. Different greens have varying speeds, influenced by factors such as grass type, moisture levels, and maintenance practices. It’s essential to gauge the speed of the putting surface before making your chip shot. Is the green fast or slow? This information will help you determine the amount of force needed to achieve the desired distance.
When factoring in the grain and speed, it’s important to think about how they interact with the slope and break of the green. For example, if you’re facing a downhill slope with the grain growing against your chip shot, you may need to hit the ball with less force to account for the slower roll.
Chipping Strategies
When it comes to chipping, there are a variety of strategies that golfers can employ. Two common techniques are the bump-and-run and the flop shot. Each has its own advantages and considerations, and it’s important to choose the right strategy based on the specific situation on the green.
Choosing between a bump-and-run or flop shot
- Bump-and-Run: The bump-and-run shot is a low-trajectory chip that is ideal for situations where you have a lot of green to work with and minimal obstacles to navigate. This shot is executed with a lower lofted club, such as a 7-iron or 8-iron, to keep the ball rolling along the ground. By utilizing this shot, you can minimize the risk of the ball getting caught up in the rough or other hazards.
- Flop Shot: On the other hand, the flop shot is a high-trajectory chip that is useful when you need to get the ball up and over an obstacle, such as a bunker or a mound. This shot requires a more lofted club, like a lob wedge or sand wedge, to generate the necessary height and soft landing. The flop shot is particularly effective when you have limited green to work with and need to stop the ball quickly.
Choosing between these two strategies depends on several factors. Consider the distance to the hole, the lie of the ball, the height of the obstacle, and the condition of the green. If you have plenty of green to roll the ball, and there are no significant obstacles in your way, the bump-and-run shot is a safer and more reliable option. However, if you need to carry the ball over a bunker or a mound, and there is limited green to work with, the flop shot may be the better choice.
Adjusting trajectory for different obstacles on the green
When faced with various obstacles on the green, it’s important to adjust your trajectory accordingly to navigate around them effectively. Here are some tips on how to adjust your chipping trajectory based on different obstacles:
- Bunkers: When chipping over a bunker, you’ll need to generate enough height to clear the lip while still landing the ball softly on the green. This is where the flop shot comes in handy. By using a higher lofted club and an open clubface, you can create the necessary loft and spin to get the ball up and over the bunker.
- Mounds or Fringe: When you encounter a mound or the fringe around the green, a bump-and-run shot can be a reliable option. By keeping the ball low and rolling it along the ground, you can avoid getting the ball caught up in the tall grass or uneven terrain. Choose a lower lofted club and focus on making clean contact with the ball.
- Slopes: Chipping uphill or downhill requires you to adjust your trajectory to compensate for the slope. When chipping uphill, use a higher lofted club to generate the necessary height and prevent the ball from rolling too far. When chipping downhill, a bump-and-run shot with a lower lofted club can help keep the ball under control and prevent it from running too far past the hole.
By adapting your chipping strategy and adjusting the trajectory of your shots, you can effectively navigate around different obstacles on the green. Remember to consider the distance to the hole, the lie of the ball, and the condition of the green when deciding between a bump-and-run or flop shot. Practice these strategies on the course and experiment with different clubs to develop a versatile short game that can save you valuable strokes.
Practicing Chipping
Chipping is a crucial skill in golf that can greatly impact your overall game. By practicing your chipping technique regularly, you can develop consistency and precision around the greens. In this section, we will explore effective ways to practice chipping, including creating a chipping practice routine and incorporating different target distances for skill development.
Creating a Chipping Practice Routine
To become proficient in chipping, it is essential to establish a structured practice routine. By following a consistent routine, you can reinforce proper technique and build muscle memory. Here are some steps to create an effective chipping practice routine:
- Warm-up: Before diving into chipping practice, it’s important to warm up your body and loosen your muscles. Perform a few dynamic stretches and swings to prepare yourself physically.
- Start close to the green: Begin your practice by setting up a target hole close to the edge of the green, preferably within 10 yards. This allows you to focus on your technique without worrying too much about distance control.
- Use different clubs: Experiment with different clubs to enhance your versatility. Start with a pitching wedge and gradually work your way up to a sand wedge or even a lob wedge. Each club offers a different loft and bounce, providing you with a variety of shot options.
- Vary the lies: Chipping practice should simulate real-life situations on the course. Create different lies by placing balls on uphill, downhill, and sidehill slopes. This will help you develop the ability to adjust your stance, grip, and swing based on the lie.
- Focus on accuracy: Accuracy should be your primary goal during chipping practice. Aim for specific targets on the green, such as a hole or a designated landing area. Keep track of your success rate and challenge yourself to hit different spots consistently.
- Practice different chip shots: Work on mastering various chip shots, such as the bump-and-run and flop shot. The bump-and-run is ideal for situations where you need to get the ball rolling quickly along the ground, while the flop shot is useful for clearing obstacles and landing softly on the green.
- Track your progress: Keep a record of your chipping practice sessions. Note down the clubs you used, the distances you targeted, and any specific areas you struggled with. This will help you identify patterns and areas for improvement.
Incorporating Different Target Distances for Skill Development
To become a well-rounded golfer, it is crucial to develop your chipping skills across a range of distances. By incorporating different target distances into your practice routine, you can improve your ability to control distance and adapt to different on-course scenarios. Here are some strategies to help you develop your chipping skills at various distances:
- Short chips (5-10 yards): Short chips require a delicate touch and precise control. Focus on using a shorter backswing and a smooth pendulum-like motion to achieve consistent results. Experiment with different clubs and practice landing the ball within a small radius around the target.
- Medium chips (10-20 yards): Medium chips require a slightly longer backswing and more power. Practice using a controlled but slightly more aggressive swing to generate the necessary distance. Focus on landing the ball softly on the green to promote better control and minimize roll.
- Long chips (20-30 yards): Long chips require a more substantial swing and the ability to generate consistent power. Experiment with different clubs, such as a pitching wedge or a 9-iron, to find the right balance between loft and distance. Focus on maintaining a smooth and controlled swing to ensure accuracy.
- Randomize target distances: Once you have practiced chips at specific distances, it’s important to challenge yourself by randomizing the target distances. Set up a series of target holes at varying distances and aim to land the ball close to each hole. This will simulate real on-course scenarios and improve your ability to adapt quickly.
Remember, consistency and practice are key when it comes to chipping. By creating a chipping practice routine and incorporating different target distances into your sessions, you can enhance your skills and become more confident around the greens. So grab your clubs, head to the practice area, and start honing your chipping technique today!
Note: The following table provides a visual representation of the chipping practice routine described above.
| Step | Activity |
|---|---|
| 1 | Warm-up |
| 2 | Start close to the green |
| 3 | Use different clubs |
| 4 | Vary the lies |
| 5 | Focus on accuracy |
| 6 | Practice different chip shots |
| 7 | Track your progress |