Build your own DIY putting green and improve your putting skills while saving money. Learn about the materials needed, choosing the right location, and steps for and .
Benefits of DIY Putting Green
Improve Putting Skills
Do you dream of sinking the perfect putt every time? With a DIY putting green, you can improve your putting skills right in the comfort of your own backyard. No more driving to the golf course or waiting for your turn on the practice green. Having a putting green at home allows you to practice whenever you want, for as long as you want. This convenience gives you the opportunity to focus on your technique and develop a consistent stroke that will translate to better performance on the course.
Cost Savings
Are you tired of spending money on expensive golf course fees or driving range sessions? Building your own putting green can save you a significant amount of money in the long run. While there may be some upfront costs involved, such as purchasing materials and equipment, the overall cost is much lower compared to regular visits to a golf facility. Additionally, you won’t have to worry about annual membership fees or green fees. Once your DIY putting green is complete, you can enjoy unlimited practice sessions without breaking the bank.
Customization Options
One of the greatest advantages of building a DIY putting green is the ability to customize it according to your preferences. You have complete control over the design, size, and shape of your putting green. Whether you want a small and simple green or a larger, more complex layout, the choice is yours. You can also choose the type of artificial turf that suits your playing style, whether it’s a slower or faster surface. Furthermore, you can incorporate additional features like undulations, slopes, or even water hazards to make your putting green more challenging and exciting.
When it comes to customization, the possibilities are endless. You can let your creativity run wild and create a putting green that perfectly matches your vision. Whether you want to replicate a famous golf course hole or design a completely unique layout, the choice is yours. This level of customization ensures that your DIY putting green is not only a practice area but also a personalized space that reflects your style and preferences.

Having explored the of a DIY putting green, it’s time to move on to the next step: understanding the materials needed for building one.
Materials Needed for DIY Putting Green
Artificial Turf
Artificial turf is a crucial component of a DIY putting green. It provides a realistic and durable playing surface that closely resembles natural grass. When choosing artificial turf, look for a high-quality product specifically designed for putting greens. The turf should have a dense pile height and a smooth, consistent texture. It should also have excellent drainage capabilities to prevent water from pooling on the surface.
Base Material
The base material is essential for creating a stable foundation for your putting green. It helps to ensure proper drainage and prevents the turf from shifting or settling over time. One popular choice for the base material is decomposed granite, which is a mixture of small granite particles. Other options include crushed limestone or gravel. The base material should be compacted and leveled to create a smooth surface for the artificial turf.
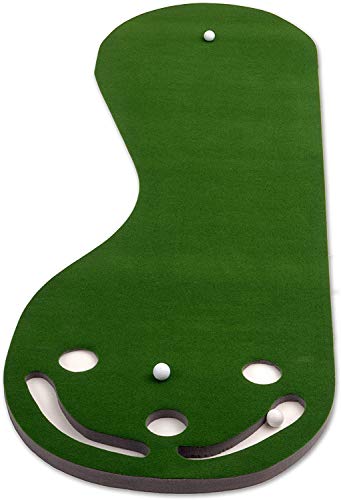
Putting Cup and Flagstick
No putting green is complete without a putting cup and flagstick. These are essential components that provide a target for your putts. The putting cup is typically made of plastic or metal and is installed flush with the surface of the green. It is important to position the cup correctly to simulate the depth and size of a regulation hole. The flagstick, on the other hand, is inserted into the cup and helps you visualize the target while practicing your putting skills.
Now that we have covered the materials needed, let’s move on to the next step: choosing the right location for your DIY putting green.
Materials Needed for DIY Putting Green
When it comes to building your own DIY putting green, there are a few essential materials that you will need to ensure a successful project. These include artificial turf, base material, and putting cup and flagstick. Let’s take a closer look at each of these materials and their importance in creating a top-notch putting green.
Artificial Turf
Artificial turf is the foundation of your DIY putting green. It mimics the look and feel of natural grass while providing a consistent and smooth surface for your putts. When selecting artificial turf for your putting green, there are a few factors to consider.
Firstly, choose a turf with a high pile density. This means that there are more fibers per square inch, resulting in a denser and more realistic feel underfoot. Additionally, opt for a turf with a shorter pile height, as this will allow the ball to roll smoothly and accurately.
Secondly, look for a turf that has good drainage capabilities. Since your putting green will be exposed to outdoor elements, it’s important to choose a turf that can withstand rain and properly drain water. This will prevent water from pooling on the surface and ensure that your green remains playable even after a heavy downpour.
Lastly, consider the aesthetics of the turf. You want your putting green to blend seamlessly with the surrounding landscape. Choose a turf that matches the color and texture of natural grass in your area, creating a visually appealing and cohesive look.

Base Material
The base material is the foundation on which your putting green will be built. It provides stability and ensures that your green remains level and free from any bumps or unevenness. There are various base materials to choose from, but the most commonly used ones are crushed stone, decomposed granite, and compacted gravel.
Before installing the base material, it’s important to prepare the area properly. Clear any vegetation and debris from the site, ensuring a clean and even surface. Once the area is clear, you can begin to lay down the base material.
Start by creating a compacted layer of the chosen material, ensuring a thickness of at least 4 inches. Use a compactor or a heavy roller to compress the material, creating a solid and stable base. This will prevent the turf from shifting or sinking over time.
Putting Cup and Flagstick
The putting cup and flagstick are the final touches that bring your DIY putting green to life. These accessories not only add visual appeal but also enhance the overall playing experience.
Installing a putting cup is relatively straightforward. Dig a hole in the desired location and place the cup in the hole, ensuring that it is level with the surface of the turf. Secure the cup in place using a concrete mix, allowing it to dry completely before use.

The flagstick, on the other hand, provides a visual target and helps golfers gauge the distance of their putts. It is typically inserted into the putting cup and can be easily removed or adjusted as needed. Choose a flagstick that is sturdy and weather-resistant, ensuring its durability over time.
To create a more challenging and dynamic putting green, consider adding multiple putting cups and flagsticks. This will allow you to create various hole configurations and practice different putt lengths and angles.
Table: Materials Needed for DIY Putting Green
Here is a summary of the materials needed for your DIY putting green:
| Materials | Description |
|---|---|
| Artificial Turf | Mimics the look and feel of natural grass |
| Base Material | Provides stability and ensures a level surface |
| Putting Cup | Creates a target for putting practice |
| Flagstick | Helps gauge the distance of putts and adds visual appeal |
Choosing the Right Location for DIY Putting Green
When it comes to creating your own DIY putting green, choosing the right location is key to ensuring its success. A well-planned and strategically placed green can greatly enhance your golfing experience right in the comfort of your own backyard. So, let’s explore the factors to consider when selecting the perfect spot for your DIY putting green.
Assessing Space Availability
Before you start planning the of your DIY putting green, it’s important to assess the available space in your yard. Consider the overall dimensions and shape of the area where you intend to build your green. Ensure that there is enough room for a putting surface that allows for a comfortable and enjoyable golfing experience. Take into account the length and width of the area, as well as any potential obstacles or obstructions that may hinder your golfing practice.

Evaluating Sunlight Exposure
Sunlight exposure is another crucial factor to consider when choosing the right location for your DIY putting green. Golf is a game that heavily relies on natural lighting conditions, and your green should receive an adequate amount of sunlight throughout the day. Observe the area at different times to determine the amount of sunlight it receives. Ideally, your putting green should be placed in an area that gets a good balance of sunlight and shade, ensuring that it is not too hot or too cold for comfortable play.
Considering Terrain and Slope
The terrain and slope of the chosen location play a significant role in the performance and aesthetics of your DIY putting green. Assess the natural slope of the area and determine if any adjustments need to be made to create a level surface. It’s important to have a relatively flat area for your green to ensure a smooth and consistent roll of the ball. If your yard has a slope, you may need to consider grading or leveling the ground to create a suitable foundation for your putting green.
Additionally, consider the overall landscape and its impact on your putting green. Ensure that there are no excessive slopes, bumps, or uneven areas that could affect the playability of your green. If necessary, you may need to make modifications to the existing landscape to create a more suitable surface for your DIY putting green.
By carefully assessing space availability, evaluating sunlight exposure, and considering the terrain and slope of your yard, you can choose the perfect location for your DIY putting green. Remember, a well-placed green can provide endless hours of enjoyment and help improve your golfing skills. So, take the time to find the ideal spot and get ready to create your own golfing oasis right at home.
Materials Needed for DIY Putting Green
Now that you have chosen the perfect location for your DIY putting green, it’s time to gather the necessary materials for the project. Building your own green requires a few key components to ensure its durability and functionality. Let’s explore the essential materials you’ll need to bring your DIY putting green to life.
Artificial Turf
Artificial turf is the foundation of any DIY putting green. It provides a realistic and consistent surface for practicing your golfing skills. When selecting artificial turf, opt for a high-quality product specifically designed for putting greens. Look for turf that offers a natural look and feel, with a dense pile height and a smooth texture that mimics the experience of playing on a professional golf course.
Base Material
The base material is an important element that provides stability and drainage for your DIY putting green. Typically, a compacted aggregate base is recommended to create a solid foundation. This base material helps to prevent shifting and settling of the green over time. It also facilitates proper drainage, ensuring that water does not accumulate on the surface and affect the playability of your green.
Putting Cup and Flagstick
No putting green is complete without a putting cup and flagstick. These components are essential for practicing your putting skills and simulating a real golfing experience. The putting cup is the target where you aim to sink your putts, while the flagstick provides a visual aid and helps to measure the distance and direction of your shots. Ensure that you choose a high-quality cup and flagstick that are durable and designed for outdoor use.
By gathering the necessary materials, including artificial turf, base material, and a putting cup with a flagstick, you’ll have everything you need to build your DIY putting green. These materials will provide the foundation and functionality required for an enjoyable golfing experience right in your own backyard. So, let’s move on to the next step and start preparing the area for your putting green.
(Note: The content continues with the next section, “
Preparing the Area for DIY Putting Green”)
Preparing the Area for DIY Putting Green
Clearing Vegetation and Debris
Clearing vegetation and debris is the first step in preparing the area for your DIY putting green. Before you can start creating your own little golf oasis, you need to ensure that the area is free from any obstacles that could affect the quality of your putting surface.
To begin, take a close look at the area where you plan to install your putting green. Are there any trees, shrubs, or other vegetation that could interfere with your game? If so, it’s important to remove them. Clearing the area of vegetation not only creates a clean and open space, but it also prevents any roots or branches from growing and potentially damaging your putting green in the future.
In addition to vegetation, you’ll also want to clear away any other debris that may be present, such as rocks, sticks, or other objects that could create an uneven surface. These small obstructions can greatly impact the smoothness of your putting green and even cause your ball to veer off course. By taking the time to clear away these items, you’ll ensure a more enjoyable and consistent putting experience.
Leveling the Ground
Once the area is clear of vegetation and debris, the next step is to level the ground. A flat and even surface is essential for a properly functioning putting green.
To level the ground, start by inspecting the area for any low or high spots. Low spots can be filled in with topsoil or sand to bring them up to the desired level, while high spots can be smoothed out by removing excess soil. Use a leveling tool, such as a long board or a rake, to ensure that the ground is perfectly even.
It’s important to note that the level of precision required for leveling depends on your personal preferences and the intended use of the putting green. If you’re a serious golfer looking to replicate the conditions of a professional course, you may want to invest more time and effort into achieving a perfectly level surface. However, if you’re simply looking to have some fun and improve your putting skills, a slightly less precise level of leveling may be sufficient.
Installing Drainage System
Installing a drainage system is crucial for maintaining the longevity and playability of your DIY putting green. Proper drainage ensures that water does not accumulate on the surface, which can lead to soggy conditions and damage the turf over time.
Firstly, assess the natural slope and drainage patterns of the area. You want to ensure that the water will naturally flow away from the putting green rather than pooling on or around it. If necessary, you may need to make minor modifications to the existing topography to facilitate proper drainage.
Next, consider installing a subsurface drainage system. This can be achieved by digging trenches around the perimeter of the putting green and filling them with gravel or other porous . These trenches will allow water to drain away from the surface and prevent any waterlogging issues.
In addition to subsurface drainage, you may also want to incorporate surface drainage features, such as strategically placed catch basins or swales. These features help to redirect water away from the putting green and prevent it from accumulating on the surface.
By taking the time to clear vegetation and debris, level the ground, and install a proper drainage system, you’ll set the foundation for a high-quality DIY putting green. These initial steps are crucial for creating a smooth and playable surface that will enhance your putting skills and provide endless hours of enjoyment. So grab your shovel and get ready to transform your backyard into your very own golfing paradise!
- Clear away any vegetation and debris that could interfere with your putting green
- Level the ground to create a flat and even surface
- Install a drainage system to prevent water accumulation
Installing the DIY Putting Green
Securing the Base Material
When it comes to installing a DIY putting green, securing the base material is a crucial step. The base material serves as the foundation for the entire green, providing stability and support for the artificial turf. Without a properly secured base material, the putting green may become uneven or prone to shifting, affecting the overall playability.
To secure the base material, you will need a few key materials:
- Gravel: Begin by excavating the area where you want to install the putting green. Once the area is cleared, add a layer of gravel to create a sturdy base. The gravel should be compacted to ensure a solid foundation.
- Geotextile Fabric: After adding the gravel layer, it is recommended to place a geotextile fabric over it. This fabric helps to prevent weed growth and provides additional stability to the base material.
- Water: Once the geotextile fabric is in place, water the area thoroughly. This will help to settle the gravel and ensure a firm base.
Securing the base material is essential for the longevity and durability of your DIY putting green. It creates a solid surface for the artificial turf, allowing for a consistent putting experience.
Laying Artificial Turf
After securing the base material, the next step is to lay the artificial turf. The choice of artificial turf is crucial, as it will determine the overall look and feel of your putting green. Consider factors such as pile height, density, and color to find the turf that best suits your preferences and needs.
To lay the artificial turf, follow these steps:
- Measure and Cut: Measure the area where you will be installing the turf and cut it accordingly. Make sure to leave some excess turf around the edges to ensure a clean and seamless finish.
- Prepare the Surface: Before laying the turf, make sure the base material is smooth and free of any debris. Remove any rocks or objects that may cause an uneven surface.
- Apply Adhesive: Apply adhesive or turf tape to the edges of the turf pieces to secure them together. This will prevent shifting or movement of the turf during use.
- Roll Out the Turf: Roll out the turf over the prepared surface, making sure it is aligned and centered. Smooth out any wrinkles or folds in the turf as you go along.
- Trim and Shape: Once the turf is in place, use a utility knife to trim any excess turf around the edges. Create clean lines and ensure a neat appearance.
Laying the artificial turf requires attention to detail and precision. Take your time to ensure the turf is properly aligned and secured to achieve a professional-looking DIY putting green.
Trimming and Shaping the Turf
Trimming and shaping the turf is the final step in installing your DIY putting green. This step adds the finishing touches and ensures that the turf contours to the desired shape of your putting green.
To trim and shape the turf, follow these guidelines:
- Trimming: Use a utility knife or turf cutter to trim any excess turf along the edges. Pay attention to the corners and curves of the putting green, ensuring a clean and seamless appearance.
- Shaping: If desired, you can shape the turf to create breaks or contours in your putting green. This can add an extra challenge and mimic the slopes and undulations of a professional golf course. Use a shovel or other tools to shape the base material before laying the turf.
By trimming and shaping the turf, you can customize your DIY putting green to suit your preferences and create a unique playing experience.
Maintaining the DIY Putting Green
Taking good care of your DIY putting green is essential to ensure its longevity and optimal performance. Regular not only keeps the turf looking pristine but also helps to preserve the integrity of the surface. In this section, we will discuss some important practices that will keep your putting green in top shape.
Brushing and Sweeping the Turf
Regularly brushing and sweeping the turf is crucial for maintaining its appearance and playability. This simple task helps to redistribute the infill material and prevents matting of the fibers. By brushing the turf in different directions, you can keep the blades upright and ensure a consistent roll for your golf ball.
To brush the turf, you can use a stiff broom or a specialized turf brush with synthetic bristles. Start by brushing against the grain of the turf to lift the fibers, and then brush with the grain to create a smooth surface. This process should be done at least once a week, or more frequently if the green experiences heavy foot traffic.
Sweeping is also important to remove any debris, leaves, or grass clippings that may accumulate on the surface. Use a leaf blower, a rake, or a soft-bristle broom to gently sweep the turf and keep it clean. Regular brushing and sweeping not only enhance the aesthetics of your putting green but also contribute to a better putting experience.
Applying Weed Control Measures
Keeping weeds at bay is crucial to maintain the pristine appearance of your DIY putting green. Weeds not only detract from the overall aesthetics but can also affect the playability of the green. Fortunately, there are several effective weed control measures that you can implement.
One of the most common methods is using a pre-emergent herbicide. This type of herbicide prevents weed seeds from germinating and establishing themselves in your putting green. It is best to apply the pre-emergent herbicide during the early spring or fall, when weed seeds are most likely to be present in the soil.
In addition to pre-emergent herbicides, spot-treating with a post-emergent herbicide can help control any weeds that manage to grow despite preventive measures. Make sure to choose a herbicide that is safe for use on artificial turf and follow the manufacturer’s instructions for application.
Regularly inspecting your putting green for any signs of weed growth and promptly addressing the issue will help keep them from spreading and causing further damage. Remember to always use weed control measures that are safe for both the turf and the environment.
Regularly Inspecting and Repairing
Regular inspections are vital to catch any issues or damage early on, allowing for timely repairs and preventing further deterioration. By conducting routine inspections, you can identify and address any problems before they become major concerns.
During your inspections, pay close attention to the seams and edges of the turf. Look for any signs of separation or fraying, as these areas are more prone to wear and tear. If you notice any damage, it is important to repair it promptly to prevent further spreading.
To repair small tears or seams, you can use specialized turf adhesive or seam tape. Apply the adhesive or tape according to the manufacturer’s instructions, ensuring a secure and seamless bond. For larger repairs, it may be necessary to replace the damaged section of turf entirely.
Regularly inspecting and repairing your DIY putting green will not only extend its lifespan but also ensure a smooth and enjoyable playing surface. By addressing any issues promptly, you can maintain the integrity and quality of your putting green for years to come.
In summary, maintaining your DIY putting green involves regular brushing and sweeping to keep the turf looking pristine and to ensure a consistent roll for your golf ball. Applying weed control measures helps to prevent weed growth and preserve the green’s aesthetics. Regular inspections and prompt repairs are essential for catching any issues early on and maintaining the integrity of the putting green. By following these practices, you can enjoy a beautiful and high-performing putting green in your own backyard.
Adding Accessories to DIY Putting Green
So, you’ve successfully built your own DIY putting green and are ready to take it to the next level. Adding accessories to your green can not only enhance your overall golfing experience but also provide you with more opportunities to practice and improve your skills. In this section, we will explore some exciting accessories that you can consider incorporating into your DIY putting green.
Installing Putting Cups and Flagsticks
One of the essential accessories for any putting green is the putting cup. Installing a putting cup allows you to simulate real-life putting scenarios, making your practice sessions more realistic and challenging. It provides you with a target to aim for and helps you refine your putting skills.
To install a putting cup, you will need to dig a hole in the ground that is wide and deep enough to accommodate the cup. Make sure to position the cup at the desired location on your putting green, ensuring it is level and secure. Once the cup is in place, you can insert the flagstick, which not only serves as a visual aid but also helps you gauge the wind direction.
Adding Chipping Targets
Chipping is an essential aspect of the game, and adding chipping targets to your DIY putting green can help you practice and improve your chipping skills. Chipping targets are typically made of different materials and come in various shapes and sizes.
You can create your own chipping targets using simple household items such as buckets, hula hoops, or even cardboard boxes. These targets can be strategically placed around your putting green to simulate different chipping scenarios. By incorporating chipping targets, you can work on your accuracy, distance control, and shot selection, making your practice sessions more engaging and effective.
Creating Bunkers or Sand Traps
If you want to truly replicate the experience of playing on a professional golf course, consider adding bunkers or sand traps to your DIY putting green. Bunkers not only add visual appeal but also provide you with the opportunity to practice your sand shots and improve your short game.
Creating a bunker requires careful planning and the right materials. Start by digging out the desired shape and size of the bunker, ensuring it blends seamlessly with your putting green. Once the shape is defined, line the bunker with a high-quality sand suitable for golfing. Make sure to maintain the correct depth and slope to mimic the challenges of a real bunker.
By incorporating bunkers or sand traps into your DIY putting green, you can work on your bunker shots, develop better control over your ball trajectory, and enhance your overall golfing skills.
Enhancing the DIY Putting Green Experience
When it comes to creating your own DIY putting green, there are several ways you can enhance the overall experience. In this section, we will explore three key aspects that can take your putting green to the next level: installing outdoor lighting, adding seating or shade options, and incorporating landscaping elements. By incorporating these elements, you can create a truly enjoyable and visually appealing space for practicing your putting skills.
Installing Outdoor Lighting
One way to enhance your DIY putting green experience is by installing outdoor lighting. By adding proper lighting to your putting green, you can extend your practice sessions into the evening hours. This not only allows you to enjoy your green after the sun goes down but also provides a unique ambiance that can make your practice sessions more enjoyable.
Outdoor lighting options for your putting green can range from simple, solar-powered stake lights to more advanced LED lighting systems. The choice will depend on your budget and preferences. Regardless of the type of lighting you choose, make sure to strategically place the lights to ensure even illumination across the entire green. This will help you see the contours of the green and improve your accuracy during evening practice sessions.
Adding Seating or Shade Options
Another way to enhance your DIY putting green experience is by incorporating seating or shade options. Practicing your putting skills can be a relaxing and enjoyable activity, and having a comfortable place to sit or relax can make the experience even better.
Consider adding a bench or some outdoor chairs near your putting green, providing a designated area for relaxation and observation. This allows you to take breaks between putting sessions and enjoy the surroundings. Additionally, you may want to consider adding a shade option, such as an umbrella or a pergola, to protect yourself from the sun during hot summer days. This not only provides relief from the heat but also adds a touch of elegance to your putting green area.
Incorporating Landscaping Elements
To truly elevate your DIY putting green, consider incorporating landscaping elements into the design. Landscaping can add a visually appealing touch to your putting green area, making it blend seamlessly with the rest of your outdoor space.
One option is to add decorative plants or flowers around the perimeter of your putting green. This can create a vibrant and inviting atmosphere, making your practice sessions more enjoyable. You can also use landscaping elements to create natural borders or pathways that lead to the putting green, enhancing the overall aesthetics of the area.
Additionally, you may want to consider adding rocks or decorative stones strategically placed throughout the landscape. These elements can serve as both visual accents and obstacles, providing additional challenges to your putting game.
Next Steps: Regularly Inspecting and Repairing
While enhancing the overall experience of your DIY putting green is important, it is equally crucial to maintain and inspect the green regularly. In the next section, we will explore the importance of regularly inspecting and repairing your putting green to ensure its longevity and optimal performance. Stay tuned for valuable tips and insights on how to keep your DIY putting green in top shape.