Improve your bunker shot skills with proper setup, club selection, and techniques. Learn how to assess the challenge, choose the right club, and escape bunkers successfully.
Proper Setup and Stance for Bunker Shots
When it comes to bunker shots, a proper setup and stance are crucial for success. By positioning yourself correctly and using the right grip and hand position, you can improve your chances of getting out of the bunker with ease. Let’s dive into the details of each aspect:
Positioning the Ball in the Stance
The first step in setting up for a bunker shot is positioning the ball in your stance. Unlike shots from the fairway, where the ball is typically positioned in the middle of your stance, bunker shots require a different approach. To maximize your chances of success, it’s recommended to position the ball slightly forward in your stance, closer to your front foot. This helps you achieve the necessary steep angle of attack, allowing the club to slide under the ball and pop it out of the sand.
Feet Placement and Alignment
In addition to ball positioning, the placement and alignment of your feet play a crucial role in your bunker shot setup. To start, position your feet slightly wider than shoulder-width apart. This wider stance provides stability and balance, which are essential for executing a clean and precise shot. As for foot alignment, aim your feet slightly left of the target (for right-handed golfers) to account for the natural tendency of the clubface to open upon impact.
Correct Grip and Hand Position
To maintain control and consistency in your bunker shots, it’s important to adopt the correct grip and hand position. Begin by gripping the club with a slightly firmer grip than usual to prevent the club from twisting in the sand. Place your hands slightly lower on the grip to encourage a steeper swing path and ensure the clubface remains open through impact.

When it comes to hand position, it’s crucial to maintain a light grip pressure. This allows for a better feel and touch when interacting with the sand. Imagine holding a delicate object in your hands, like a butterfly, to help you visualize the required gentle touch. By keeping your grip relaxed, you’ll have more control over the clubhead and increase your chances of executing a successful bunker shot.
In summary, a proper setup and stance for bunker shots are essential for achieving consistent and successful outcomes. Positioning the ball slightly forward in your stance, adopting a wider stance with slightly left-aligned feet, and using the correct grip and hand position all contribute to a more effective bunker shot. Remember to practice these techniques to build muscle memory and improve your overall performance from the bunker.
Now that we’ve covered the setup and stance, let’s move on to the next section: “Club Selection for Bunker Shots.” But before we do, take a moment to reflect on how these simple adjustments can make a significant difference in your bunker play. How might these changes positively impact your ability to escape the sand traps? Let’s explore further in the following section.
Club Selection for Bunker Shots
Choosing the right club for bunker shots can greatly impact your ability to escape the sand with precision and control. The lofted wedge is the go-to club for most bunker shots, but understanding its bounce and loft angle, as well as considering the lie of the ball, is essential for optimal club selection. Let’s delve into each aspect in more detail:
Choosing the Right Lofted Wedge
When it comes to bunker shots, the lofted wedge is your best friend. This club provides the necessary loft to lift the ball out of the sand and onto the green. The most common lofted wedges used for bunker shots are the sand wedge (56-58 degrees) and the lob wedge (60-64 degrees). These clubs allow for a steeper angle of attack, making it easier to slide the club under the ball and achieve the desired trajectory.

While the sand wedge and lob wedge are the typical choices, it’s important to consider the specific conditions and challenges of the bunker you’re facing. If you’re dealing with a particularly deep or soft bunker, a higher lofted wedge might be necessary to generate the required lift. On the other hand, if you’re faced with a shallower or firmer bunker, a lower lofted wedge may be more suitable for a flatter trajectory.
Understanding the Bounce and Loft Angle
In addition to the lofted wedge selection, it’s crucial to understand the bounce and loft angle of your chosen club. The bounce refers to the curvature or angle on the sole of the club, which helps prevent the club from digging too deeply into the sand. Generally, a higher bounce angle is preferred for softer sand conditions, while a lower bounce angle is more suitable for firmer sand.
The loft angle, as mentioned earlier, determines the trajectory of the shot. A higher loft angle provides more height and a softer landing, while a lower loft angle produces a flatter and more penetrating shot. By understanding the interplay between the bounce and loft angle, you can choose the right combination for the bunker conditions at hand.
Considering the Lie of the Ball
Lastly, it’s important to consider the lie of the ball when selecting your club. If the ball is sitting on top of the sand or in a fluffy lie, a higher lofted wedge may be needed to prevent the club from slipping under the ball without making contact. Conversely, if the ball is buried or sitting in a compacted lie, a lower lofted wedge may be more appropriate to ensure clean contact and sufficient distance.
By carefully considering the lie of the ball, you can make an informed decision on the club selection and increase your chances of executing a successful bunker shot. Remember, each bunker shot presents unique challenges, and adapting your club selection accordingly can greatly improve your chances of escaping the sand with finesse.
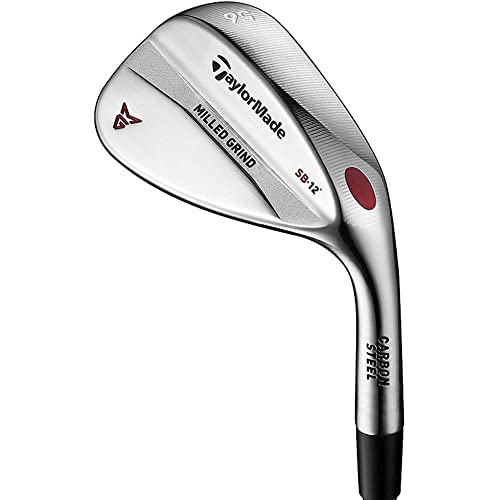 TaylorMade Golf MG1 CHROME WEDGE, 56 DEGREE LOFT, 12 DEGREE STANDARD BOUNCE, RIGHT HAND, STIFF FLEX
With the proper club selection in mind, we can move on to the next section: “Technique for Hitting a Bunker Shot.” But before we do, take a moment to reflect on the importance of club selection in bunker play. How might understanding bounce, loft angle, and lie impact your ability to get out of various bunker situations? Let’s explore further in the following section.
Club Selection for Bunker Shots
When it comes to hitting bunker shots, selecting the right club is crucial. The club you choose can greatly affect your chances of successfully escaping the bunker and getting the ball close to the hole. Here are some important factors to consider when selecting a club for bunker shots:
Choosing the Right Lofted Wedge
The lofted wedge is the most commonly used club for bunker shots. It is designed with a higher loft angle, which helps to get the ball up quickly and out of the sand. When choosing a lofted wedge, consider the following:
- Loft Angle: The loft angle refers to the angle of the clubface. A higher loft angle, such as 56 degrees or higher, is generally recommended for bunker shots. This allows for a steeper trajectory, helping the ball to clear the lip of the bunker and land softly on the green.
- Personal Preference: Each golfer may have their own preference when it comes to the loft angle of their wedge. Some players may feel more comfortable with a slightly lower loft, around 54 degrees, while others may prefer a higher loft, around 58 degrees. Experiment with different loft angles to find the one that suits your game best.
- Course Conditions: Consider the course conditions when selecting a lofted wedge. If the sand in the bunker is soft and fluffy, a higher loft angle may be beneficial. On the other hand, if the sand is compact and firm, a slightly lower loft angle may be more effective in generating the necessary distance.
Understanding the Bounce and Loft Angle
In addition to the loft angle, it is important to understand the concept of bounce and its relationship to the loft angle. Bounce refers to the angle between the leading edge of the clubface and the trailing edge or sole of the club. Here are a few key points to keep in mind:
- Bounce Options: Wedges are available with different degrees of bounce. A higher bounce angle, such as 12 degrees or more, is suitable for players who tend to take shallow divots or play on softer turf. It helps prevent the club from digging into the sand or turf, allowing for cleaner contact with the ball.
- Lower Bounce: Conversely, wedges with a lower bounce angle, around 8 degrees or less, are better suited for players who take deeper divots or play on firmer turf. Lower bounce angles allow the leading edge to dig into the sand or turf, providing more control and versatility.
- Matching Bounce to Loft: The bounce and loft angle of your wedge should complement each other. Generally, a higher lofted wedge will have a higher bounce angle, while a lower lofted wedge will have a lower bounce angle. This helps maintain the proper balance between the club’s interaction with the sand and the desired trajectory of the shot.
Considering the Lie of the Ball
Another important factor to consider when selecting a club for bunker shots is the lie of the ball in the sand. The lie refers to how the ball is positioned in the bunker, and it can greatly affect the type of shot you can play. Here are a few things to keep in mind:

- Buried Lie: If the ball is buried deep in the sand, it may be challenging to get it out and onto the green. In this situation, a higher lofted wedge with a steeper angle of attack can help. By opening the clubface and taking a more aggressive swing, you can increase the chances of getting the ball out of the bunker.
- Bare Lie: If the ball is sitting on top of the sand or has a clean lie, you have more options available to you. A lower lofted wedge with less bounce can be effective in this situation, as it allows for a more controlled shot that rolls out on the green. Experiment with different clubs and techniques to find what works best for you.
- Firm Lie: When the sand is compact and firm, it can be more challenging to generate the necessary distance and spin. In this case, a higher lofted wedge with more bounce can help the club glide through the sand more easily, producing the desired trajectory and spin. Adjust your club selection accordingly based on the firmness of the sand.
By considering these factors – choosing the right lofted wedge, understanding the bounce and loft angle, and considering the lie of the ball – you can make more informed decisions when it comes to club selection for bunker shots. Remember to practice with different clubs and techniques to find the best combination that suits your game and helps you escape the bunkers successfully.
Technique for Hitting a Bunker Shot
Hinging the Wrists and Cocking the Club
When faced with a bunker shot, one of the key techniques to master is hinging the wrists and cocking the club. This motion is crucial for generating the necessary power and control to successfully escape the sand trap.
To execute this technique, start by gripping the club lightly but firmly. As you swing back, allow your wrists to hinge naturally, creating an angle between the clubshaft and your lead arm. This hinging action stores energy in the wrists, which will be released during the downswing to propel the ball out of the bunker.
At the same time, it’s important to cock the club. This means rotating the clubface open as you hinge your wrists. By doing so, you increase the loft of the club, which helps the ball to launch higher and clear the lip of the bunker more easily. Visualize the clubface as a door that you’re opening to create more loft and provide the necessary lift for the shot.
Maintaining a Steady Lower Body
While hinging the wrists and cocking the club are essential aspects of the bunker shot technique, it’s equally important to maintain a steady lower body throughout the swing. This stability ensures proper weight transfer, balance, and control, all of which are crucial for executing a successful shot.

As you address the ball, distribute your weight evenly on both feet. Throughout the swing, keep your lower body stable and avoid any excessive lateral movement or swaying. This stability allows you to maintain a consistent swing path and strike the ball cleanly.
To help you achieve a steady lower body, imagine yourself standing on a solid foundation, like a sturdy pillar. This mental image will help you stay grounded and prevent any unnecessary movement that could negatively impact your shot.
Using an Open Clubface
Another key element in hitting a bunker shot is using an open clubface. By opening the clubface, you increase the effective loft of the club, which helps the ball to launch higher and land softly on the green.
To achieve an open clubface, align the clubface slightly to the right of your target (for right-handed golfers) at address. This open alignment ensures that the club will strike the sand before making contact with the ball, allowing you to splash the sand and lift the ball out of the bunker.
As you swing through the shot, maintain the open clubface position, ensuring that it doesn’t close prematurely. This will help you maintain the desired loft and trajectory. Remember, the open clubface is your ally in navigating the challenging sand conditions, so embrace it and trust in its ability to help you escape the bunker successfully.
In summary, when it comes to hitting a bunker shot, mastering the technique is essential. By hinging the wrists and cocking the club, maintaining a steady lower body, and using an open clubface, you’ll be well-equipped to tackle the challenging sand conditions. Remember to practice these techniques regularly and incorporate them into your bunker shot routine. With time and effort, you’ll develop the skills necessary to confidently escape bunkers and improve your overall golf game.
Addressing the Bunker Shot Challenge
When faced with a bunker shot, there are several factors you need to consider in order to successfully navigate the challenge. By assessing the depth and distance of the bunker, determining the swing path and speed, and visualizing the desired shot outcome, you can increase your chances of executing a successful bunker shot.
Assessing the Depth and Distance of the Bunker
The first step in addressing the bunker shot challenge is to assess the depth and distance of the bunker. This will help you determine the approach you need to take in order to clear the sand and reach your target. Take into account the size of the bunker and the position of the pin on the green. Are you faced with a long bunker shot or a shorter one? Assessing the depth and distance will allow you to select the appropriate club and plan your shot accordingly.
Determining the Swing Path and Speed
Once you have assessed the depth and distance of the bunker, the next step is to determine the swing path and speed. The swing path refers to the direction in which your clubhead should travel through impact. For a bunker shot, it’s important to take a steeper approach to the ball in order to avoid getting stuck in the sand. This means opening up your stance slightly and swinging along a more vertical plane.
In terms of swing speed, it’s crucial to find the right balance between power and control. Too much power can cause the ball to fly over the green, while too little speed may result in the ball not clearing the bunker. Practice your swing to find the perfect balance for bunker shots. Remember, it’s better to focus on accuracy and consistency rather than trying to hit the ball with all your strength.
Visualizing the Desired Shot Outcome
Visualization plays a key role in successfully executing a bunker shot. Before you even step into the bunker, take a moment to visualize the desired shot outcome. Picture the ball landing softly on the green and rolling towards the pin. This mental imagery helps to create a clear picture of the shot you want to execute.
As you stand in the bunker and prepare to hit the shot, keep this visualization in mind. Imagine the ball soaring out of the sand and landing on the green exactly where you want it to. By visualizing the desired shot outcome, you are priming your mind and body to work together to achieve that result.
Remember, bunker shots require finesse and precision. It’s not just about power and strength. By assessing the depth and distance of the bunker, determining the swing path and speed, and visualizing the desired shot outcome, you’ll be better equipped to address the challenge of bunker shots. Practice these techniques and soon you’ll find yourself confidently navigating bunkers and getting closer to your target with each shot.
Conclusion
Addressing the bunker shot challenge requires a combination of technique, strategy, and mental focus. By assessing the depth and distance of the bunker, determining the swing path and speed, and visualizing the desired shot outcome, you’ll be able to approach bunker shots with confidence and increase your chances of success.
Remember to practice these techniques regularly to build consistency and accuracy in your bunker shots. With time and dedication, you can become proficient at escaping bunkers and lowering your scores on the golf course. So the next time you find yourself in a bunker, approach the challenge head-on and trust in your ability to execute a successful shot.
Strategies for Escaping Bunkers Successfully
Bunker shots can be intimidating for many golfers, but with the right strategies and techniques, you can escape bunkers successfully and save strokes on your scorecard. In this section, we will explore three effective strategies for navigating bunker shots: the Splash Shot Technique, the Explosion Shot Technique, and adjusting for different bunker conditions. Let’s dive in and discover how to master these strategies and become a bunker escape artist.
Utilizing the Splash Shot Technique
The Splash Shot Technique, also known as the “splash and run,” is a reliable approach when you have a longer distance to cover from the bunker. This technique involves using a higher lofted wedge, such as a sand wedge, and focusing on striking the sand behind the ball to create a splash effect. Here’s how to execute the Splash Shot Technique:
- Open the clubface: Start by aligning your feet slightly left of the target and opening the clubface. This will increase the bounce of the club and allow it to glide through the sand smoothly.
- Position the ball: Place the golf ball slightly forward in your stance, towards your front foot. This will enable you to strike the sand behind the ball, promoting the desired splash effect.
- Maintain a consistent swing: Take a slightly wider stance and keep your weight evenly distributed. As you swing, focus on striking the sand about two inches behind the ball. This will create the necessary explosion of sand that propels the ball out of the bunker and onto the green.
Remember, the key to the Splash Shot Technique is to strike the sand first, rather than making direct contact with the ball. Practice this technique on the driving range to develop a feel for the amount of sand to take and the desired distance the ball will travel.
Employing the Explosion Shot Technique
When faced with a shorter distance to the target, the Explosion Shot Technique can be a game-changer. This technique allows you to generate more height and spin on the ball, making it easier to stop it quickly on the green. Here’s how to employ the Explosion Shot Technique:
- Select the appropriate wedge: Choose a sand wedge or lob wedge with a higher loft to create more height on the shot. The increased loft will help the ball get out of the bunker and land softly on the green.
- Square the clubface: Unlike the Splash Shot Technique, you want to square the clubface for the Explosion Shot Technique. Align your feet parallel to the target line and position the ball slightly forward in your stance.
- Focus on a steeper swing: To generate more height, take a steeper swing and aim to strike the sand right behind the ball. This will create an explosion of sand and lift the ball into the air with the desired spin.
- Follow through: After striking the sand, ensure a complete follow-through to maximize the height and spin on the shot. Let the club continue its upward motion and finish with your weight on your front foot.
By employing the Explosion Shot Technique, you can confidently tackle bunker shots that require more precision and finesse. Practice this technique on the practice green to develop a feel for the distance and spin control.
Adjusting for Different Bunker Conditions
Bunker conditions can vary greatly depending on factors such as the type of sand, moisture levels, and the maintenance of the bunker. To escape bunkers successfully, it’s crucial to adjust your strategy based on these conditions. Here are some tips for adapting to different bunker conditions:
- Dry and firm bunkers: In dry and firm bunkers, the sand tends to be compacted, making it more challenging to get the ball out. To counter this, use a lower lofted wedge, such as a pitching wedge, to minimize the amount of sand you need to hit. Additionally, take a more aggressive swing to ensure the ball clears the lip of the bunker.
- Wet and fluffy bunkers: When bunkers are wet and fluffy, the sand is looser and tends to grab the clubhead more. In this situation, select a higher lofted wedge to prevent the club from digging too deep into the sand. Take a slightly shallower swing and focus on making clean contact with the sand behind the ball.
- Bunker slope and lip: The slope and lip of the bunker can greatly influence your shot. If the bunker has a steep slope or a high lip, you may need to adjust your club selection and aim to hit the ball higher on the clubface. This will help you generate more loft and distance to clear the obstacle.
Remember, adaptability is key when it comes to bunker shots. Pay attention to the characteristics of the bunker and make the necessary adjustments to execute successful shots.
In conclusion, mastering the strategies for escaping bunkers successfully can significantly improve your golf game. By utilizing the Splash Shot Technique and the Explosion Shot Technique, you can confidently navigate different distances and achieve the desired results. Additionally, adjusting your approach based on bunker conditions will ensure that you are well-prepared for any situation. So, the next time you find yourself in a bunker, remember these strategies and techniques to escape with ease.