Transform your home into the ultimate golfing haven with our step-by-step guide on setting up a home golf simulator. From choosing the right space to calibrating the system, we’ve got you covered.
Choosing the Right Space for Your Home Golf Simulator Setup
Having a dedicated space for your home golf simulator setup is crucial to ensure an optimal golfing experience. In this section, we will discuss the key considerations when it comes to choosing the right space for your setup.
Assessing Available Space
Before setting up your home golf simulator, it’s essential to assess the available space in your home. Consider the following questions:
- Do you have a spare room or a large enough area where you can set up the simulator?
- Is there enough space for you to swing a golf club comfortably without any obstructions?
- Can the space accommodate the necessary equipment, such as the simulator system, net, projector, and other components?
Assessing the available space will help you determine if you need to make any adjustments or find alternative locations for your golf simulator setup.
Determining Room Dimensions
Once you have identified a suitable space, it’s important to determine the room dimensions. This will help you understand the limitations and possibilities for your setup. Measure the length, width, and height of the room accurately.
Consider the following factors when determining the room dimensions:
- Length: The length of the room should be sufficient to accommodate your swing and provide enough space for the ball to travel without hitting any walls or furniture.
- Width: The width of the room should be wide enough to allow for a comfortable swing and ensure that you have enough space to position yourself properly during the game.
- Height: Ceiling height is an often overlooked but critical aspect. Ideally, the ceiling should be high enough to accommodate your swing without the risk of hitting the ceiling with your club. Additionally, consider the height required for mounting the projector and ensuring a clear line of sight.
By determining the room dimensions, you can ensure that the space is adequate for your golf simulator setup and avoid any potential inconveniences during gameplay.
Considering Ceiling Height
Ceiling height is an important consideration when setting up your home golf simulator. A low ceiling can restrict your swing and limit the overall experience. On the other hand, a high ceiling allows for more freedom of movement and a more realistic feel.
To determine the appropriate ceiling height, consider the following:
- Club Length: Take into account the length of your golf clubs. If you are using longer clubs, such as drivers, you will need a higher ceiling to avoid any obstructions during your swing.
- Swing Characteristics: Assess your swing characteristics. If you tend to have a flatter swing, you may require less overhead clearance compared to someone with a steeper swing.
- Projection Angle: Consider the projection angle of the simulator system. The projector needs to be positioned at a height that allows for a clear and unobstructed view of the screen or hitting surface.
Remember, the higher the ceiling, the more flexibility you will have when it comes to swinging the club and positioning the simulator equipment.

To summarize, when choosing the right space for your home golf simulator setup, assess the available space, determine the room dimensions, and consider the ceiling height. By taking these factors into account, you can ensure a comfortable and realistic golfing experience in the comfort of your own home.
Setting Up the Simulator Equipment
Setting up your home golf simulator equipment is an exciting and crucial step in creating your own virtual golfing experience. In this section, we will guide you through the process of selecting the right simulator system, installing the golf net, mounting the projector, and connecting audio and visual components. Let’s dive in and get started!
Selecting the Simulator System
When it comes to selecting the simulator system for your home golf setup, there are a few key factors to consider. Firstly, you’ll want to determine your budget and the level of realism you desire. High-end simulator systems often offer more accurate swing analysis and realistic graphics, but they come with a higher price tag. On the other hand, more affordable systems may sacrifice some advanced features but still provide an enjoyable golfing experience.
Another important consideration is the space you have available. Some simulator systems require larger rooms or specific ceiling heights, so be sure to check the requirements before making your decision. Additionally, consider the software and game options that come with the system. Look for a simulator that offers a wide range of golf courses and practice modes to keep you engaged and challenged.
Installing the Golf Net
Once you’ve selected your simulator system, it’s time to install the golf net. The net serves as a safety feature to catch golf balls and prevent any damage to your surroundings. Before installation, measure the space where you plan to set up the net and ensure that it provides enough clearance for your swing.

To install the net, follow these steps:
- Start by assembling the frame of the net according to the manufacturer’s instructions. Most nets come with a lightweight and durable frame that can be easily put together.
- Once the frame is assembled, attach the netting securely to the frame using the provided connectors or hooks. Make sure the netting is taut and free from any sagging.
- Position the net in the desired location, ensuring that it is centered and aligned with your hitting area.
- Use the included stakes or anchors to secure the net to the ground or nearby walls, providing extra stability.
Installing a golf net will not only protect your surroundings but also enhance your overall golfing experience by giving you the freedom to swing with confidence.
Mounting the Projector
To bring the virtual golf courses to life, you’ll need to mount a projector in your simulator setup. Mounting the projector properly is crucial for achieving optimal image quality and accuracy. Here are the steps to mount your projector:
- Determine the ideal placement for your projector by considering factors such as the size of your screen and the distance between the projector and hitting area. The projector should be mounted at a height that allows for a clear and unobstructed projection onto the screen.
- Use a ceiling mount or wall mount bracket to securely attach the projector to the desired location. Ensure that the mount is level and stable.
- Connect the projector to your simulator system using the provided cables. Follow the manufacturer’s instructions for proper connection.
- Adjust the projector’s focus and alignment to achieve a sharp and well-centered image on the screen. Most projectors come with built-in adjustment features for easy calibration.
By mounting the projector correctly, you’ll be able to immerse yourself in the virtual golfing experience and enjoy vivid and realistic visuals.
Connecting Audio and Visual Components
To create a truly immersive golfing environment, it’s essential to connect audio and visual components that enhance the overall experience. Here’s how you can do it:

- Start by connecting your simulator system to a high-definition display or projector. Use HDMI or VGA cables, depending on the available ports on both your system and display device.
- Connect external speakers or a soundbar to your simulator system to enhance the audio output. This will provide you with realistic sound effects and commentary while playing.
- If your simulator system supports it, consider connecting additional peripherals such as a subwoofer or surround sound speakers for a more immersive audio experience.
- Test the audio and visual components to ensure they are working properly. Adjust the volume levels and audio settings according to your preference.
By connecting audio and visual components effectively, you’ll be able to hear the satisfying sound of a well-struck golf ball and feel fully immersed in the virtual golfing world.
Creating an Optimal Golfing Environment
Lighting Considerations
When setting up your home golf simulator, it’s essential to consider the lighting in your designated space. Proper lighting can greatly enhance your golfing experience and ensure accurate readings from your simulator system. Here are some key considerations for lighting your golfing environment:
- Natural Light: If possible, position your simulator in a room with ample natural light. Natural light not only provides a more realistic feel but also reduces eye strain during extended gaming sessions. Consider placing your simulator near a window or using curtains to control the amount of natural light entering the room.
- Ambient Lighting: In addition to natural light, you’ll need to supplement with artificial lighting to ensure consistent illumination throughout the day and evening. Opt for LED lights or fluorescent fixtures that offer a bright and even distribution of light. Avoid using harsh overhead spotlights that can create shadows or glare on the simulator screen.
- Adjustable Lighting: To replicate different playing conditions and enhance the overall immersion, consider installing adjustable lighting options. This allows you to simulate playing in various weather conditions, such as a sunny day or a cloudy afternoon. Dimmable lights or smart lighting systems can be controlled easily and adjusted according to your preferences.
- Lighting Placement: Proper placement of lights is crucial to avoid any shadows or reflections that may interfere with your gameplay. Mount the lights at an angle that minimizes glare on the screen and ensures an even distribution of light across the entire simulator area. Experiment with different positions to find the optimal setup that works best for you.
Flooring Options
Choosing the right flooring for your home golf simulator setup is essential for both comfort and functionality. The flooring should provide a stable and level surface while also minimizing the impact on your joints during swings. Here are some flooring options to consider:
- Carpet: Carpet is a popular choice for home golf simulators due to its cushioning effect and ability to absorb impact. Look for low-pile or commercial-grade carpets that offer durability and easy maintenance. Avoid high-pile carpets as they may interfere with the movement of the golf ball.
- Synthetic Turf: Synthetic turf provides a realistic feel and allows the golf ball to react similarly to a real golf course. It offers a consistent surface and is easy to clean. Look for turf with a high-quality backing that provides stability and prevents the turf from shifting during swings.
- Rubber Flooring: Rubber flooring is an excellent choice if you prefer a more durable and low-maintenance option. It offers shock absorption, reduces noise, and provides a stable surface for your swings. Look for rubber flooring with a textured surface to prevent slipping and ensure proper traction.
- Hardwood or Laminate: If you prefer a traditional look, hardwood or laminate flooring can be a great option for your home golf simulator. Ensure that the surface is level and free from any imperfections that may affect the ball roll. Consider using a mat or hitting area to protect the flooring from any potential damage.
Controlling Temperature and Humidity
Maintaining an optimal temperature and humidity level in your golfing environment is crucial for both your comfort and the longevity of your equipment. Here are some tips to control temperature and humidity effectively:
- Temperature Control: Ensure that the room where your simulator is located is adequately insulated and equipped with proper heating or cooling systems. Extreme temperatures can affect the performance of your simulator as well as your overall comfort. Consider using a thermostat or smart home system to regulate the temperature based on your preferences.
- Humidity Control: High humidity levels can cause the golf ball to react differently and affect the accuracy of your simulator readings. Use dehumidifiers or air conditioners to maintain a moderate humidity level in the room. Aim for a humidity range of 40-60% for optimal gameplay.
- Ventilation: Proper ventilation is essential to prevent the buildup of stale air and maintain a fresh and comfortable environment. Ensure that the room has adequate airflow by using fans or opening windows when necessary. This will help regulate temperature and reduce the risk of moisture buildup.
- Equipment Maintenance: Regularly check your simulator equipment for any signs of condensation or moisture buildup. Wipe down the projector, sensors, and other components to prevent any damage caused by excessive humidity. Follow the manufacturer’s guidelines for cleaning and maintenance to ensure the longevity of your equipment.
Creating an optimal golfing environment requires careful consideration of lighting, flooring, and temperature and humidity control. By implementing these tips, you can enhance your home golf simulator setup and enjoy a realistic and immersive golfing experience.

Enhancing the Simulator Experience
In order to truly enhance your home golf simulator experience, there are several additional features and accessories that you can incorporate. These will not only make your setup more immersive but also add to the overall enjoyment of playing virtual golf.
Adding Surround Sound
One of the key elements in creating a realistic golfing environment is sound. By adding surround sound to your simulator setup, you can bring the sounds of the golf course right into your own home. Imagine the rush of the crowd cheering as you make a spectacular shot or the satisfying thud of the ball hitting the fairway. Surround sound can truly transport you to the course and make your virtual golf experience more engaging.
To achieve the best surround sound effect, it is important to strategically place speakers around your simulator space. Position them in a way that mimics the layout of a real golf course. For example, you can place speakers near the virtual tee box, the fairway, and the greens. This will create a dynamic sound experience that matches the visuals on your simulator screen.
Incorporating Virtual Reality Features
Virtual reality (VR) technology has revolutionized the gaming industry, and it has also made its way into the world of golf simulators. By incorporating VR features into your setup, you can take your virtual golf experience to the next level.
With VR, you can step into a fully immersive golfing world where you can interact with the course and surroundings in a way that feels incredibly realistic. Put on a VR headset and suddenly you’re standing on the tee box, feeling the grass beneath your feet and the wind on your face. As you swing your club, you can see the ball soar through the air and land on the fairway.
In addition to the visual immersion, VR also allows for more interactive gameplay. You can use handheld controllers to navigate the virtual course, adjust your stance, and even simulate the feel of different golf clubs. This level of interactivity adds a new dimension to your simulator experience and makes it feel even more like you’re playing a real game of golf.
Installing Putting Greens and Chipping Mats
While the focus of a golf simulator is often on driving and long shots, it’s important not to neglect your short game. Installing putting greens and chipping mats in your simulator space can help you practice and improve your skills around the green.
Putting greens are designed to mimic the surface of a real golf course green, allowing you to practice your putting stroke with precision. They often come with built-in alignment aids and contours to simulate different putting scenarios. By practicing on a putting green within your simulator, you can work on your accuracy, speed control, and overall putting technique.
Chipping mats, on the other hand, are designed to simulate the rough or fringe surrounding the green. They provide a realistic surface for practicing chip shots and pitches. With a chipping mat in your simulator setup, you can work on your short game without having to leave the comfort of your home.
By incorporating these additional features into your home golf simulator setup, you can create a more immersive and enjoyable experience. Whether it’s the surround sound that transports you to the golf course, the virtual reality that puts you right in the game, or the putting greens and chipping mats that help you perfect your short game, these enhancements will take your simulator experience to new heights. So why wait? Start enhancing your simulator setup today and take your virtual golf game to a whole new level.
Table:
| Feature | Benefit |
|---|---|
| Surround Sound | Immersive audio experience that mimics the sounds of a golf course |
| Virtual Reality | Fully immersive gameplay and interactivity |
| Putting Greens | Practice and improve putting accuracy and technique |
| Chipping Mats | Perfect your short game without leaving home |
Calibrating and Fine-Tuning the System
When it comes to setting up your home golf simulator, calibrating and fine-tuning the system is crucial to ensuring an accurate and realistic golfing experience. This process involves adjusting swing sensors and cameras, configuring simulation software, and testing accuracy and calibration. Let’s dive into each of these steps in detail.
Adjusting Swing Sensors and Cameras
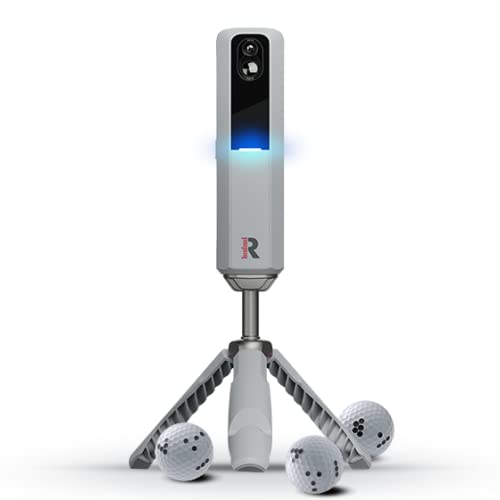
One of the most important aspects of a golf simulator is its ability to accurately detect and track your swing. To achieve this, you need to properly adjust the swing sensors and cameras. These sensors and cameras capture your swing data and translate it into a virtual golf experience.
Start by positioning the swing sensors in a way that they can easily track your club’s movement. Make sure they are securely mounted and aligned with your swing path. It’s also essential to adjust the sensitivity of the sensors to match your swing style. Some simulators offer customization options that allow you to fine-tune the sensor settings based on your preferences.
Similarly, the cameras play a significant role in capturing your swing from different angles. Position the cameras strategically to capture your swing from a front-facing and side-facing perspective. This will provide a comprehensive view of your swing mechanics. Adjust the camera settings to ensure optimal clarity and visibility, so you can analyze your swing in detail.
Configuring Simulation Software
Once you’ve adjusted the swing sensors and cameras, it’s time to configure the simulation software. The software is the heart of your golf simulator, as it translates the data from the sensors and cameras into a virtual golf course experience.
Start by calibrating the software to match your swing mechanics. This may involve inputting your club specifications, such as length and loft, into the software. This allows the simulator to accurately calculate the distance and trajectory of your shots.
Next, explore the software settings and customization options. Many simulators offer a range of features to enhance your golfing experience. Adjust the difficulty level, course conditions, and weather settings to match your skill level and personal preferences. You can even choose to play on famous golf courses from around the world, right from the comfort of your home.
Testing Accuracy and Calibration
After adjusting the swing sensors, cameras, and configuring the software, it’s crucial to test the accuracy and calibration of your system. This step ensures that your simulator is providing reliable and realistic feedback.
Start by hitting a few practice shots and observe how the simulator tracks and displays your swing data. Check if the swing path, club speed, and face angle are accurately represented on the screen. Pay attention to any discrepancies or inconsistencies between your actual swing and the virtual representation.
If you notice any inaccuracies, revisit the sensor and camera settings to make further adjustments. Fine-tuning the system may require multiple iterations until you achieve the desired accuracy. Keep in mind that each golfer’s swing is unique, so it’s essential to tailor the system to your individual style.
In addition to accuracy, calibration is essential for maintaining the integrity of your simulator. Regularly check and calibrate the sensors and cameras to ensure they are functioning optimally. This involves checking for loose connections, cleaning the lenses, and verifying the alignment of the sensors.
By regularly calibrating and fine-tuning your system, you can enjoy a more realistic and immersive golfing experience. Whether you’re practicing your swing or playing a virtual round with friends, a well-calibrated simulator will provide accurate feedback and enhance your overall enjoyment.
In conclusion, calibrating and fine-tuning your home golf simulator is crucial to ensure an accurate and realistic experience. Adjusting swing sensors and cameras, configuring simulation software, and testing accuracy and calibration are essential steps in achieving optimal performance. By paying attention to these details and regularly maintaining your system, you can enjoy a truly immersive golfing experience in the comfort of your own home.