Looking to create the perfect golf simulator room? Learn about the standard dimensions, ideal room size, height considerations, flooring options, lighting choices, wall finishes, ventilation needs, soundproofing solutions, screen placement, equipment storage, wiring requirements, and cost considerations.
Standard Golf Simulator Room Dimensions
When it comes to setting up a golf simulator room in your home or commercial space, it is crucial to consider the dimensions of the room. The right room size can greatly impact your overall golfing experience and ensure that you have enough space to swing your clubs without any hindrance. In this section, we will discuss the minimum room size requirements and the ideal room size recommendations for a golf simulator room.
Minimum Room Size Requirements
To create a functional and comfortable golf simulator room, there are certain minimum room size requirements that you should keep in mind. These dimensions ensure that you have enough space for your swing and allow for proper ball flight and projection. Here are some key guidelines for the minimum room size:
- Ceiling Height: The minimum ceiling height requirement for a golf simulator room is 8 feet (2.4 meters). This allows for ample clearance when swinging your club and ensures that the ball can travel without hitting the ceiling.
- Width: The minimum width requirement for a golf simulator room is 10 feet (3 meters). This provides enough room for you to swing the club comfortably and prevents any potential collisions with the walls.
- Depth: The minimum depth requirement for a golf simulator room is 12 feet (3.7 meters). This depth allows for proper ball flight and ensures that you have enough space to step back and take your swing without any obstructions.
By meeting these minimum room size requirements, you can create a golf simulator room that is functional and provides a realistic golfing experience. However, keep in mind that these dimensions are the bare minimum, and having more space is always beneficial.
Ideal Room Size Recommendations
While the minimum room size requirements provide a baseline for setting up a golf simulator room, it is recommended to have more space for an optimal experience. A larger room allows for better movement, improved tracking accuracy, and a more immersive golfing environment. Here are the ideal room size recommendations for a golf simulator room:
- Ceiling Height: For an ideal golf simulator room, a ceiling height of 10 feet (3 meters) or higher is recommended. This additional height minimizes the risk of hitting the ceiling during your swing and creates a more spacious atmosphere.
- Width: Ideally, the width of a golf simulator room should be at least 14 feet (4.3 meters) or more. This extra width provides ample room for your swing, allowing you to move freely without any restrictions.
- Depth: An ideal golf simulator room should have a depth of 16 feet (4.9 meters) or more. This increased depth ensures that you have enough space to fully extend your swing and provides a realistic ball flight trajectory.
By following these ideal room size recommendations, you can enhance your golf simulator experience and enjoy a more immersive and realistic game. The additional space allows for greater freedom of movement and creates a more comfortable environment for practicing and playing golf.
To better visualize the room dimensions, here is a table summarizing the minimum and ideal room size requirements for a golf simulator room:
| Room Dimension | Minimum Requirement | Ideal Recommendation |
|---|---|---|
| Ceiling Height | 8 feet (2.4 meters) | 10 feet (3 meters) or higher |
| Width | 10 feet (3 meters) | 14 feet (4.3 meters) or more |
| Depth | 12 feet (3.7 meters) | 16 feet (4.9 meters) or more |
Remember, these are general guidelines, and you can always adjust the room dimensions based on your personal preferences and available space. However, keeping these recommendations in mind will help you create a golf simulator room that maximizes your enjoyment and performance on the virtual course.
In the next sections, we will explore other important considerations for setting up a golf simulator room, such as height considerations, room shape and layout, flooring options, lighting considerations, and more. Stay tuned to learn how each aspect contributes to creating the ultimate golf simulator experience.
Height Considerations for Golf Simulator Rooms
When designing a golf simulator room, height is an important factor to consider. The height of the room will affect the overall experience and functionality of the simulator. In this section, we will discuss the minimum ceiling height requirements and optimal ceiling height recommendations for golf simulator rooms.
Minimum Ceiling Height Requirements
To ensure a comfortable and realistic golfing experience, it is essential to have adequate ceiling height in your golf simulator room. The minimum ceiling height requirements vary depending on the type of simulator and the golfer’s height.
For most golf simulators, a minimum ceiling height of 8 feet (2.4 meters) is recommended. This allows enough clearance for the golfer to swing the club without hitting the ceiling. However, if you are a taller golfer or plan to use a simulator that requires a higher swing, you may need a higher ceiling height.
For example, if you are using a simulator that includes a full swing analysis system or a launch monitor, you may need a ceiling height of at least 9 feet (2.7 meters) to accommodate the additional space required for accurate measurements. This ensures that your swing is not restricted and that you can fully enjoy the benefits of the simulator.
It is important to note that these are general guidelines and it is always recommended to consult the specific requirements of your chosen simulator manufacturer. They may have specific recommendations or requirements for ceiling height based on the technology and features of their system.
Optimal Ceiling Height Recommendations
While the minimum ceiling height requirements provide the necessary clearance for swinging the club, optimal ceiling height recommendations take into consideration other factors that can enhance the overall experience in your golf simulator room.

Ideally, a ceiling height of 10 to 12 feet (3 to 3.6 meters) is recommended for a more spacious and immersive feel. With a higher ceiling, you will have a greater sense of freedom and room to fully extend your swing. This can contribute to a more realistic golfing experience and allow for better accuracy in your shots.
In addition to the increased sense of space, a higher ceiling can also accommodate other features that can enhance your golf simulator room. For instance, if you plan to install overhead lighting or a projector system, a higher ceiling will provide the necessary clearance for these fixtures.
Moreover, a higher ceiling can also help with proper ventilation and air circulation in the room. This is particularly important if you plan to spend long hours practicing or playing in your simulator room. Adequate airflow can keep the room cool and comfortable, preventing any discomfort during your sessions.
Room Shape and Layout for Golf Simulator Rooms
When it comes to setting up a golf simulator room, the shape and layout of the room play a crucial role in creating an immersive and realistic experience. Different room shapes offer unique advantages and considerations for golf simulator enthusiasts. Let’s explore three common room shapes and their implications for golf simulator setups.
Rectangular Room Layouts
Rectangular rooms are the most common and versatile option for golf simulator rooms. Their symmetrical shape provides a balanced environment for accurate shot tracking and gameplay. The elongated layout allows for a more natural simulation of long shots, providing ample space for players to swing their clubs without feeling cramped.
In a rectangular room layout, it is important to consider the placement of the screen and the golfer’s position. The ideal setup involves positioning the screen on the shorter wall of the room, with the golfer standing at a suitable distance away. This ensures that the golfer has sufficient room to swing their club without any obstructions.
Furthermore, a rectangular room layout provides the opportunity to incorporate additional features such as seating areas, equipment storage, and even a mini putting green. These added elements can enhance the overall experience and create a golfing haven right in the comfort of your own home.
Square Room Layouts
Square rooms may present some challenges when it comes to setting up a golf simulator, but they can still be optimized for an enjoyable experience. The symmetrical nature of a square room provides equal distances from the screen to all sides, ensuring that shot tracking remains accurate regardless of the golfer’s position.
One consideration for a square room layout is the golfer’s proximity to the screen. With limited depth, it is important to find the optimal distance that allows for a full swing while maintaining a comfortable playing experience. A square room may also benefit from a slightly elevated screen placement to ensure an unobstructed view for the golfer.
Despite the potential limitations, a square room layout can be creatively utilized to maximize the available space. By incorporating storage solutions that are integrated into the room’s design, golfers can efficiently store their clubs and accessories without sacrificing valuable playing space.

L-Shaped Room Layouts
L-shaped rooms offer a unique opportunity to create a dedicated golf simulator space that can accommodate multiple activities. The distinct shape of an L-shaped room allows for the creation of separate zones, such as a designated hitting area and a lounge or seating area.
In an L-shaped room layout, the screen is typically positioned at the corner where the two walls meet. This placement allows for an unobstructed view from various angles within the room. With the golfer positioned in the longer section of the room, there is ample space for a full swing without worrying about colliding with furniture or walls.
The additional space in an L-shaped room layout opens up possibilities for customization. Golfers can incorporate comfortable seating areas for friends and family to enjoy the simulation experience together. They can also add additional equipment storage solutions, such as cabinets or racks, to keep their golf clubs and accessories organized and easily accessible.
Table: Golf Simulator Room Layout Comparison
| Room Shape | Advantages | Considerations |
|---|---|---|
| Rectangular | Balanced gameplay, space for full swing | Careful screen and golfer placement |
| Square | Symmetrical shot tracking | Limited depth, optimized distance |
| L-Shaped | Separate zones for multiple activities | Corner screen placement, customization |
Flooring Options for Golf Simulator Rooms
Golf simulator rooms require careful consideration when it comes to choosing the right flooring. The flooring not only affects the overall aesthetics of the room but also plays a crucial role in providing a stable and comfortable surface for golfers. Let’s explore some popular flooring options that are commonly used in golf simulator rooms.
Carpeting
Carpeting is a common choice for golf simulator rooms due to its soft and cushioned surface. It provides a comfortable feel underfoot and helps absorb impact, making it easier on the joints. Carpeting also helps reduce noise and echoes in the room, creating a more pleasant environment for golfers.
When selecting carpeting for your golf simulator room, it’s essential to choose a low-pile or commercial-grade carpet. These types of carpets are more durable and resistant to wear and tear, ensuring that your simulator room remains in top condition even with heavy foot traffic. Additionally, consider opting for a carpet with a tight weave to prevent golf balls from getting stuck or bouncing unpredictably.
To enhance the golfing experience, some golfers prefer to use putting mats on top of the carpeting. These putting mats mimic the feel of a real putting green and allow golfers to practice their short game. They come in various sizes and designs, offering options to suit different skill levels and preferences.
Synthetic Turf
Synthetic turf, also known as artificial grass, is another popular flooring option for golf simulator rooms. It offers a realistic feel and appearance similar to natural grass, providing a visually appealing environment for golfers. Synthetic turf has come a long way in recent years and now offers improved durability and performance.
One of the significant advantages of synthetic turf is its low maintenance requirements. Unlike natural grass, synthetic turf does not require mowing, watering, or fertilizing. This makes it a convenient choice for golf simulator rooms, as it allows golfers to focus on their game rather than maintenance tasks.
When selecting synthetic turf for your golf simulator room, consider the pile height and density. These factors affect the ball’s roll and how the turf feels underfoot. Ideally, choose a turf with a shorter pile height and higher density for a more realistic experience. Additionally, ensure that the turf has adequate drainage capabilities to prevent water buildup and potential damage to the flooring.
Rubber Flooring
Rubber flooring is a versatile option that offers several benefits for golf simulator rooms. It provides excellent shock absorption, making it an ideal choice for those seeking a forgiving surface that reduces the impact on joints and muscles. Rubber flooring also offers excellent traction, ensuring that golfers maintain their footing during swings.
In addition to its shock-absorbing properties, rubber flooring is highly durable and resistant to wear and tear. It can withstand heavy use and is easy to clean, making it a practical choice for busy golf simulator rooms. Rubber flooring is also available in various thicknesses and colors, allowing you to customize the appearance of your simulator room.
One of the advantages of rubber flooring is its versatility. It can be installed as individual tiles or as a seamless surface, depending on your preferences. The tiles can be easily replaced if damaged, ensuring that your flooring remains in top condition for a long time.
To summarize, when choosing the flooring for your golf simulator room, consider factors such as comfort, durability, noise reduction, and aesthetics. Carpeting provides a soft and cushioned surface, while synthetic turf offers a realistic feel similar to natural grass. Rubber flooring, on the other hand, provides excellent shock absorption and durability. Each option has its own set of advantages, so choose the one that best suits your needs and preferences.
(* Carpeting
* Synthetic Turf
* Rubber Flooring)
Table:
| Flooring Option | Advantages |
|---|---|
| Carpeting | – Soft and cushioned surface |
| – Noise reduction | |
| – Comfortable underfoot | |
| – Durability and resistance to wear and tear | |
| Synthetic Turf | – Realistic feel and appearance |
| – Low maintenance requirements | |
| – Durability and improved performance | |
| Rubber Flooring | – Shock absorption |
| – Excellent traction | |
| – Durability and resistance to wear and tear | |
| – Versatility in installation and customization options |
Lighting Considerations for Golf Simulator Rooms
When setting up a golf simulator room, it’s essential to pay careful attention to the lighting. Proper lighting can greatly enhance the overall experience and accuracy of your golf simulation. In this section, we will discuss the various lighting considerations, including ambient lighting, overhead lighting, and track lighting.
Ambient Lighting
Ambient lighting refers to the general, overall illumination in a room. It is essential to create a well-lit environment that allows you to see clearly without any harsh shadows or glare. The right ambient lighting can help create a realistic and immersive golfing experience.
To achieve optimal ambient lighting in your golf simulator room, consider the following:
- Natural Light: If possible, position your golf simulator room in a location that allows for natural light to enter the space. Natural light not only provides a more pleasant environment but also reduces the need for artificial lighting during the day.
- Windows and Curtains: If your golf simulator room has windows, consider installing curtains or blinds that can be adjusted to control the amount of natural light entering the space. This allows you to create the desired level of brightness and prevent any glare on the simulator screen.
- Lighting Fixtures: Choose lighting fixtures that provide a soft and even distribution of light. Avoid fixtures with harsh or direct lighting, as they can create unwanted shadows. LED lights are a popular choice for ambient lighting due to their energy efficiency and adjustable brightness options.
Overhead Lighting
In addition to ambient lighting, overhead lighting plays a significant role in illuminating the golf simulator room. Overhead lighting fixtures are typically mounted on the ceiling and provide direct lighting from above. They help eliminate shadows and ensure clear visibility of the simulator screen and surroundings.
Consider the following when selecting overhead lighting for your golf simulator room:
- LED Downlights: LED downlights are a popular choice for overhead lighting in golf simulator rooms. They provide a focused and uniform illumination, ensuring an evenly lit environment without any dark spots or uneven light distribution.
- Dimmer Switches: Installing dimmer switches for your overhead lights allows you to adjust the brightness according to your preference and the specific lighting requirements of your simulator game. This flexibility enhances the overall experience and can help create a more realistic golfing atmosphere.
- Lighting Placement: Proper placement of overhead lights is crucial to avoid shadows and achieve optimal lighting conditions. Position the lights strategically to ensure that there are no obstructions or glare on the simulator screen. Consider consulting a lighting professional to assist with the placement and installation of overhead lighting fixtures.
Track Lighting
Track lighting offers a versatile lighting solution for golf simulator rooms. It consists of a track mounted on the ceiling or wall, with adjustable light fixtures that can be moved and directed to focus on specific areas of the room. Track lighting allows you to highlight certain elements, such as golf club displays or seating areas, while maintaining overall illumination.
Consider the following when incorporating track lighting in your golf simulator room:
- Accent Lighting: Use track lighting to accentuate specific features of your golf simulator room. For example, you can aim the track lights at your golf club collection or trophy display to create a visually appealing focal point.
- Flexibility and Control: Track lighting offers the advantage of flexibility and control. You can adjust the position of the light fixtures along the track to achieve the desired lighting effects. Additionally, many track lighting systems come with dimming capabilities, allowing you to create different moods and atmospheres.
- Lighting Zones: Divide your golf simulator room into different lighting zones using track lighting. This allows you to create different lighting levels in different areas of the room. For example, you may want brighter lighting around the simulator screen and softer lighting in seating areas for a more relaxed ambiance.
Wall Finishes for Golf Simulator Rooms
When it comes to creating the perfect atmosphere for your golf simulator room, the choice of wall finishes plays a crucial role. Not only do they contribute to the overall aesthetics of the space, but they also have a significant impact on the acoustics and sound quality. In this section, we will explore three popular wall finish options: drywall, paneling, and acoustic treatments.
Drywall
Drywall is the most commonly used wall finish in both residential and commercial spaces. It offers a smooth and clean surface that can easily be painted or wallpapered to match your desired theme. One of the advantages of drywall is its affordability and ease of installation. It is also relatively easy to repair if any damage occurs.
To enhance the sound quality in your golf simulator room, consider adding an additional layer of soundproof drywall. This will help to reduce the noise transfer from both inside and outside the room, ensuring a more immersive and enjoyable experience. Additionally, you may also opt for thicker drywall sheets, such as 5/8-inch or even 1-inch, to further enhance sound insulation.
Paneling
If you are looking for a more unique and visually appealing wall finish, paneling can be an excellent choice. Paneling comes in various materials, including wood, PVC, and fiberboard, allowing you to create a customized look for your golf simulator room. Wood paneling, for example, can add warmth and elegance to the space, while PVC paneling offers a more modern and sleek appearance.
In terms of acoustics, paneling can provide some sound absorption, but it may not be as effective as other options. However, you can improve the sound quality by adding acoustic panels or soundproofing materials behind the panels. This will help to minimize echo and reverberation, creating a more acoustically balanced environment for your golf simulator.
Acoustic Treatments
For those seeking the highest level of sound control and acoustic performance, acoustic treatments are a must-have for your golf simulator room. Acoustic treatments include a range of products such as sound-absorbing panels, bass traps, diffusers, and soundproofing materials. These treatments are specifically designed to enhance sound quality and reduce unwanted noise reflections.
Sound-absorbing panels are typically made from materials like foam, fabric, or mineral wool and can be strategically placed on the walls to absorb excess sound waves. Bass traps, on the other hand, are designed to reduce low-frequency sounds, which can often be a challenge in golf simulator rooms due to the impact of golf swings. Diffusers help to scatter sound waves evenly throughout the room, creating a more natural and immersive audio experience.
Incorporating acoustic treatments into your golf simulator room can significantly enhance the overall audio quality, making you feel like you’re truly on the golf course. While they may require a higher investment compared to other wall finish options, the benefits they provide in terms of sound control and immersion make them worth considering.
To summarize, when choosing the wall finishes for your golf simulator room, consider the balance between aesthetics and acoustics. Drywall offers affordability and versatility, while paneling provides a unique and customizable look. For the ultimate sound control, acoustic treatments are essential. By carefully selecting the right wall finishes and incorporating acoustic elements, you can create a golf simulator room that not only looks great but also delivers an exceptional audiovisual experience.
Wall Finishes for Golf Simulator Rooms – Summary:
To recap, the three main wall finish options for golf simulator rooms are:
- Drywall: Affordable, easy to install, and can be improved with soundproofing measures such as additional layers or thicker sheets.
- Paneling: Offers a unique and customizable look, but may require additional acoustic treatments to optimize sound quality.
- Acoustic Treatments: Essential for the best sound control and audio experience, including sound-absorbing panels, bass traps, diffusers, and soundproofing materials.
By choosing the right wall finish and incorporating acoustic treatments, you can create a golf simulator room that not only looks visually appealing but also provides an immersive and acoustically balanced environment for an unparalleled golfing experience.
Ventilation and Air Circulation in Golf Simulator Rooms
Having proper ventilation and air circulation in your golf simulator room is crucial for creating a comfortable and enjoyable environment. In this section, we will discuss the HVAC system requirements and airflow and ventilation considerations that you need to keep in mind.
HVAC System Requirements
When it comes to the HVAC system in your golf simulator room, there are a few key requirements to consider. The HVAC system is responsible for heating, ventilation, and air conditioning, ensuring that the room stays at an optimal temperature and humidity level.
- Sizing the HVAC System: It is essential to ensure that the HVAC system you choose is properly sized for your golf simulator room. A system that is too small will struggle to maintain the desired temperature, while an oversized system may lead to excessive energy consumption and poor humidity control. Consult with a professional HVAC contractor to determine the appropriate size for your room.
- Insulation and Sealing: Proper insulation and sealing of the room are crucial to maximize the efficiency of the HVAC system. Insulating the walls, ceiling, and floor will help to retain the desired temperature and prevent energy loss. Additionally, sealing any gaps or air leaks will ensure that the conditioned air remains inside the room.
- Humidity Control: Maintaining the right humidity level is important for both comfort and equipment longevity. Excessive humidity can lead to condensation on the golf simulator equipment, potentially causing damage. Conversely, low humidity levels can lead to discomfort and affect the accuracy of the readings. Consider installing a humidifier or dehumidifier to control the humidity level as needed.
Airflow and Ventilation Considerations
In addition to the HVAC system, proper airflow and ventilation are essential for keeping the air fresh and preventing stagnant air in the golf simulator room.
- Air Exchange Rate: Aim for an optimal air exchange rate in your golf simulator room to ensure a constant supply of fresh air. This can be achieved through the use of mechanical ventilation systems, such as exhaust fans or air purifiers. The recommended air exchange rate for a golf simulator room is typically around 2-3 air changes per hour.
- Airflow Direction: Consider the direction of airflow in your room to enhance the overall experience. It is advisable to have the airflow directed away from the golfer to avoid any disturbance during the swing. Placing the air vents strategically can help achieve this.
- Natural Ventilation: If possible, incorporate natural ventilation into your golf simulator room design. This can be achieved by installing windows or vents that can be opened to allow fresh air to circulate. Natural ventilation not only helps improve air quality but also adds to the overall ambiance of the room.
- Air Quality Monitoring: Regularly monitor the air quality in your golf simulator room to ensure a healthy environment. This can be done using air quality monitors that measure factors such as temperature, humidity, and air particulate levels. By keeping track of these parameters, you can take necessary actions to maintain optimal air quality.
Note: The information provided in this section is for general guidance purposes only. It is recommended to consult with professionals, such as HVAC contractors and architects, to assess specific requirements and ensure compliance with local building codes and regulations.
Soundproofing Golf Simulator Rooms
Creating a soundproof environment is crucial for a golf simulator room. Whether you’re practicing your swing or enjoying a virtual round of golf, you want to eliminate any distractions or disturbances from the outside world. In this section, we will explore different methods of soundproofing to ensure a quiet and immersive experience.
Soundproof Wall Construction
The first step in soundproofing your golf simulator room is to focus on the walls. Soundproof wall construction involves adding layers of materials that can absorb or block sound waves. One popular option is to use a combination of drywall and mass-loaded vinyl. Drywall acts as a barrier, while mass-loaded vinyl adds density to prevent sound from passing through. Another effective technique is to use acoustic panels or foam to absorb sound waves and reduce echoes within the room.
To further enhance the soundproofing capabilities of your walls, consider adding an additional layer of insulation between the studs. This insulation not only helps with sound reduction but also improves the room’s thermal insulation. By creating a well-insulated space, you can enjoy your golf simulator room year-round without worrying about excessive noise or temperature fluctuations.
Soundproof Door and Window Options
While walls play a significant role in soundproofing, it’s essential not to overlook the impact of doors and windows. These openings can be significant sources of noise leakage if not properly addressed. When it comes to soundproof doors, look for options that are solid and well-sealed. Solid wood or metal doors are excellent choices as they provide better sound insulation compared to hollow doors.
For windows, consider using double-glazed or laminated glass. These types of windows have multiple layers that help to reduce noise transmission. Additionally, using window seals and weatherstripping can further enhance the soundproofing capabilities of your windows.
Acoustic Treatment for Noise Reduction
In addition to soundproofing the structure of your golf simulator room, incorporating acoustic treatment can significantly improve the overall sound quality within the space. Acoustic treatment involves using materials that absorb sound waves, reducing echoes and reverberations.
One popular acoustic treatment option is the use of acoustic panels. These panels are designed to absorb sound and can be strategically placed on walls, especially in areas where sound reflections are more likely to occur. Acoustic panels come in various sizes, shapes, and designs, allowing you to customize the aesthetics of your golf simulator room while optimizing sound quality.
Another effective acoustic treatment technique is the use of bass traps. Bass traps are specifically designed to absorb low-frequency sound waves, which are often the most challenging to control. By strategically placing bass traps in corners or along walls, you can minimize the buildup of low-frequency sound, resulting in a more balanced and immersive audio experience.
It’s important to note that while soundproofing and acoustic treatment can significantly improve the sound quality in your golf simulator room, it’s essential to strike a balance. The aim is to create a controlled acoustic environment that eliminates external noise while maintaining a natural and realistic audio experience.
To summarize, soundproofing your golf simulator room involves a combination of techniques such as soundproof wall construction, using solid doors and double-glazed windows, and incorporating acoustic treatment. By taking these steps, you can create a quiet and immersive space where you can focus on improving your golf skills or enjoying a virtual round of golf without any distractions.
Viewing Distance and Screen Placement in Golf Simulator Rooms
When it comes to enjoying a golf simulator experience in the comfort of your own home, viewing distance and screen placement are crucial factors to consider. After all, you want to ensure that you have the best possible view of the action, just like you would on a real golf course. In this section, we will explore the optimal viewing distance from the screen and the ideal screen placement height and angle.
Optimal Viewing Distance from Screen
Finding the right viewing distance from the screen is essential for a truly immersive golf simulator experience. You want to strike a balance between being close enough to see all the details and being far enough to comfortably swing your club. So, what is the optimal viewing distance?
The optimal viewing distance from the screen can vary depending on the size of your screen and personal preferences. As a general guideline, a viewing distance of about 10 to 14 feet is recommended for a 100-inch screen. This distance allows you to fully appreciate the details on the screen without feeling overwhelmed.
However, it’s important to note that this is just a starting point. Some golfers may prefer to be closer to the screen, especially if they have visual impairments or simply want to feel more immersed in the virtual golfing experience. On the other hand, some golfers may prefer to be further away from the screen to give themselves more room to swing their clubs without worrying about hitting the screen.
Ultimately, the optimal viewing distance from the screen is a personal preference that you can adjust to suit your needs. Experiment with different distances to find what feels most comfortable and enjoyable for you.
Screen Placement Height and Angle
In addition to the viewing distance, the height and angle at which you place your screen can significantly impact your golf simulator experience. The goal is to position the screen in a way that mimics the view you would have on a real golf course.
Ideally, the screen should be positioned at a height where your eye level is aligned with the middle of the screen. This ensures that you have a clear view of the entire screen without straining your neck or eyes. If the screen is too high or too low, it can lead to discomfort and make it difficult to fully immerse yourself in the game.
As for the angle, it’s best to tilt the screen slightly towards the player. This angle simulates the perspective you would have while standing on a golf course, where you look down the fairway towards the green. Tilting the screen towards you helps create a more realistic and engaging experience.
To achieve the optimal screen placement height and angle, consider using an adjustable mount or stand for your screen. This allows you to easily fine-tune the positioning to find what works best for you. Remember, the goal is to create a setup that feels natural and allows you to fully enjoy your golf simulator experience.
Equipment Storage and Layout in Golf Simulator Rooms
Club Storage Solutions
When it comes to setting up your golf simulator room, one important aspect to consider is how to store your golf clubs. Proper club storage not only keeps your equipment organized but also helps protect them from damage. There are several club storage solutions available to choose from, depending on your preferences and the size of your room.
One popular option for club storage is a golf bag rack. These racks are designed to hold multiple golf bags upright, keeping them easily accessible and neatly stored. They often come with additional shelves or compartments for storing accessories such as golf balls, gloves, and tees. Golf bag racks are available in different sizes and styles, so you can choose one that fits your room layout and aesthetic preferences.
Another option for club storage is a wall-mounted golf club organizer. These organizers typically consist of hooks or slots where you can hang your clubs, allowing you to display them while keeping them off the ground. Wall-mounted organizers are a great space-saving solution, especially if you have limited floor space in your golf simulator room. They also make it easy to see and select the clubs you want to use for your virtual golf sessions.
If you prefer a more compact storage solution, a golf club stand or rack might be the right choice for you. These stands are designed to hold your clubs in an upright position, similar to how they would be stored in a golf bag. They typically have slots or compartments for each club, ensuring that they are securely held in place. Golf club stands are often portable and can be easily moved around the room if needed.
In addition to club storage, it’s important to consider the placement of seating and furniture in your golf simulator room. Creating a comfortable and functional seating area enhances the overall experience of playing virtual golf. You want to make sure that you and your guests have a clear view of the screen while also having a comfortable place to sit and relax between swings.
One option for seating in your golf simulator room is a set of comfortable chairs or stools. Look for chairs that provide adequate support and cushioning, allowing you to sit for extended periods without discomfort. Adjustable chairs are also a great choice, as they allow you to find the perfect height and position for optimal viewing of the screen.
If you prefer a more casual seating arrangement, consider adding a sofa or a couple of bean bags to your golf simulator room. These options provide a relaxed and laid-back vibe, perfect for enjoying a virtual round of golf with friends or family. Just make sure that the seating is positioned in such a way that everyone can comfortably see the screen without any obstructions.
To complete the layout of your golf simulator room, you may also want to incorporate a small table or shelf for holding drinks, snacks, or additional accessories. This adds convenience and ensures that everything you need is within reach during your virtual golf sessions.
In summary, when it comes to equipment storage and layout in your golf simulator room, there are several options to consider. Whether you choose a golf bag rack, a wall-mounted organizer, or a compact club stand, make sure that your clubs are stored securely and are easily accessible. Additionally, create a comfortable seating area with chairs, stools, or sofas that allow for optimal viewing of the screen. Adding a small table or shelf can also enhance the functionality of your golf simulator room. By carefully planning and arranging these elements, you can create a space that is both functional and enjoyable for your virtual golfing experience.
Seating and Furniture Placement
In a golf simulator room, the placement of seating and furniture is crucial in creating a comfortable and immersive experience for players. The right seating arrangement ensures that everyone has a clear view of the screen and allows for relaxation between swings. Here are some considerations for seating and furniture placement in your golf simulator room.
Firstly, it’s important to position the seating in such a way that everyone has an unobstructed view of the screen. The screen should be the focal point of the room, and all seating should be oriented towards it. Avoid placing any furniture or objects that could block the view, such as bulky chairs or tall shelves. This ensures that everyone can fully enjoy the virtual golf experience without any visual hindrances.
When choosing seating options, comfort should be a top priority. Look for chairs or stools that provide adequate support and cushioning. Adjustable chairs are a great choice as they allow players to find their preferred height and position for optimal viewing. Consider the duration of your virtual golf sessions and choose seating that allows for extended periods of sitting without discomfort.
In addition to traditional chairs and stools, consider adding a sofa or bean bags to your golf simulator room. These options provide a more casual and relaxed seating experience, perfect for enjoying a virtual round of golf with friends or family. Just make sure that the placement of these seating options still allows for a clear view of the screen.
Apart from seating, it’s also important to consider the placement of additional furniture or accessories in your golf simulator room. A small table or shelf can be a convenient addition, providing a surface for holding drinks, snacks, or even golfing accessories. Make sure that these items are easily accessible and within reach of the seating area.
When arranging the furniture in your golf simulator room, consider the flow of movement within the space. Ensure that there is enough room for players to move around comfortably without bumping into furniture or each other. This is especially important if you plan to have multiple players in the room at the same time.
Wiring and Electrical Requirements for Golf Simulator Rooms
Setting up a golf simulator room requires careful consideration of the wiring and electrical requirements. In this section, we will discuss the essential aspects of power outlet placement, as well as the installation of Ethernet and HDMI cables.
Power Outlet Placement
When it comes to power outlet placement in a golf simulator room, convenience and accessibility are key. You want to ensure that your simulator setup is powered without any hassle or limitations. Here are some important points to keep in mind:
- Strategic Outlet Placement: It is crucial to have power outlets positioned strategically throughout the room. This will allow you to connect and power your simulator components, including the launch monitor, projector, computer, and any additional devices such as speakers or lighting. Consider the layout of your room and the placement of your equipment to determine the optimal locations for power outlets.
- Sufficient Number of Outlets: Depending on the complexity of your simulator setup, you may require multiple power outlets. It’s always a good idea to have more outlets than you think you’ll need, as it provides flexibility for future upgrades or additions. Avoid overloading outlets by distributing the load evenly across different circuits.
- Proximity to Equipment: To minimize cable clutter and potential tripping hazards, it’s best to position power outlets near the equipment that requires power. This will help keep cables organized and reduce the risk of accidents. Additionally, consider using surge protectors or power strips to protect your valuable equipment from power surges.
- Professional Electrical Installation: If you’re not experienced with electrical work, it’s highly recommended to hire a professional electrician for the installation of power outlets. They will ensure compliance with electrical codes, proper grounding, and safe wiring practices. Remember, safety should always be a top priority.
Ethernet and HDMI Cable Installation
In addition to power outlets, the installation of Ethernet and HDMI cables is crucial for the seamless functioning of your golf simulator. These cables enable the transfer of data and video signals, allowing you to connect your simulator components and enjoy a realistic golfing experience. Here are some important considerations:
- Ethernet Cable Installation: Ethernet cables are essential for connecting your simulator computer to the internet, allowing you to access online golf courses, updates, and multiplayer features. When installing Ethernet cables, consider the following:
- Determine the length of cable required to reach your computer from the modem or router. It’s always better to have slightly more cable than you need to avoid tension or strain on the connection.
- Use high-quality Cat6 or Cat6a Ethernet cables for reliable and fast data transmission. These cables provide better performance and are suitable for long-distance connections.
- Conceal the Ethernet cables either by running them along the baseboard, under carpets, or through wall conduits. This will help maintain a neat and clutter-free environment in your simulator room.
- HDMI Cable Installation: HDMI cables are used to connect your simulator computer or media player to the projector or display screen. Here are some tips for HDMI cable installation:
- Consider the length of the HDMI cable required to reach from the computer to the projector or display screen. Ensure that the cable is long enough without excess length, as longer cables can result in signal degradation.
- Use high-speed HDMI cables that support 4K resolution and have sufficient bandwidth for transmitting high-quality video and audio signals.
- Avoid sharp bends or twists in the cable, as this can damage the internal wires and affect the signal quality.
- If possible, conceal the HDMI cables behind walls or use cable management solutions to keep them organized and out of sight.
Remember, proper cable management is essential for both aesthetics and functionality. Ensure that all cables are neatly organized, secured, and labeled for easy identification and maintenance.
Budgeting and Cost Considerations for Golf Simulator Rooms
Cost of Room Construction and Renovation
Planning and budgeting for a golf simulator room involves considering the costs associated with both the construction or renovation of the room itself, as well as the additional equipment and accessories needed to create an immersive and functional space.
When it comes to the cost of room construction or renovation, there are several factors to take into account. The size of the room, the materials used, and the complexity of the design will all play a role in determining the overall cost. For a standard-sized golf simulator room, the cost of construction or renovation can range from a few thousand dollars to tens of thousands of dollars.
To get a better understanding of the potential costs involved, let’s break down some of the key components:
- Room Size: The dimensions of the room will impact the overall cost. Larger rooms will require more materials, such as drywall and flooring, which can increase the expenses.
- Construction Materials: The choice of construction materials will also affect the cost. Drywall is a common option for walls, but there are alternatives like paneling or acoustic treatments that can add to the overall cost. Similarly, the type of flooring chosen, such as carpeting, synthetic turf, or rubber flooring, will have different price points.
- Electrical and Wiring: To power the golf simulator equipment, you may need to install additional electrical outlets or wiring. Hiring a professional electrician for this task can add to the overall cost.
- Soundproofing: If you want to minimize noise disturbance in and out of the room, soundproofing measures like special wall constructions, acoustic treatments, and soundproof doors and windows may be necessary. However, these additions can increase the budget.
- Lighting: Adequate lighting is essential for a golf simulator room. You may need to invest in ambient lighting, overhead lighting, or track lighting to create an optimal playing environment. The cost of lighting fixtures and installation should be considered.
- Ventilation and HVAC: Proper ventilation and air circulation are important for comfort during gameplay. Depending on the existing HVAC system in your home, you may need to make adjustments or install additional vents for the golf simulator room. This can impact the overall cost.
- Finishing Touches: Lastly, don’t forget to consider the cost of any additional finishing touches, such as paint, trim, or decor, to complete the look and feel of your golf simulator room.
It’s important to note that the cost of room construction and renovation can vary greatly depending on your location, the complexity of the project, and the materials you choose. Consulting with professionals and obtaining multiple quotes can help you get a more accurate estimate.
Additional Equipment and Accessories Costs
In addition to the construction or renovation costs, it’s crucial to budget for the necessary equipment and accessories to fully outfit your golf simulator room. These additional costs can vary depending on your preferences and the level of realism and functionality you desire.
- Golf Simulator: The centerpiece of any golf simulator room is, of course, the golf simulator itself. There are various options available, ranging from basic setups to high-end, professional-grade systems. The cost can range from a few hundred dollars to several thousand dollars, depending on the features and accuracy of the simulator.
- Projection Screen: A high-quality projection screen is essential for displaying the virtual golf course and tracking your shots. The cost of a projection screen can vary based on the size, material, and brand. It’s worth investing in a screen that provides a clear and immersive experience.
- Projector: To project the virtual golf course onto the screen, you’ll need a projector. The cost of a projector can vary greatly depending on the resolution, brightness, and other features. It’s important to choose a projector that is compatible with your simulator and screen.
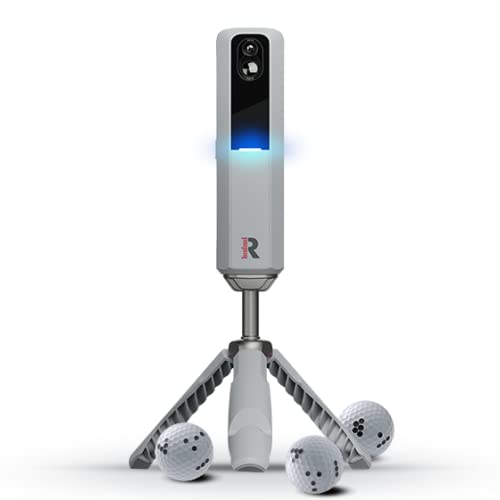
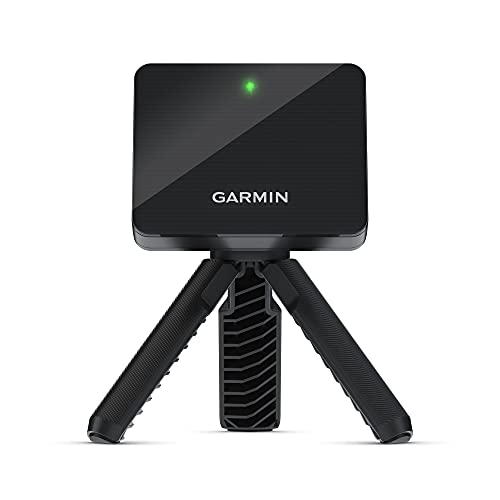
- Launch Monitor: A launch monitor is a device that measures various parameters of your golf swing, such as clubhead speed, ball speed, and launch angle. This data is crucial for analyzing your performance and improving your game. The cost of a launch monitor can range from a few hundred dollars to several thousand dollars, depending on the features and accuracy.
- Netting and Impact Screens: To protect your walls and surroundings from errant shots, you may need to invest in netting or impact screens. The cost will depend on the size and quality of the netting or screen you choose.
- Golf Clubs and Accessories: If you don’t already have a set of golf clubs, you’ll need to budget for them. Additionally, accessories such as golf balls, tees, and putting mats should be considered in your overall cost.
- Audio System: To enhance the immersive experience, you may want to invest in a quality audio system. This can include speakers, subwoofers, and soundbars. The cost will depend on the brand and quality of the audio equipment.
- Furniture and Seating: Lastly, don’t forget to budget for comfortable seating and furniture. Whether it’s a couch, chairs, or bar stools, having a designated area for relaxation and socializing can greatly enhance the overall experience of your golf simulator room.
It’s important to research and compare prices for the equipment and accessories you need. Consider reaching out to manufacturers, reading reviews, and consulting with experts to make informed decisions.
In conclusion, budgeting for a golf simulator room involves considering both the construction or renovation costs and the additional equipment and accessories needed. By carefully planning and estimating the expenses, you can create a dream golf simulator room that fits your budget and provides endless hours of enjoyment.