Discover the best dimensions for your home golf simulator setup. Learn about room size, ceiling height, and furniture placement to create an immersive golfing experience in limited space.
Choosing the Right Space for Your Golf Simulator
When it comes to setting up your own golf simulator at home, choosing the right space is crucial for an optimal experience. In this section, we will explore important considerations such as determining the ideal room size, minimum ceiling height requirements, and clearing obstacles and furniture.
Determining the Ideal Room Size
To ensure that you have enough space for your golf simulator, it’s important to determine the ideal room size. The dimensions of the room will impact your ability to swing the club freely and comfortably. A room that is too small may restrict your movements, while a room that is too large may result in a less immersive experience.
When considering the ideal room size, it is recommended to have a space that is at least 10 feet wide and 10 feet long. This will provide enough room for you to swing the club without feeling cramped. However, if you have the luxury of a larger space, such as a basement or garage, it is advisable to go for a room that is 15 feet wide and 15 feet long. This will allow for a more realistic and enjoyable golf simulation experience.
Minimum Ceiling Height Requirements
Another important factor to consider when choosing the right space for your golf simulator is the minimum ceiling height requirements. The height of the ceiling is directly related to the type of golf shots you can comfortably take. If the ceiling is too low, it may restrict your ability to hit shots that require a higher trajectory.

The minimum ceiling height required for a golf simulator is typically 8 feet. This will allow you to take most shots without any issues. However, if you want to have the flexibility to hit shots with a higher trajectory, it is recommended to have a ceiling height of at least 10 feet. This will ensure that you can swing freely and avoid any obstructions.
Clearing Obstacles and Furniture
When setting up your golf simulator, it is important to clear any obstacles and furniture that may interfere with your swing or the trajectory of your shots. Take a look around the room and identify any potential obstacles such as light fixtures, shelves, or furniture that may be in the way.
If possible, remove or rearrange any furniture that could obstruct your swing. This will ensure that you have a clear path to swing the club without any hindrance. Additionally, consider the placement of your screen and make sure it is positioned in a way that allows for an unobstructed view.
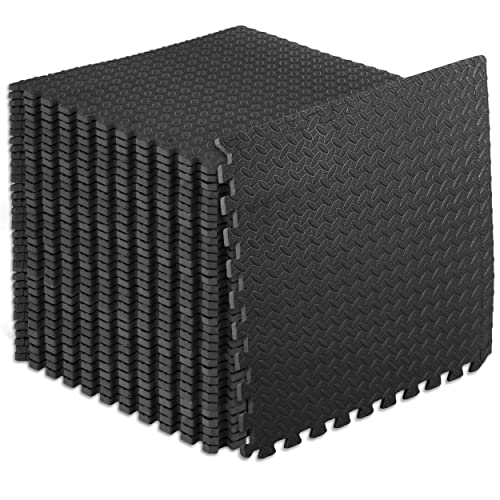
It’s also worth considering the flooring in the room. Opting for a high-quality, durable flooring material such as rubber or synthetic turf can help minimize any potential damage from swings and provide a more realistic feel.
In summary, when choosing the right space for your golf simulator, consider the ideal room size, minimum ceiling height requirements, and clearing any obstacles or furniture that may interfere with your swing. By taking these factors into account, you can create a dedicated space that allows for an immersive and enjoyable golf simulation experience.
Dimensions of a Golf Simulator for Home
When setting up a golf simulator in your home, it’s important to consider the dimensions of the space you have available. This will ensure that you have enough room to swing your club and play comfortably. In this section, we will discuss the overall dimensions, width and depth measurements, as well as the height and ceiling clearance required for a golf simulator setup.
Overall Dimensions
The overall dimensions of a golf simulator for home can vary depending on the specific model and setup you choose. However, it’s generally recommended to have a dedicated space that is at least 10 feet wide, 12 feet long, and 8 feet high. These dimensions will provide enough room for you to swing your club without feeling restricted. Keep in mind that these are minimum recommendations, and having a slightly larger space can enhance your overall experience.
Width and Depth Measurements
When determining the width and depth measurements for your golf simulator setup, it’s important to consider the space required for the player, as well as the equipment. Ideally, you should have a width of at least 10 feet to allow for comfortable swinging and follow-through. The depth of the space should be around 12 feet to accommodate the player’s position and the projection screen.
In terms of equipment placement, the width should also account for the golf mat and any additional accessories, such as a ball tray or club rack. These items should be positioned in a way that allows for easy access and movement during gameplay. Additionally, consider leaving some extra space on either side of the simulator to avoid any potential collisions with walls or furniture.
Height and Ceiling Clearance
One of the crucial factors to consider when setting up a golf simulator is the height and ceiling clearance. Ideally, the height of your room should be at least 8 feet to provide enough vertical space for your swing. This will prevent any interference with your club or potential mishits due to limited headroom.
In terms of ceiling clearance, it’s important to account for the height of the player and the golf club’s length. As a general rule of thumb, add an additional 6-12 inches to the height of the player to ensure a comfortable swing without the risk of hitting the ceiling. For example, if the player’s height is 6 feet, the ceiling should be at least 7-7.5 feet high.
It’s worth mentioning that some golf simulators may require higher ceiling clearances, especially if they feature advanced swing analysis technology or overhead tracking systems. Always refer to the manufacturer’s specifications to ensure you have the appropriate ceiling height for your specific simulator model.
To summarize, when setting up a golf simulator in your home, make sure to consider the overall dimensions, width and depth measurements, as well as the height and ceiling clearance. These factors play a crucial role in creating a comfortable and immersive golfing experience. By ensuring you have enough space to swing your club freely, you’ll be able to enjoy realistic gameplay and improve your skills without any limitations.
References:
- Reference heading: “Choosing the Right Space for Your Golf Simulator”
- Reference heading: “Determining the Ideal Room Size”
- Reference heading: “Minimum Ceiling Height Requirements”
- Reference heading: “Clearing Obstacles and Furniture”
Important Considerations for Room Layout
Optimal Distance from Screen to Player
When setting up your golf simulator, one of the most important considerations is determining the optimal distance between the screen and the player. This distance can greatly affect your overall experience and the accuracy of your shots.

Ideally, you want to position yourself at a distance that allows you to fully immerse yourself in the virtual golfing experience while also providing enough space for your swing. Too close to the screen, and you may feel cramped and restricted in your movements. Too far away, and you may have difficulty seeing the details on the screen and judging distances accurately.
A good rule of thumb is to position yourself approximately 8 to 10 feet away from the screen. This distance allows for a comfortable stance and swing while still providing a clear view of the virtual golf course. However, it’s important to note that this distance can vary depending on the size of your simulator screen and personal preferences. Experiment with different distances to find the one that feels most natural to you.
Placement of Surrounding Furniture
In addition to the distance from the screen, the placement of surrounding furniture is another crucial aspect of room layout for a golf simulator. You want to ensure that there is enough space around you to move freely and swing without any obstructions.
Start by clearing the immediate area around the simulator. Remove any furniture or objects that could potentially interfere with your swing or cause accidents during gameplay. This includes coffee tables, side tables, and any fragile items that may be within reach.
Next, consider the positioning of larger furniture pieces, such as sofas or recliners. These should be placed at a reasonable distance from the simulator to avoid any collisions during your swing. It’s also a good idea to position the seating area in a way that allows for easy viewing of the screen without straining your neck or eyes.

Lighting and Reflections
Proper lighting is essential for creating an optimal golf simulator experience. You want to ensure that the lighting in the room is both adequate and free from any reflections that could negatively impact your gameplay.
Start by assessing the natural light sources in the room. If there are windows or skylights, consider how the sunlight may affect the visibility of the screen. Direct sunlight can cause glare and reflections, making it difficult to see the virtual golf course clearly. In such cases, it’s recommended to use curtains or blinds to control the amount of natural light entering the room.
For artificial lighting, choose fixtures that provide even and consistent lighting throughout the space. Avoid harsh overhead lights or spotlights that can create shadows or uneven illumination. Instead, opt for diffused lighting options such as recessed lights or soft LED bulbs. These will help minimize any distractions and provide a clear view of the screen.
To further reduce reflections, you can also consider using anti-glare screen protectors or installing blackout curtains for complete light control. These measures will ensure that your golf simulator room is well-lit and free from any distractions that may hinder your performance.
Understanding Simulator Screen Size and Placement
When it comes to setting up your golf simulator at home, one of the key considerations is understanding the screen size and placement. This is crucial for creating an immersive and realistic experience that will enhance your golfing practice. In this section, we will delve into the recommended screen sizes for home simulators, the optimal placement for the best viewing experience, and how to adjust the screen height for different shots.
Recommended Screen Sizes for Home Simulators
Choosing the right screen size for your golf simulator is essential for an enjoyable and accurate experience. The size of the screen will determine how well you can see the virtual course and your shots. Generally, larger screens provide a more immersive experience, but they also require more space. Here are some recommended screen sizes based on the available space you have:
- For small rooms or limited space: A screen size between 80 and 100 inches diagonal would be suitable. This size will still provide a decent viewing experience without overwhelming the room.
- For medium-sized rooms: A screen size between 100 and 120 inches diagonal would be ideal. This range offers a good balance between immersion and space requirements.
- For larger rooms or dedicated simulator spaces: If you have a spacious room dedicated solely to your golf simulator, you can consider a screen size of 120 inches or more. This will provide a truly immersive experience similar to playing on a real golf course.
Remember, these are general recommendations, and you can adjust the screen size based on your personal preferences and available space. It’s always a good idea to measure your room and visualize how different screen sizes would fit within the space before making a final decision.
Placement for Optimum Viewing Experience
Once you have determined the appropriate screen size, the next step is to consider the placement of the screen for the optimum viewing experience. The goal is to position the screen in a way that allows you to see the virtual course clearly and comfortably. Here are some tips for screen placement:
- Distance from the player: The screen should be positioned at a distance that allows you to see the entire course without straining your eyes. A general rule of thumb is to place the screen at a distance of 10 to 14 feet from the player.
- Height adjustment: The height of the screen is crucial for maintaining a realistic perspective during your shots. Ideally, the center of the screen should be at eye level when you are in your golf stance. This will ensure that your shots accurately reflect the real-world experience.
- Angle of the screen: The screen should be positioned facing directly towards the player. Avoid angling the screen too much, as it can distort the visuals and affect your shot accuracy.
Experimenting with different screen positions and angles can help you find the optimal setup that suits your playing style and preferences. Remember to take into account any furniture or obstacles in the room that may obstruct the view or create reflections on the screen.
Adjusting Screen Height for Different Shots
In golf, different shots require different trajectories and angles. To replicate this in your simulator, it’s important to be able to adjust the screen height accordingly. This will ensure that your shots accurately reflect the real-world conditions and provide a more realistic practice experience.
Some simulators offer adjustable screen heights, allowing you to modify the height based on the type of shot you want to practice. For example, if you’re practicing a driver shot that requires a higher tee height, you can raise the screen to match the desired height. Similarly, for approach shots or putting, you can lower the screen to simulate the lower trajectory.
Having the flexibility to adjust the screen height adds another layer of realism to your golf simulator setup. It allows you to practice a wide range of shots and adapt to different course conditions without leaving the comfort of your home.
Dealing with Limited Space Constraints
Compact Golf Simulator Options
When it comes to setting up a golf simulator in a limited space, there are several compact options available that can help you make the most of your available room. These compact golf simulators are designed to fit into smaller spaces without compromising on the quality of your golfing experience.
One option is to choose a compact golf simulator that comes with a smaller screen size. These simulators are designed to provide an immersive golfing experience while taking up less space. They often come with a retractable screen that can be easily folded away when not in use, allowing you to reclaim your space for other activities.
Another option for dealing with limited space is to consider a folding or portable golf simulator. These simulators are designed to be easily folded up and stored away when not in use, making them ideal for those who have limited space. They can be set up and taken down quickly, allowing you to use your space for other purposes when you’re not playing golf.
Folding or Portable Simulator Solutions
Folding or portable golf simulator solutions offer great flexibility for those with limited space. These simulators are designed to be lightweight and easy to transport, making them a perfect choice for golfers who want to set up a simulator in different locations or have limited space that needs to be shared with other activities.
One popular option is a pop-up golf simulator. These simulators are designed to be easily set up and taken down, allowing you to use your space for other purposes when needed. They often come with a carrying case, making them easy to transport and store away when not in use. With a pop-up golf simulator, you can enjoy a full golfing experience without taking up permanent space in your home.
Another option is a collapsible golf simulator. These simulators are designed to be folded up and stored away when not in use, making them ideal for those with limited space. They often come with a compact frame that can be easily folded up and stored in a closet or under a bed. With a collapsible golf simulator, you can set up and take down your simulator quickly and easily, allowing you to use your space for other activities when you’re not playing golf.
Utilizing Multi-Purpose Rooms
If you have limited space in your home, you can still enjoy a golf simulator by utilizing multi-purpose rooms. By designating a room or area in your home for multiple uses, you can maximize the functionality of your space without compromising on your golfing experience.
One option is to set up your golf simulator in a spare bedroom or office. These rooms are often underutilized and can be transformed into a dedicated golfing space. By removing unnecessary furniture and creating a golf-friendly environment, you can optimize the space for your simulator. Consider using a foldable table or desk that can be easily stored away when not in use, allowing you to convert the room back to its original purpose.
Another option is to set up your golf simulator in a garage or basement. These areas often have more available space and can be easily converted into a golfing haven. By clearing out clutter and organizing your equipment, you can create a dedicated area for your simulator. Consider installing storage solutions such as shelves or cabinets to keep your golfing gear organized and easily accessible.
Ventilation and Heating Requirements for Golf Simulators
Ensuring Proper Airflow in the Room
When setting up a golf simulator in your home, it’s important to consider the ventilation and airflow in the room. Proper airflow is crucial for maintaining a comfortable and enjoyable experience while using the simulator. Without adequate airflow, the room can become stuffy and uncomfortable, making it difficult to focus on your game.
One way to ensure proper airflow is by strategically placing fans or ventilation systems throughout the room. This can help circulate the air and prevent it from becoming stagnant. Consider placing fans near windows or doors to create a cross breeze and promote air circulation. Additionally, ceiling fans can be an effective way to keep the air moving and provide a cooling effect.
Another important consideration for airflow is the placement of furniture and obstacles in the room. Make sure there is enough space around the simulator for air to flow freely. Avoid blocking air vents or placing furniture in a way that restricts airflow. This can help prevent the room from feeling stuffy and ensure a comfortable environment for your golfing sessions.
Managing Temperature Control for Comfort
Maintaining a comfortable temperature in your golf simulator room is essential for an enjoyable experience. Nobody wants to play in a room that is too hot or too cold. To manage temperature control, consider the following tips:
- Insulation: Proper insulation can help regulate the temperature in the room. Insulating the walls, ceiling, and floor can help keep the room warm in colder months and cool in hotter months.
- Heating and Cooling Systems: Depending on your climate, you may need heating or cooling systems to maintain a comfortable temperature. Consider installing a thermostat-controlled heating and cooling system to easily adjust the temperature as needed.
- Windows and Natural Light: Windows can impact the temperature in the room. During hot days, consider using curtains or blinds to prevent excessive heat from entering the room. On cooler days, open the windows to let in fresh air and natural ventilation.
- Air Conditioning: If you live in a particularly hot climate, air conditioning may be necessary to keep the room at a comfortable temperature. Consider installing an air conditioning unit specifically for the golf simulator room.
Avoiding Overheating Equipment
Golf simulators require electronic equipment such as projectors, computers, and sensors, which can generate heat during operation. To avoid overheating and potential damage to your equipment, it’s important to take certain precautions:
- Proper Ventilation: Ensure that the equipment has sufficient space around it for ventilation. Avoid placing it in enclosed spaces or cabinets where heat can build up. Allow for proper airflow to dissipate heat.
- Cooling Systems: Consider using additional cooling systems, such as fans or cooling pads, to help regulate the temperature of the equipment. These can be especially useful if you live in a hot climate or if your equipment tends to run hot.
- Regular Maintenance: Keep your equipment clean and free from dust or debris that can obstruct airflow and cause overheating. Regularly check and clean the vents of your equipment to ensure proper ventilation.
- Temperature Monitoring: Invest in a temperature monitoring system or use a thermometer to keep an eye on the temperature in the room. If you notice that the temperature is consistently high, take steps to address the issue promptly.
By ensuring proper airflow, managing temperature control, and taking precautions to avoid overheating, you can create a comfortable and safe environment for your golf simulator. This will allow you to fully enjoy your virtual golfing experience without any distractions or discomfort.
Remember, maintaining a well-ventilated and temperature-controlled room is just one aspect of setting up a golf simulator. In the next section, we will explore important considerations for the room layout to optimize your gaming experience.
Soundproofing Considerations for Home Golf Simulators
Reducing Noise Transfer to Other Rooms
When setting up a home golf simulator, one of the biggest concerns is minimizing noise transfer to other rooms in your house. After all, you don’t want to disturb your family members or neighbors while you’re enjoying a round of virtual golf. Here are some effective strategies for reducing noise transfer:
- Insulate the Walls: The first step in soundproofing your golf simulator room is to insulate the walls. Use soundproofing materials such as mass-loaded vinyl or acoustic foam panels to absorb and dampen sound waves. These materials can significantly reduce noise transmission to other areas of your home.
- Seal Gaps and Cracks: Even the smallest gaps and cracks in your walls can allow sound to escape. Inspect the room for any openings and seal them with acoustic caulk or weatherstripping. Pay special attention to areas around doors, windows, and electrical outlets.
- Upgrade Doors and Windows: Standard doors and windows don’t provide adequate sound insulation. Consider upgrading to soundproof doors and windows that are designed to block out noise. These specialized products have multiple layers of glass and insulation to keep sound from escaping.
Sound Absorption Techniques
In addition to reducing noise transfer, it’s also important to create a quiet and immersive environment within your golf simulator room. Sound absorption techniques can help eliminate echo and reverberation, enhancing your overall experience. Here are a few effective sound absorption techniques:
- Acoustic Panels: Install acoustic panels on the walls and ceiling of your simulator room. These panels are designed to absorb sound waves, reducing echo and improving the acoustics of the space. Place the panels strategically around the room, focusing on areas where sound reflection is most prominent.
- Carpet and Rugs: Covering the floor with carpet or rugs can help absorb sound and prevent it from bouncing around the room. Opt for thick, dense carpets that have good sound absorption properties. Additionally, placing a rug underneath your golf simulator setup can further minimize noise transmission.
- Curtains and Drapes: Hang heavy curtains or drapes over windows to absorb sound and reduce outside noise. Choose curtains made from thick, dense fabrics that have sound-absorbing qualities. This will not only help with soundproofing but also provide additional privacy and light control.
Sound Isolation Materials and Solutions
In addition to sound absorption techniques, you can also incorporate sound isolation materials and solutions to further enhance the soundproofing of your home golf simulator room. Here are a few options to consider:
- Soundproofing Insulation: Use soundproofing insulation materials, such as mineral wool or cellulose, in the walls and ceiling of your simulator room. These materials have excellent sound-blocking properties, preventing noise from escaping or entering the space.
- Acoustic Caulk and Sealant: Apply acoustic caulk or sealant to seal gaps and joints in walls, ceilings, and floors. This will create an airtight barrier, preventing sound from leaking out or seeping in. Be sure to use a high-quality acoustic caulk specifically designed for soundproofing purposes.
- Soundproof Doors and Windows: If you haven’t already done so, consider installing soundproof doors and windows. These specialized products are designed to block out noise and provide better sound insulation than standard doors and windows. Look for options with multiple layers of glass and effective seals.
Remember, soundproofing your home golf simulator room is crucial for creating an immersive and enjoyable experience while minimizing noise disturbance to others. By implementing these soundproofing techniques, you can transform your space into a quiet haven where you can swing away without worrying about bothering anyone else.
Wiring and Electrical Requirements for Golf Simulators
When setting up a golf simulator in your home, it’s essential to consider the wiring and electrical requirements to ensure a safe and efficient setup. In this section, we will discuss power outlet placement and quantity, managing cables and wiring, as well as surge protection and electrical safety measures.
Power Outlet Placement and Quantity
To power your golf simulator, you’ll need to have convenient access to electrical outlets. The placement and quantity of power outlets will depend on the specific requirements of your simulator setup. Here are a few considerations:
- Location: Ideally, the power outlets should be located near the area where you plan to set up your golf simulator. This will prevent the need for long extension cords, which can be both unsightly and pose a tripping hazard.
- Dedicated Circuits: Golf simulators often require a significant amount of power. It’s recommended to have dedicated circuits for your simulator equipment to avoid overloading the electrical system. Consult with a qualified electrician to determine the appropriate circuit requirements for your specific setup.
- Quantity: The number of power outlets you’ll need will depend on the equipment you have. It’s a good idea to have multiple outlets available to accommodate different components such as the computer, projector, and simulator console. Additionally, consider any other devices you might want to plug in, such as speakers or charging stations for handheld devices.
Managing Cables and Wiring
Proper cable management is crucial for both the aesthetics and functionality of your golf simulator setup. Here are some tips to help you manage the cables and wiring effectively:
- Organize and Conceal: Start by labeling each cable to identify its purpose. This will make troubleshooting and future maintenance easier. Use cable ties or clips to bundle and secure the cables together, keeping them neat and organized. Consider using cable management solutions such as cable raceways or wire covers to hide the cables and prevent them from becoming a tripping hazard.
- Optimize Cable Length: Measure the distance between your equipment and power outlets and choose cables of appropriate lengths. Excessively long cables can create clutter and increase the risk of tripping. On the other hand, cables that are too short may limit your flexibility in positioning your equipment.
- Consider Wireless Options: Where possible, utilize wireless connections to reduce the number of cables required. Wireless technology has advanced significantly, and many golf simulator components, such as sensors and controllers, can now connect wirelessly, eliminating the need for additional cables.
Surge Protection and Electrical Safety Measures
Protecting your golf simulator equipment from power surges and ensuring electrical safety is essential. Here are some measures you should consider:
- Surge Protectors: Invest in high-quality surge protectors for your valuable equipment. Surge protectors help safeguard against voltage spikes and fluctuations, which can damage sensitive electronic components. Look for surge protectors with built-in power conditioning features for added protection.
- Ground Fault Circuit Interrupters (GFCI): GFCIs are designed to prevent electrical shocks and are especially important in areas where water is present, such as basements or garages. Consider installing GFCI outlets near your simulator setup to enhance electrical safety.
- Proper Wiring and Grounding: Ensure that the electrical wiring in your home is up to code and properly grounded. Faulty wiring or inadequate grounding can increase the risk of electrical hazards. If you’re unsure about the condition of your home’s electrical system, consult a licensed electrician for an inspection.
In conclusion, when setting up a golf simulator in your home, it’s crucial to consider the wiring and electrical requirements. Ensure that you have convenient access to power outlets, manage cables and wiring efficiently, and take necessary measures to protect your equipment from power surges and ensure electrical safety. By addressing these aspects, you can enjoy your golf simulator experience with peace of mind.