Explore the benefits of a floor or ceiling mount projector for your golf simulator, including enhanced viewing experience and flexible installation options. Discover , installation process, tips, common issues, and a comparison of floor and ceiling mount projectors.
Benefits of a Floor or Ceiling Mount Projector for Golf Simulator
When it comes to setting up a golf simulator, choosing the right projector is crucial for creating an immersive and realistic experience. A floor or ceiling mount projector offers several benefits that can greatly enhance your overall gaming experience.
Enhanced Viewing Experience
One of the key benefits of using a floor or ceiling mount projector for your is an enhanced viewing experience. Unlike a traditional TV screen, a projector allows you to project the game onto a larger surface, creating a more immersive environment. With a larger display, you’ll feel like you’re actually on the golf course, making your swings and putts with greater precision and accuracy.
In addition to the size advantage, projectors also offer better image quality. Most golf simulators require high-resolution graphics to accurately replicate the golf course. A floor or ceiling mount projector can provide crisp and clear images, ensuring that every detail of the virtual golf course is displayed with precision. This enhanced image quality brings your golf simulator to life, making it feel like you’re playing on a real golf course.
Flexible Installation Options
Another advantage of using a floor or ceiling mount projector is the flexibility it offers in terms of installation. Unlike a fixed TV screen, a projector can be mounted on either the floor or the ceiling, giving you more options to fit it into your golf simulator setup.

For those with limited space, a floor mount projector can be the ideal choice. It can be placed on the floor, projecting the image onto a screen or a flat surface. This setup is perfect for smaller rooms or if you prefer a more portable option.
On the other hand, a ceiling mount projector is ideal for larger spaces or if you want a more permanent installation. By mounting the projector on the ceiling, you can create a seamless and clutter-free setup. This allows you to maximize the space in your golf simulator room and ensures that the projector is out of the way, giving you an unobstructed view of the projected image.
Improved Accuracy and Realism
Accuracy and realism are two crucial elements when it comes to golf simulators. A floor or ceiling mount projector can greatly improve both of these aspects.
With a properly installed projector, you can ensure that the projected image is aligned correctly with your hitting area or golf screen. This alignment is essential for accurate shot tracking and swing analysis. By having the projector mounted securely, you eliminate any chances of misalignment that can affect the accuracy of your shots.
Additionally, a floor or ceiling mount projector helps create a more realistic experience by providing a larger viewing area. As mentioned earlier, projectors can project the game onto a larger surface, giving you a wider field of view. This wider field of view allows you to see more of the virtual golf course, making it feel like you’re actually standing on the fairway. It enhances the realism of the game and improves your overall immersion.
In summary, choosing a floor or ceiling mount projector for your offers several benefits. From an enhanced viewing experience to flexible installation options and improved accuracy and realism, a projector can take your golf simulator setup to the next level. Whether you opt for a floor mount or ceiling mount, make sure to select a projector that meets your specific needs and preferences. With the right projector, you can transform your golf simulator into a truly immersive and realistic golfing experience.
Factors to Consider When Choosing a Floor or Ceiling Mount Projector
When setting up a golf simulator, one of the crucial decisions you need to make is choosing the right floor or ceiling mount projector. This choice can significantly impact your overall experience, so it’s essential to consider several factors before making a decision.
Room Size and Layout
One of the primary considerations when selecting a floor or ceiling mount projector for your is the size and layout of your room. The room’s dimensions will determine the throw distance required for the projector to display a clear and accurate image.
If you have a smaller space, a floor mount projector might be a more suitable option. These projectors are typically placed closer to the screen, allowing for a shorter throw distance. On the other hand, if you have a larger room, a ceiling mount projector can provide the necessary distance to display a larger image without sacrificing image quality.
Consider the layout of your room as well. Are there any obstructions, such as beams or columns, that could interfere with the projector’s placement? Ensure that your chosen projector can be positioned in a way that won’t obstruct your swing or hinder your gameplay.

Projector Compatibility
Another crucial factor to consider is the compatibility of the projector with your golf simulator setup. Before making a purchase, ensure that the projector you choose is compatible with the software and hardware you plan to use.
Check the specifications of the projector and compare them with the requirements of your golf simulator software. Ensure that the projector supports the necessary resolutions and refresh rates for a smooth and immersive gaming experience. Additionally, consider the connectivity options available on the projector, such as HDMI or VGA ports, to ensure seamless integration with your other equipment.
It’s also worth considering the projector’s compatibility with accessories such as golf swing analyzers or motion tracking systems. Some projectors may offer additional features or compatibility with specific accessories that can enhance your golf simulator experience.
Image Quality and Resolution
The image quality and resolution of the projector play a significant role in creating a realistic and immersive golf simulator experience. When choosing a floor or ceiling mount projector, consider the resolution it offers and whether it meets your expectations.
For a crisp and clear image, opt for a projector with a high native resolution. Full HD (1920×1080) or even 4K UHD (3840×2160) projectors can provide stunning visuals, allowing you to see every detail of the golf course. Higher resolutions can also enhance the accuracy of shot tracking, ensuring that your swing and ball flight are accurately represented on screen.

Additionally, consider the projector’s brightness and contrast ratio. Golf simulators are often used in well-lit environments, so a projector with high brightness levels can help maintain image quality even in brighter conditions. A high contrast ratio will also ensure that the projected image has vibrant colors and deep blacks, further enhancing the realism of your golf simulator setup.
Table: Comparison of Projector Factors
| Factors | Floor Mount Projector | Ceiling Mount Projector |
|---|---|---|
| Room Size and Layout | Suitable for smaller rooms | Suitable for larger rooms |
| Projector Compatibility | Check compatibility with software and hardware | Check compatibility with software and hardware |
| Image Quality and Resolution | Consider native resolution, brightness, and contrast ratio | Consider native resolution, brightness, and contrast ratio |
Is your golf simulator room small or spacious? Are you using the latest golf simulator software? Do you want a projector that delivers crystal-clear visuals? Consider these factors when choosing between a floor or ceiling mount projector for your setup.
Installation Process for a Floor or Ceiling Mount Projector
Mounting Options for Floor Installation
Installing a floor mount projector for your golf simulator can greatly enhance your overall experience. When it comes to mounting options, you have a few choices depending on your specific setup and preferences.
One popular option is to use a floor stand that provides stability and adjustability. These stands are designed to securely hold the projector while allowing you to easily position it at the right height and angle for optimal viewing. They are usually made of durable materials like steel or aluminum, ensuring longevity and stability.
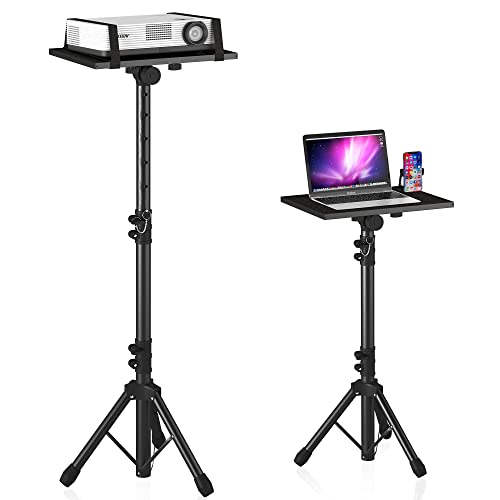
Another option is to mount the projector directly onto the floor. This requires drilling holes into the floor and using mounting brackets to secure the projector in place. While this option may require more effort during installation, it provides a clean and professional look with the projector seamlessly integrated into the floor.
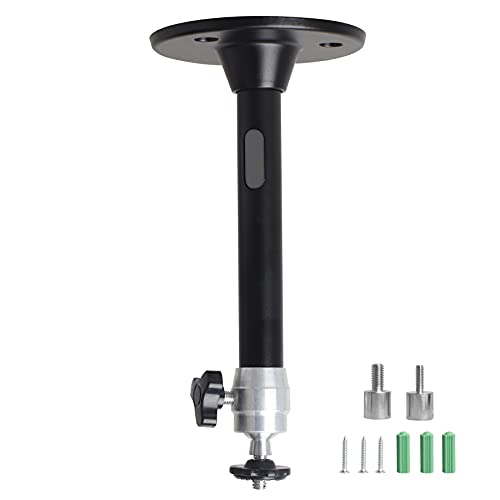
Mounting Options for Ceiling Installation
Ceiling installation is another popular choice for mounting projectors in golf simulators. This option offers a clean and clutter-free setup, as the projector is mounted on the ceiling, out of the way and providing an unobstructed view of the screen.
One option for ceiling installation is using a ceiling mount kit. These kits typically include a mounting bracket that securely attaches to the ceiling, allowing you to easily hang the projector. The adjustable arms on the bracket provide flexibility in positioning the projector at the desired height and angle.
For a more discreet installation, you can opt for a recessed ceiling mount. This involves creating a cavity in the ceiling where the projector can be recessed, providing a flush and seamless appearance. This type of installation may require professional assistance to ensure proper placement and stability.
Connecting and Configuring the Projector
Once you have chosen the appropriate mounting option for your floor or ceiling installation, it’s time to connect and configure your projector. This step is crucial to ensure optimal performance and functionality.
First, you will need to connect the projector to your golf simulator computer or media player. Most projectors offer multiple input options, such as HDMI, VGA, or DVI. Choose the appropriate cable that matches the output port on your computer or media player and connect it to the corresponding input port on the projector.
Next, you will need to configure the projector settings. This includes adjusting the display resolution, aspect ratio, and other image settings to match your golf simulator software and personal preferences. Consult the projector’s user manual for detailed instructions on accessing and navigating the settings menu.
Once the projector is connected and configured, it’s important to test the image quality and alignment. Use a test image or your golf simulator software to ensure that the projected image is clear, sharp, and properly aligned with the screen. Adjust the projector position and settings as needed to achieve the desired results.
(* Note: The content provided is for informational purposes only and does not constitute professional advice. Always consult the manufacturer’s guidelines and seek professional assistance if needed.)
Maintenance and Care for a Floor or Ceiling Mount Projector
When it comes to maintaining and caring for your floor or ceiling mount projector, there are a few important aspects to keep in mind. Proper not only ensures the longevity of your projector but also helps maintain optimal performance for an enhanced golf simulator experience. In this section, we will discuss three key areas of : cleaning the projector lens, regular lamp replacement, and adjusting and calibrating the projector.
Cleaning the Projector Lens
One of the most crucial steps in projector is cleaning the lens. Over time, dust and dirt can accumulate on the lens surface, resulting in reduced image quality and clarity. To keep your projector performing at its best, it is essential to regularly clean the lens.
To clean the projector lens, follow these simple steps:
- Start by turning off the projector and allowing it to cool down completely.
- Gently remove any visible dust or debris from the lens surface using a soft, lint-free cloth or a lens cleaning brush. Avoid using any abrasive materials or harsh chemicals that may damage the lens.
- Moisten a lens cleaning solution or lens cleaning wipes with a small amount of non-abrasive, alcohol-based cleaning fluid.
- Gently wipe the lens surface in a circular motion, starting from the center and moving toward the edges. Be careful not to press too hard, as this can cause scratches.
- Allow the lens to air dry or use a clean, lint-free cloth to gently pat it dry.
- Once the lens is completely dry, you can turn on the projector and ensure that the image quality has improved.
Regularly cleaning the projector lens will help maintain optimal image quality and ensure that your golf simulator experience remains immersive and true to life.
Regular Lamp Replacement
The lamp is a crucial component of a floor or ceiling mount projector and is responsible for producing the bright and vibrant images on the screen. Over time, projector lamps gradually lose their brightness and may eventually burn out. To ensure consistent image quality and brightness, it is important to replace the lamp regularly.
The frequency of lamp replacement depends on various factors, including the usage hours and the specific projector model. However, as a general guideline, it is recommended to replace the lamp after approximately 2,000 to 3,000 hours of use.
To replace the projector lamp, refer to the manufacturer’s instructions specific to your projector model. Here are some general steps to follow:
- Turn off the projector and allow it to cool down completely.
- Locate the lamp access panel, which is usually located on the bottom or side of the projector.
- Remove the panel and carefully extract the old lamp by unscrewing it or releasing the latch mechanism, depending on the design.
- Insert the new lamp into the lamp slot, ensuring that it is securely in place.
- Replace the lamp access panel and tighten any screws or latches.
- Reset the lamp usage timer on the projector, if applicable, to keep track of the lamp’s usage hours accurately.
- Turn on the projector and verify that the new lamp is functioning correctly.
By regularly replacing the projector lamp, you can ensure optimal brightness and image quality for an immersive golf simulator experience.
Adjusting and Calibrating the Projector
To achieve the best possible image quality and accuracy, it is essential to adjust and calibrate the projector settings. Proper calibration ensures that colors are displayed accurately, brightness and contrast levels are optimized, and the image is aligned correctly on the screen.
Most projectors offer built-in calibration features that allow you to adjust various settings such as brightness, contrast, color temperature, and keystone correction. Here are some steps to help you calibrate your projector:
- Start by accessing the projector’s settings menu. This can usually be done through the remote control or the on-screen display.
- Navigate to the calibration or image settings section of the menu.
- Adjust the brightness and contrast levels to achieve a balanced image. Avoid setting the brightness too high, as it can lead to a washed-out appearance, or too low, resulting in a dim image.
- Use the color temperature settings to ensure accurate color reproduction. Depending on your preference, you can choose between preset color temperature options or manually adjust the color balance.
- If the projected image appears distorted or misaligned, utilize the keystone correction feature to correct the geometry of the image. Keystone correction allows you to adjust the image vertically or horizontally to align it with the screen.
- Once you have made the necessary adjustments, take some time to evaluate the image quality and make further fine-tuning if required.
Regularly checking and adjusting the projector settings will help maintain accurate and realistic visuals for your golf simulator. By calibrating the projector, you can ensure that the colors are vivid, the image is sharp, and the overall viewing experience is immersive.
Troubleshooting Common Issues with Floor or Ceiling Mount Projectors
When it comes to using floor or ceiling mount projectors for your golf simulator, it’s important to be prepared for any potential issues that may arise. While these projectors offer a great viewing experience and flexibility in installation, there are a few common problems that you may encounter. In this section, we will discuss how to troubleshoot image distortion or misalignment, poor image quality or brightness, and connectivity problems.
Image Distortion or Misalignment
One of the most frustrating issues that enthusiasts may face is image distortion or misalignment. This can significantly impact your overall experience and accuracy when playing. Fortunately, there are a few steps you can take to address this problem.
First, check the projector’s lens for any smudges or dirt. Over time, dust particles can accumulate and cause image distortion. Use a soft, lint-free cloth to gently clean the lens. Be careful not to apply too much pressure, as this can damage the lens.
If cleaning the lens doesn’t solve the issue, you may need to adjust the projector’s zoom and focus settings. Most projectors have built-in controls that allow you to fine-tune the image. Experiment with these settings until the image appears clear and aligned.
In some cases, image distortion or misalignment may be caused by an uneven projection surface. Ensure that your screen or wall is flat and properly mounted. If necessary, use a level to check for any unevenness. Adjusting the screen or wall position may help eliminate any distortions.
Poor Image Quality or Brightness
Another common problem with floor or ceiling mount projectors is poor image quality or brightness. This can make it difficult to see details and affect the overall realism of your golf simulator experience. Here are a few steps to improve image quality.
First, check the projector’s resolution settings. Make sure it is set to the optimal resolution for your golf simulator software and screen size. Adjusting the resolution can significantly enhance the image quality.
Next, examine the projector’s lamp. Over time, the lamp may lose its brightness and affect the overall image quality. Refer to your projector’s manual for instructions on how to replace the lamp. Regular lamp replacement is essential to maintain optimal image brightness.
If the image still appears dim or lacks clarity, consider the ambient lighting in your room. Excessive natural light or bright artificial lighting can impact the image quality. Consider installing blackout curtains or dimmer switches to control the lighting conditions.
Connectivity Problems
Connectivity problems can be frustrating when you’re ready to play your favorite golf simulator game. Whether it’s a connection issue between the projector and the computer or a problem with the input source, here are a few steps to help you resolve connectivity problems.
First, check all the cables and connections. Ensure that they are securely plugged in and not damaged. Sometimes, loose or faulty cables can disrupt the connection between the projector and the computer. If necessary, replace any damaged cables.
If the cables are properly connected and the issue persists, check the input source settings on the projector. Make sure it is set to the correct input mode, such as HDMI or VGA, depending on your setup. Adjusting the input source settings may restore the connectivity.
Sometimes, the problem may lie with the computer’s graphics card or driver. Update the graphics card driver to the latest version and restart the computer. This can often resolve compatibility issues and restore the connection between the projector and the computer.
In some cases, connectivity problems may be related to wireless connections. If you’re using a wireless projector, ensure that it is connected to the correct Wi-Fi network and that the signal strength is strong. Consider moving the projector closer to the router to improve the connection stability.
By following these steps, you can address common issues with floor or ceiling mount projectors for your . Remember to regularly clean the projector lens, replace the lamp when necessary, and ensure proper connectivity for an optimal golfing experience.
Comparison of Floor and Ceiling Mount Projectors for Golf Simulators
When it comes to setting up a golf simulator, choosing the right projector is crucial for an immersive and realistic experience. Two popular options for mounting projectors in golf simulators are floor mount projectors and ceiling mount projectors. Each option has its own pros and cons, and there are several when deciding which one is best for your specific setup.
Pros and Cons of Floor Mount Projectors
Floor mount projectors offer a number of benefits for golf simulators. One of the main advantages is the flexibility they provide in terms of placement. With a floor mount projector, you have the freedom to position it wherever you like within the room. This allows you to customize the projection angle and distance to suit your preferences.
Another advantage of floor mount projectors is that they are generally easier to install compared to ceiling mount projectors. You don’t need to worry about drilling holes in the ceiling or dealing with complex mounting systems. Floor mount projectors can often be set up quickly and easily, making them a convenient choice for those who want a hassle-free installation process.
However, there are also some drawbacks to consider when it comes to floor mount projectors. One potential issue is the risk of people accidentally blocking the projection path. Since the projector is positioned on the floor, there is a higher chance of someone inadvertently stepping in front of the projection, causing a disruption in the image. This can be particularly problematic if you have a crowded or busy simulator space.
Another disadvantage of floor mount projectors is that they may not provide the same level of accuracy and realism as ceiling mount projectors. The projection angle and distance from the floor can affect the quality of the image, potentially leading to distortions or misalignments. While these issues can often be mitigated with proper calibration and adjustment, it’s important to consider the impact on the overall simulation experience.
Pros and Cons of Ceiling Mount Projectors
Ceiling mount projectors offer their own set of advantages and considerations for golf simulators. One of the main benefits is that they provide a more unobstructed projection path. Since the projector is mounted on the ceiling, there is less risk of people accidentally blocking the image. This can contribute to a smoother and more uninterrupted simulation experience.
Another advantage of ceiling mount projectors is that they often provide better image quality and brightness compared to floor mount projectors. The higher positioning of the projector can result in a clearer and more vibrant image, enhancing the visual experience of the golf simulator. This can be especially important for those who prioritize image quality and want a truly immersive simulation.
However, there are also some drawbacks to consider when it comes to ceiling mount projectors. One potential issue is the complexity of installation. Mounting a projector on the ceiling typically requires drilling holes and using specialized mounting systems. This can be time-consuming and may require professional assistance, particularly if you’re not familiar with the installation process.
Another consideration is the limited flexibility in terms of projection angle and distance. Ceiling mount projectors are fixed in their position, which means you have less control over the specific projection setup. This can be a disadvantage if you have specific preferences or constraints in your simulator space.
Factors to Consider for Your Specific Setup
When choosing between floor mount and ceiling mount projectors for your golf simulator, it’s important to consider several factors that are specific to your setup. These factors can help you make a more informed decision and ensure that the projector you choose meets your needs and preferences.
One important factor to consider is the size and layout of your simulator room. If you have limited space or unique room dimensions, this may influence whether a floor mount or ceiling mount projector is more suitable. For smaller rooms, a floor mount projector may be a better fit due to its flexibility in placement. On the other hand, larger rooms with high ceilings may benefit from a ceiling mount projector for optimal image quality and projection distance.
Another factor to consider is the compatibility of the projector with your software and hardware. Ensure that the projector you choose is compatible with the specific system requirements of your simulator setup. This includes factors such as resolution, refresh rate, and connectivity options. Checking the compatibility beforehand can help prevent any compatibility issues or limitations that may affect the overall performance of your .
Lastly, take into account your personal preferences and priorities when it comes to image quality, realism, and ease of installation. Consider the level of accuracy and realism you want to achieve in your golf simulator, as well as the level of convenience you desire during the installation process. Balancing these factors with the available options in floor mount and ceiling mount projectors can help you make a decision that aligns with your specific needs.
In conclusion, both floor mount and ceiling mount projectors have their own advantages and considerations when it comes to golf simulators. Floor mount projectors offer flexibility in placement and ease of installation, while ceiling mount projectors provide unobstructed projection paths and better image quality. By considering factors such as room size, compatibility, and personal preferences, you can choose the projector that best suits your specific setup and enhances your golf simulation experience.